The Focus View is a dedicated, real-time touchscreen that offers simplified editing options for the selected model. As outlined on this page, the Focus View offers various options based on the current model type.
Amp, Preamp, and Effect Models
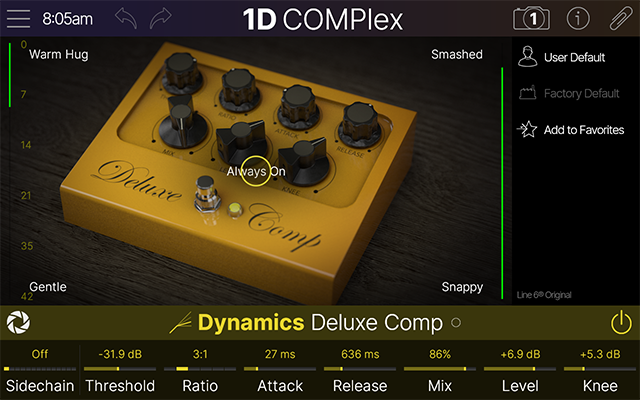
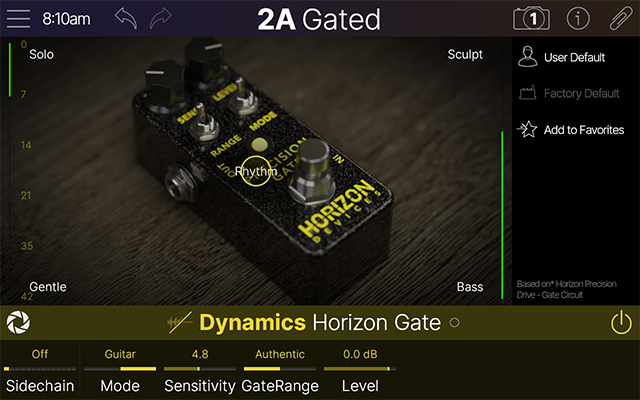
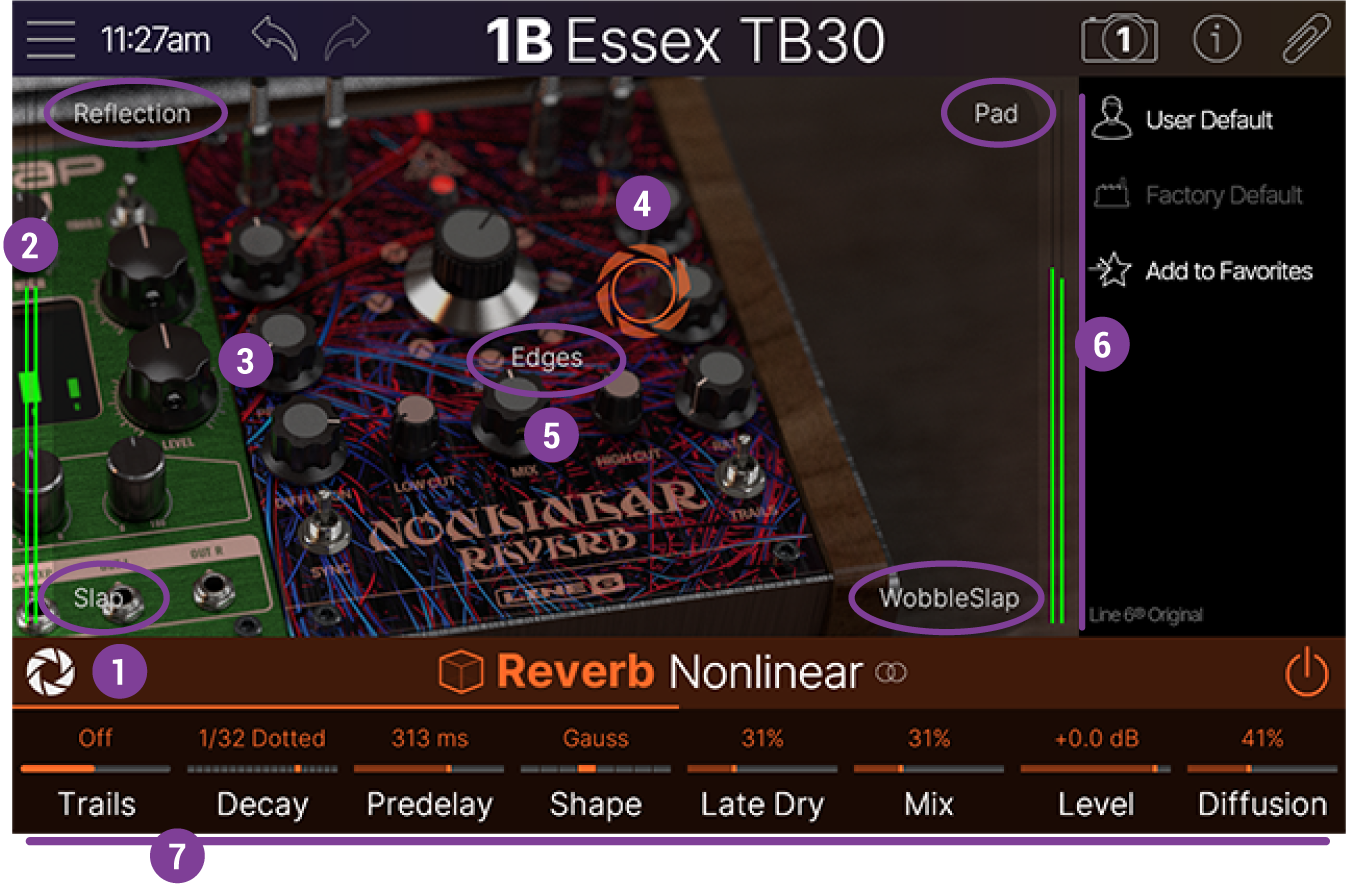
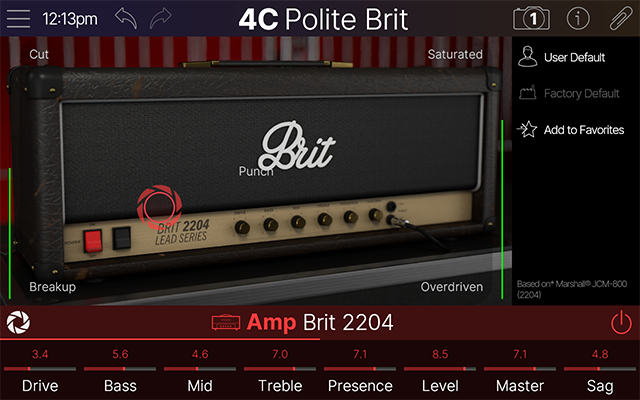
For Amp, Preamp, and most Effect models, Focus view offers an XY control touchscreen that allows you to quickly adjust multiple simultaneous parameters by dragging to its five descriptively titled “Zones” on the screen. Each model’s pre-configured zones consist of combinations of parameters that morph as you drag the “Lens Icon” cursor between them.
Tip: Using the Focus View first can be a quick and easy way to dial in the overall settings of any amp or effect, which you can then fine-tune using the individual parameter Knobs 1~8.
![]()
![]()
![]()
![]()
![]()
![]()
![]()
-
User Default: Once you’ve configured desirable parameter settings for the current model, you can assign them to be the User Default settings for the model, so that these are the initial default settings whenever you load the model in any preset. (Existing instances of this model in other presets are not affected.) Additionally, refer to Creating User Default Settings.
-
Factory Default: This option is selectable if you’ve enabled the User Default feature; selecting this will clear your custom User Default and return the model to use its original Factory Default settings when you next use the model.
-
Add to Favorites: Once you’ve configured desirable parameter settings, set the preferred model bypass state, and assigned bypass and control assignments, tap this option to add a Favorite of the model, which will then be conveniently available within the Model List’s Favorites category. See the Favorites section for more info.
-
“Based On” Information: The read-only text at the bottom of the sidebar informs you of the specific gear on which the current model is based.
![]()
Amp and Preamp Focus View
The Focus View for an Amp or Preamp is similar to that for an Effect model. All the same descriptions in the preceding sections also apply to editing an Amp or Preamp’s settings.
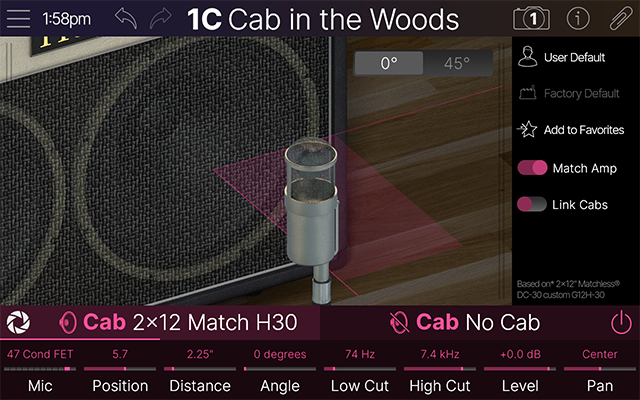
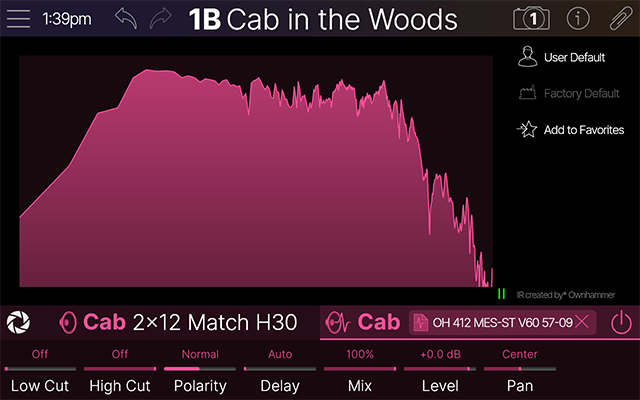
Cab and Cab IRs
For Cab models, the Focus View offers a graphical Mic position editor that lets you visually adjust the mic’s position, distance, and angle relative to the current Cab’s speaker. When a Cab IR is loaded, its frequency plot is displayed, and its sidebar options are available. Please see the Cab Block - Focus View section for details.
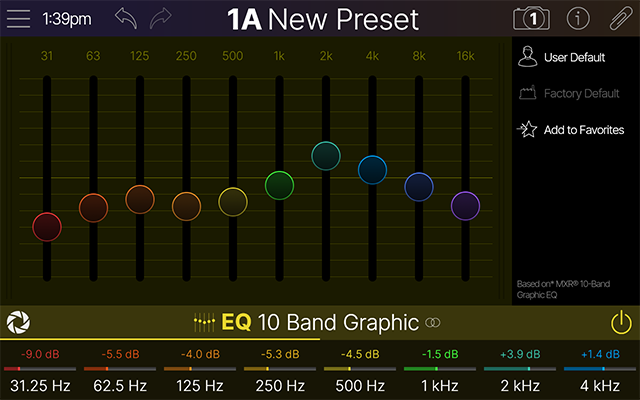
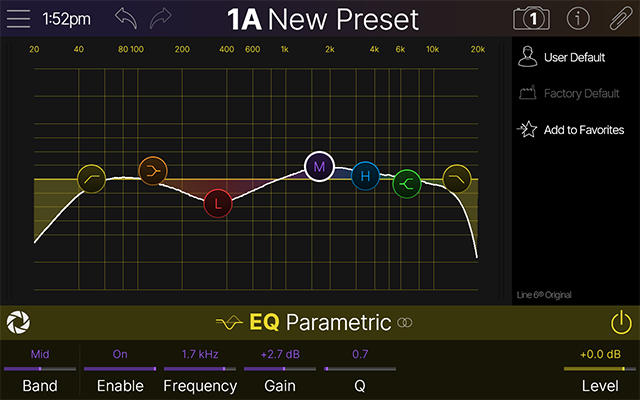
EQs
For EQ models (excluding the Acoustic Sim model), Focus view provides a graphic or parametric editor for the respective EQ types, as illustrated below. Tap and drag directly on the EQ band controls to make your adjustments.
Dynamics
For any Dynamics - Compressor or Gate type effect, a gain reduction meter appears at the left for a real-time visual reference of the amount of input signal that is attenuated by the current settings.