We recommend that you perform firmware updates for Helix Stadium directly, using its built-in Wi-Fi/Ethernet connectivity (see the Quick Start instructions). But, if those steps are not available to you, you can alternatively update using the Helix Stadium application and a USB-C® connection to your Helix Stadium hardware, provided your macOS or Windows computer is connected to the Internet.
Note: Connecting the Helix Stadium app with your Stadium device via USB supports only device firmware updates. For all other uses of the Helix Stadium application, you must connect both the application and your device to the same local network and utilize the network connectivity, as described in the earlier Connect to Your Device section.
Please note the following computer setup tips for smooth updating:
-
Turn off your computer’s screensaver and disable any of its power-saving features that may cause it to go to sleep while the firmware installation is in progress.
-
If using a desktop/tower computer, connect to the computer’s rear-panel USB port, near the power cable connection, to reduce the chance of intermittent USB interruptions.
-
If using a laptop, connect it to AC power before starting an update to avoid running out of battery power.
-
First, disconnect your Helix Stadium’s Wi-Fi connection, if currently connected, by going into the Stadium Main Menu > Wi-Fi dialog and toggling the switch off (to the left position)

-
Connect from Stadium’s USB-C port directly to your macOS or Windows computer’s USB port, and launch the Helix Stadium application.
-
Click on the app toolbar’s My Account button

-
Click the app’s Connect button

-
Within the Connect to Device dialog, click the Connect button for your “Available” USB


-
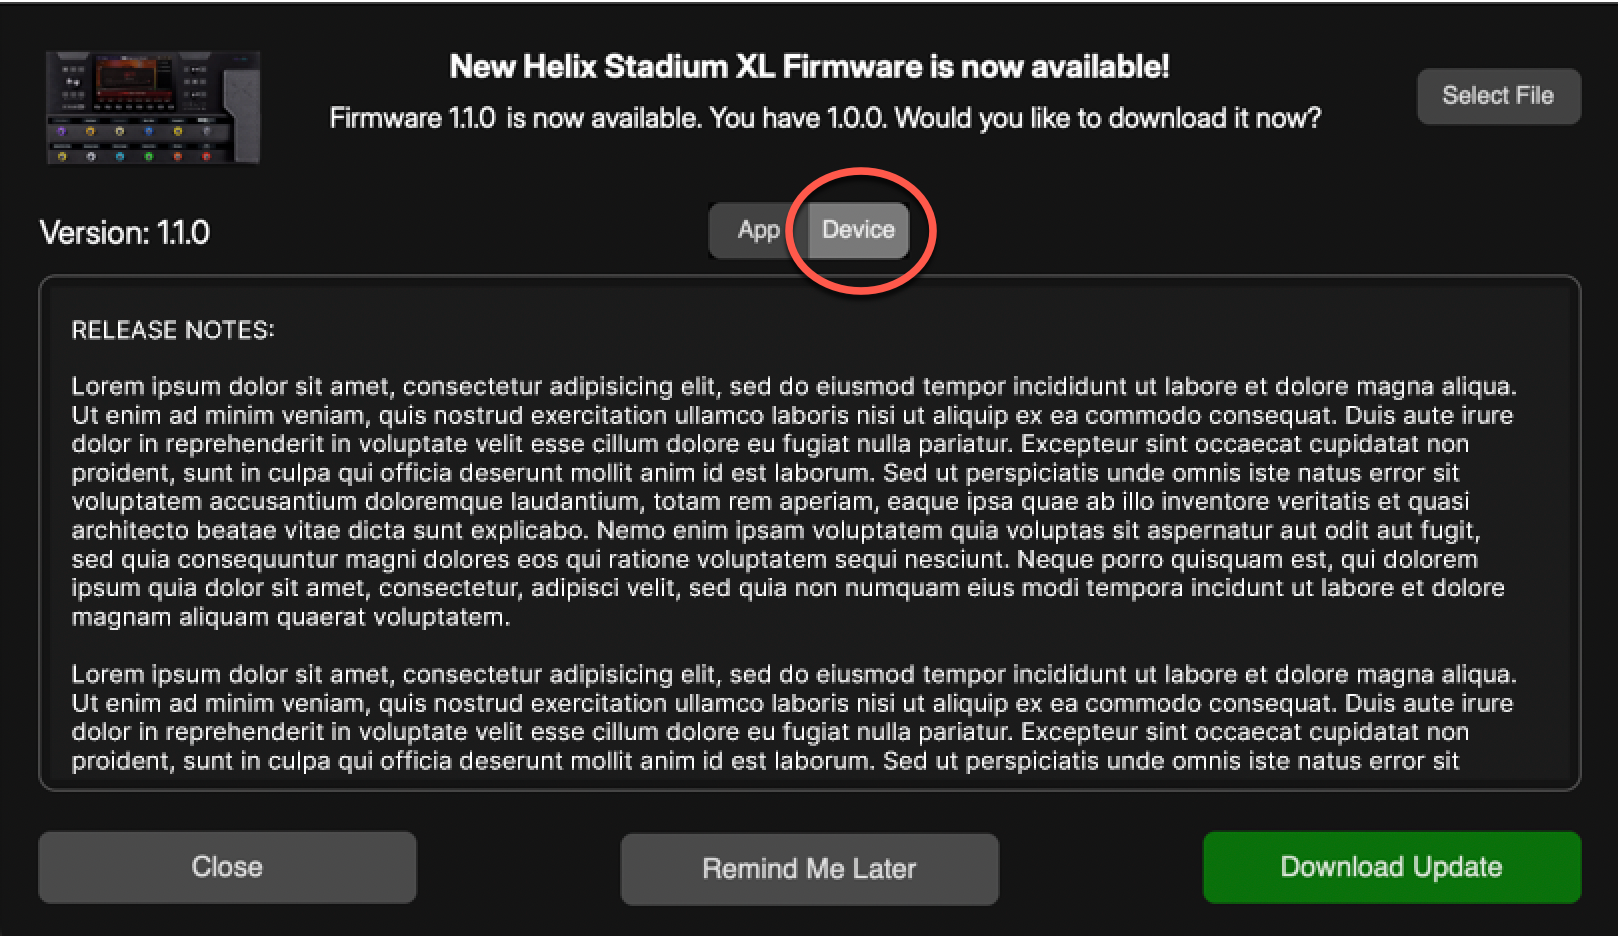
Click the “Update Firmware” button when prompted.

-
Click the Device tab within the app’s Update window to display the firmware update, if one is available.
-
Read the Release Notes or any special instructions for the available update, then click

The download progress will appear on the app screen. Allow the download to complete.
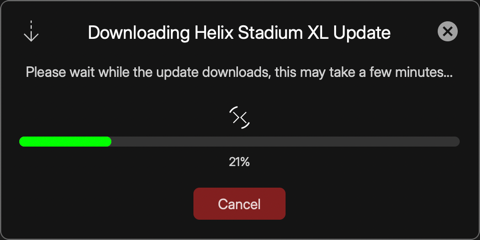
Once Download Complete appears, click on 

-
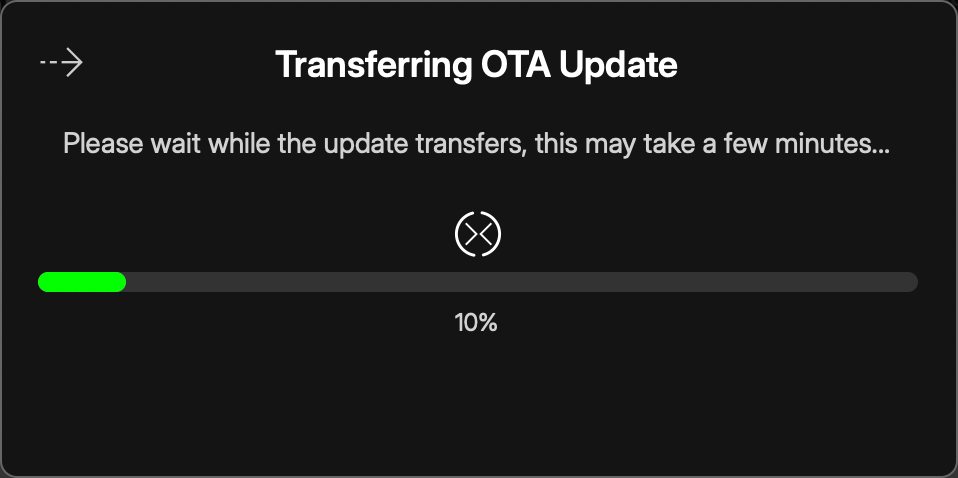
The “Transferring OTA Update” process will begin, showing its progress in the app window.
Do not disconnect the USB cable, power off, or disturb the device or your computer until the process completes!
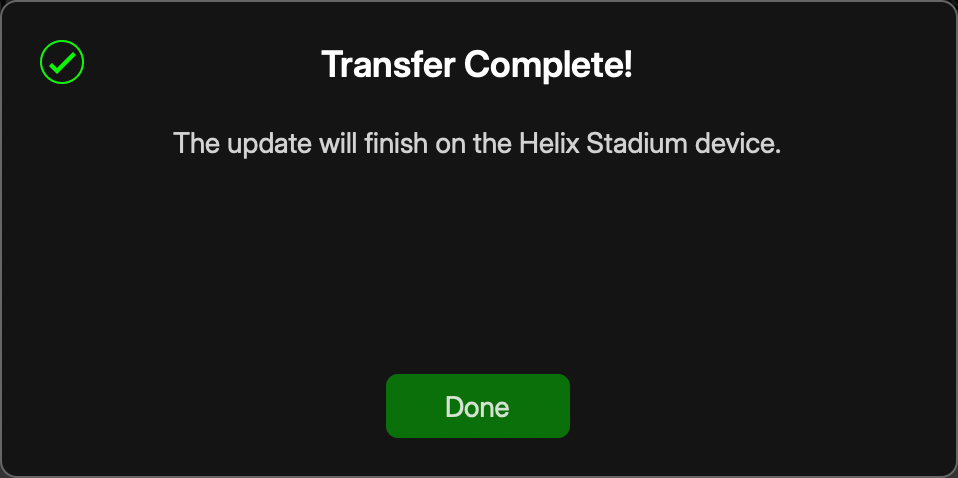
Once the transfer is complete, click ![]()
-
You’ll see the progress on your Helix Stadium’s Main Display, and the update will run completely with no interaction needed. Please note that it is normal for Stadium to restart automatically multiple times during the process.
-
Once the update completes and your Stadium device displays its Welcome to Helix Stadium screen, you can begin using it with its new firmware. Exit the Helix Stadium app and disconnect the USB cable.
-
If you wish to use the Helix Stadium application with your device to remotely create and edit presets, connect the app to Stadium via Wi-Fi or Ethernet connection, as covered in the Connect to Your Device section.