About Presets

![]()
Important! Presets in the FACTORY PRESETS folder cannot be overwritten or deleted by the user, and Line 6 reserves the right to expand, reorder, remove, and/or improve factory presets for future firmware updates. However, you can save any factory presets (heavily tweaked or otherwise) into the USER PRESETS folder. See Saving Presets.
![]()
![]()
![]()
![]()
You can create up to 122 setlists, each accommodating 1 to 128 presets.
Important! Setlists only contain aliases of (or pointers to) presets within the USER PRESETS folder; they do not contain preset files themselves. Therefore:
-
If you rename or save changes to any preset, all presets with the same name—in every setlist plus the USER PRESETS folder—will also change.
-
If you delete a preset from the USER PRESETS folder, all setlist presets (aliases) that reference it are cleared. If you clear a preset (alias) from a setlist, however, it is not deleted from the USER PRESETS folder or any other setlists.
-
If you save a new preset directly to any setlist, it also automatically appears in the USER PRESETS folder.
If you think about it, this is a good thing, because if a preset exists across multiple setlists, you only have to tweak it once—all instances will be updated because they’re really the same preset, just appearing in multiple locations. Just remember that if you want to save changes to a preset without messing with the others, tap Save As from the Save screen and change the name, just like you would with files on your computer. See Saving Presets.
As a general guide, use the USER PRESETS folder to create your presets, and reserve setlists for placing those presets in a specific order for your performances, rehearsals, and recording sessions.
Tip: You can also use the Helix Stadium application to import, export, and manage presets (including preset templates, setlists, favorites, and Cab IRs), allowing you to create virtually unlimited libraries on your computer.
Importing Helix/HX Presets
Helix Stadium can import presets and favorites from Helix Floor, Helix Rack, Helix LT, Helix Native, HX Effects, HX Stomp, and HX Stomp XL, as long as the hardware is running 3.50 or newer firmware or software when exporting them. There are some caveats, however; see the important yellow box below for preparing your Helix/HX assets.
Important! Before transferring your presets, setlists, favorites, and/or IRs from Helix/HX to Helix Stadium, there are several things to be aware of:
-
As of this writing, Helix Marketplace premium presets and IRs are not supported. They will be, but unfortunately, we have no timeline to share.
-
Helix Stadium and the Helix Stadium application save and export all presets in a new (.hsp) preset file format, and model Favorites in a new (.hsf) file format. Therefore, any imported Helix/HX/Helix Native preset (.hlx) and Favorite (.fav) files are no longer “back-compatible” with the original device or software once exported from Helix Stadium. Please be sure to create and retain backups of your original presets to maintain compatibility with these earlier products, as covered in the Helix/HX and HX Edit Owner’s Manuals, available at https://line6.com/support/manuals/.
-
Your Helix/HX multieffect (or Helix Native plugin) must be updated to 3.50 or higher before exporting presets or setlists. There’s no guarantee that presets exported from earlier firmware will bring all the blocks forward. Note that some presets on CustomTone.com may have been exported from earlier firmware and may not appear as intended. But if you load them into Helix/HX (running 3.50 or newer firmware) and then export, they should work fine.
-
Helix Stadium can load individual presets, entire setlists, favorites, and IR (.wav) files from Helix/HX. It cannot load an entire Helix/HX backup file.
-
The older Hybrid cab engine from Helix/HX is not included in Helix Stadium. Any Helix/HX presets with Hybrid cabs will automatically load an equivalent new cab, which will sound different.
-
Helix/HX IR blocks are not fully restored upon import into Helix Stadium, due to its all-new, much more powerful file system. (The Cab block is set to the Cab IR subcategory, but no IR file is automatically loaded.) You will need to manually select an IR file from the Cab > Cab IR List in Helix Stadium.
-
1024-sample IRs from Helix/HX are converted to 2048-sample.
-
Helix Stadium does not include four EQ types from Helix/HX: Simple EQ, Low and High Cut, Low/High Shelf, and Parametric [5-band]. These have all been supplanted with a new, better-sounding 7-band Parametric EQ model, and this will be automatically added in their place with your settings intact. In some cases, you may notice that the filtering might sound slightly different. This is due to improved peak filter Qs and more precise low and high cut slopes.
-
Volume leveling of parallel paths in Helix Stadium is slightly different, meaning that presets with parallel paths may sound slightly louder or softer than presets with serial paths. This can be easily compensated for from the Merge > Mixer or Output blocks’ Level parameter.
-
The relationship between the two sides of a dual Cab/IR block is slightly different, meaning that presets with dual cabs may sound slightly louder or softer than presets with a single cab/IR. This can be easily compensated for from the Cab blocks’ Level parameters.
-
Connect your Helix/HX device to your computer via USB and launch HX Edit.
-
Export the desired file(s) from HX Edit:
-
If you only have a few presets, it may be easier to simply drag them from HX Edit’s preset list onto your desktop or any window.*
-
To export an entire setlist, click Export at the top of the Librarian - Preset List, choose the destination folder, and click Save.
-
To export favorites, go to the Librarian - Favorites List, select the favorites you want, and drag them to your desktop or any window.
-
To export IRs, click the IR tab above the Preset List, select the IRs, and drag them to your desktop or any window.
*Tip: Even easier, you can actually drag a preset from the HX Edit app’s preset library panel and drop it directly into the Helix Stadium app’s preset list to import it!
-
Connect Helix Stadium XL to your computer via Wi-Fi and launch the Helix Stadium app.
-
Click the Librarian button

-
Presets: Click Presets in the left column and then USER PRESETS in the Preset List. Drag Helix/HX presets from your desktop into the list.
-
Setlists: Click Presets in the left column and then USER PRESETS in the Preset List. Click Import, browse to your Helix/HX setlist file, and click Open.
-
Favorites: Click Favorites in the left column. Drag Helix/HX favorites from your desktop into the librarian’s right pane.
-
IRs: Click Cab IRs in the left column. Drag individual IRs or folders of IRs into the list.
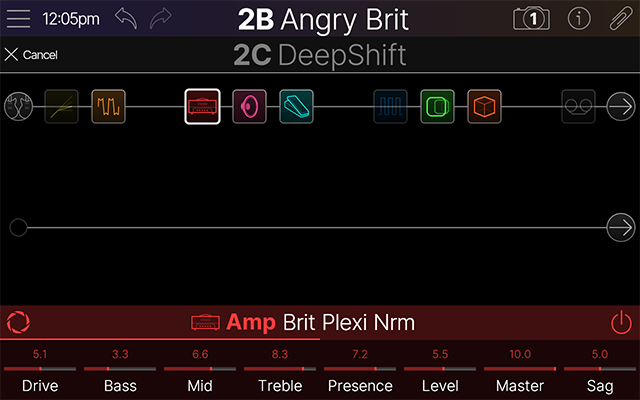
Selecting Presets
Several methods exist for selecting presets:
Selecting Presets with the Upper Knob
-
Turn the Upper Knob

-
Press the Upper Knob
-
To cancel a cued preset, tap Cancel

-
*Note: Turning the Upper Knob will skip over any “Empty” preset locations.
Selecting Presets from the Preset List
-
Tap the preset name in the header—or—press the Upper Knob
-
In the left column, tap FACTORY PRESETS, USER PRESETS, or a setlist (if any). Its presets appear in the list.
-
Swipe the list up and down (or turn the Upper Knob
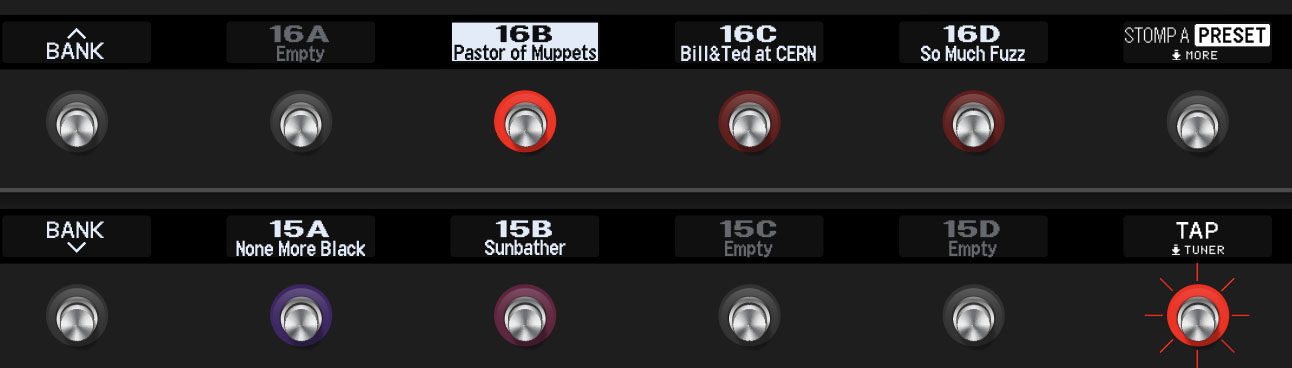
Selecting Presets from the Switches
-
Press FS6 (MODE) to enter Preset footswitch mode (see below).
-
Press a preset switch to load it.
-
In Preset mode, two banks of presets are visible at a time. To access more banks, press FS1 (Bank Up) or FS7 (Bank Down) one or more times to find the preset you want, then press the preset switch to load it. See Footswitches for details.

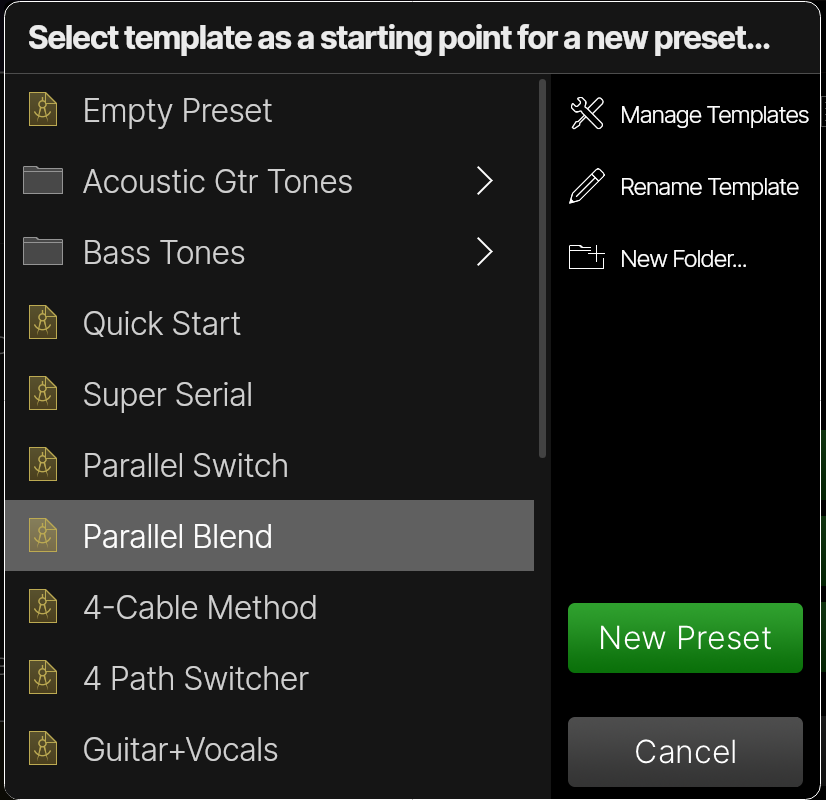
Creating a New Preset
-
Tap Menu

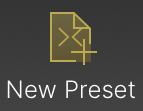
-
Tap the desired template from which you want to start your new preset. If you’re not sure, tap “Empty Preset.”
-
Tap New Preset

Tip: Alternatively, from the Preset List, double-tap on an “Empty” preset location to load an empty new preset.
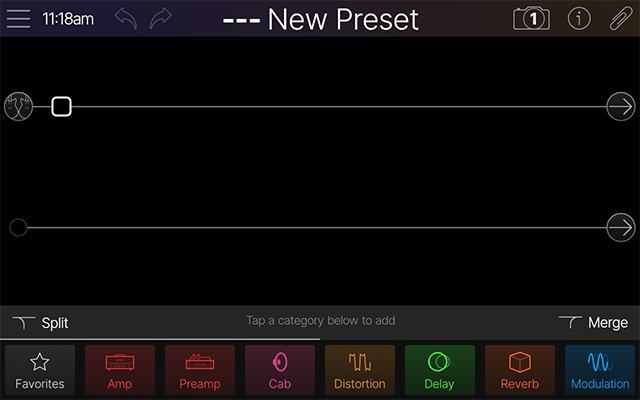
The Preset List
-
Tap the preset name in the header—or—press the Upper Knob

![]()
![]()

![]()
![]()
![]()

![]()
![]()
![]()
![]()
-
Manage Setlists: Once you’ve created one or more setlists, tap to copy, move, reorder, and clear them. See Setlists for details.
-
New Setlist: Tap to create and name a new empty setlist.
-
Duplicate Setlist: Tap to create and name a copy of the current setlist, including all its presets.
-
Rename Setlist: Tap to rename the current setlist.
-
Manage Presets: Tap to copy, move, reorder, or clear your presets. See Managing Presets below.
-
Rename Preset: Tap to rename and color the current preset.
-
MIDI Recall: This read-only text displays the MIDI messages required to recall the current Setlist, Preset, and Snapshot.*
*Note: Reordering setlists and presets will change the MIDI Recall CC and PC messages to which they respond. See MIDI.
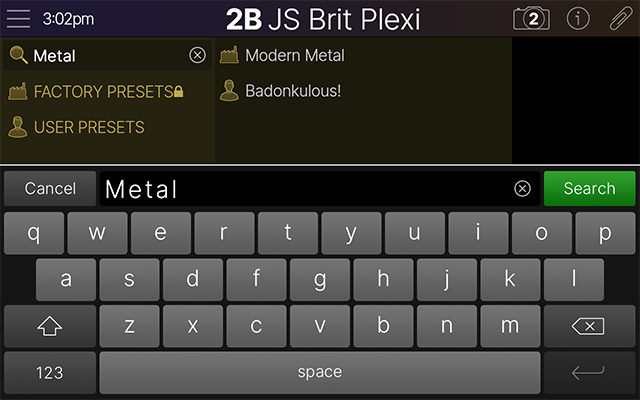
Searching Presets
Instead of manually hunting through your preset lists, you can quickly perform a search to find what you’re looking for. See the following video for an overview, and the steps below.
-
Tap the Search Presets field

-
Tap the green Search button to dismiss the keyboard.
-
To cancel the search, tap the small X to the right of your search criteria.
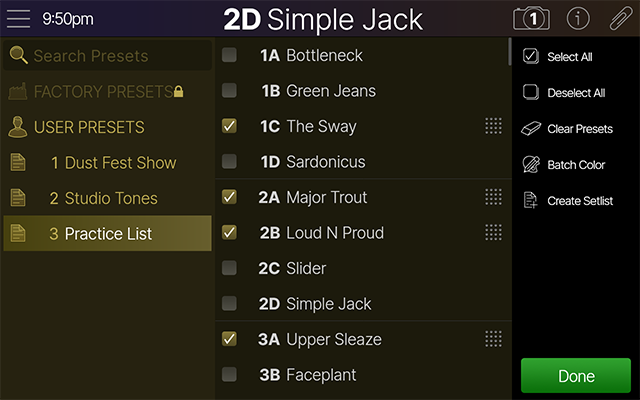
Managing Presets
-
Tap


-
To reorder an item in the list, tap its drag icon
-
Reordering presets renumbers them accordingly and updates the MIDI PC values to which they respond.
-
-
To copy and paste one or more items to a different setlist, tap their checkboxes and drag them to the left and hover over the target setlist; it automatically opens. Continue dragging the preset(s) to the desired location in the target setlist.
-
Sidebar items are replaced with the following items (see screenshot below):
-
Select All
-
Deselect All
-
Delete Presets (USER PRESETS folder only): Permanently deletes all checked items from the USER PRESETS folder. Note that this also deletes any aliases of these presets from any setlists.
-
Clear Presets (setlists only): Clears all checked presets from the selected setlist. Does not affect the original preset(s) in the USER PRESETS folder or any other setlist in which they may exist.
-
Batch Color: When multiple presets are checked, lets you change all presets' colors simultaneously.
-
Create Setlist: When one or more presets are checked, creates a new setlist with those presets.
-
-
When finished, tap Done
-
Once the desired presets are checked, use the following steps to perform the preset management tasks.
Setlists
![]()
![]()
You can create up to 122 setlists, and each setlist can accommodate anywhere from 1 to 128 presets.
Creating a Setlist
-
From the Preset List, tap New Setlist


-
Add presets to your new setlist by copying them from the USER PRESETS folder or any other setlist. See Managing Presets above above.
Duplicating a Setlist
-
From the Preset List, tap an existing setlist, then tap Duplicate Setlist

Renaming a Setlist
-
From the Preset List, tap an existing setlist, then tap Rename Setlist

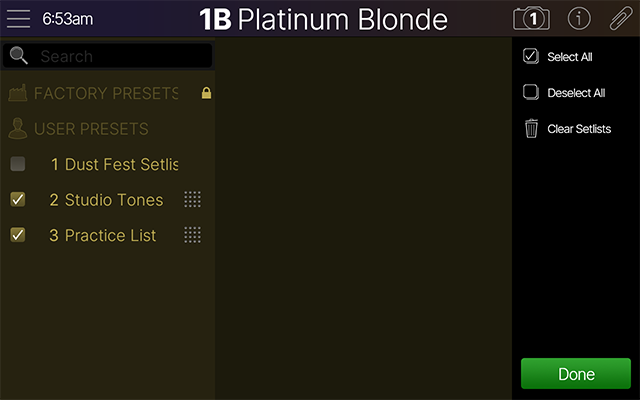
Managing Setlists
-
Tap

-
To reorder a setlist, tap its drag icon
-
Sidebar items are replaced with the following items (see screenshot below):
-
Select All
-
Deselect All
-
Clear Presets: Clears all checked setlists. Does not affect the original preset(s) in the USER PRESETS folder or any other setlist in which they may exist.
-
-
When finished, tap
Note: The FACTORY PRESETS and USER PRESETS folders cannot be duplicated, renamed, or cleared.
Templates
![]()
-
Tap the Main Menu icon

-
Optional: To rename a template, select the template and tap Rename Template

-
Optional: To add a new template folder, tap

-
Tap

-
To reorder a template in the list, tap its drag icon
-
Sidebar items are replaced with the following items (see screenshot below):
-
Select All
-
Deselect All
-
Move to Folder
-
Delete
-
-
When finished, tap Done