Ever get to the gig and the venue’s backline or acoustics suddenly make all your tones sound too tubby or harsh, or there’s this weird ringing frequency that wasn’t in your practice space or studio? Or ever plug into a different speaker or amp and realize everything is too dark or bright? Global EQ can help compensate for the wide sonic disparity experienced when switching acoustic environments and/or playback systems, playing along with various groups of instruments, or just when you need to cut through the mix.
There are actually three Global EQs in Helix Stadium, one each for the 1/4”, XLR, and Phones outputs (even if you’ve linked two—or all three—outputs. See Matrix Mixer). This way, you can EQ the signals sent to your onstage playback system, the Front Of House mixer, and feed to your IEMs (In Ear Monitors) separately.
-
Tap the Menu icon


-
Press the desired output button (1/4”


-
Tap the bypass icon

-
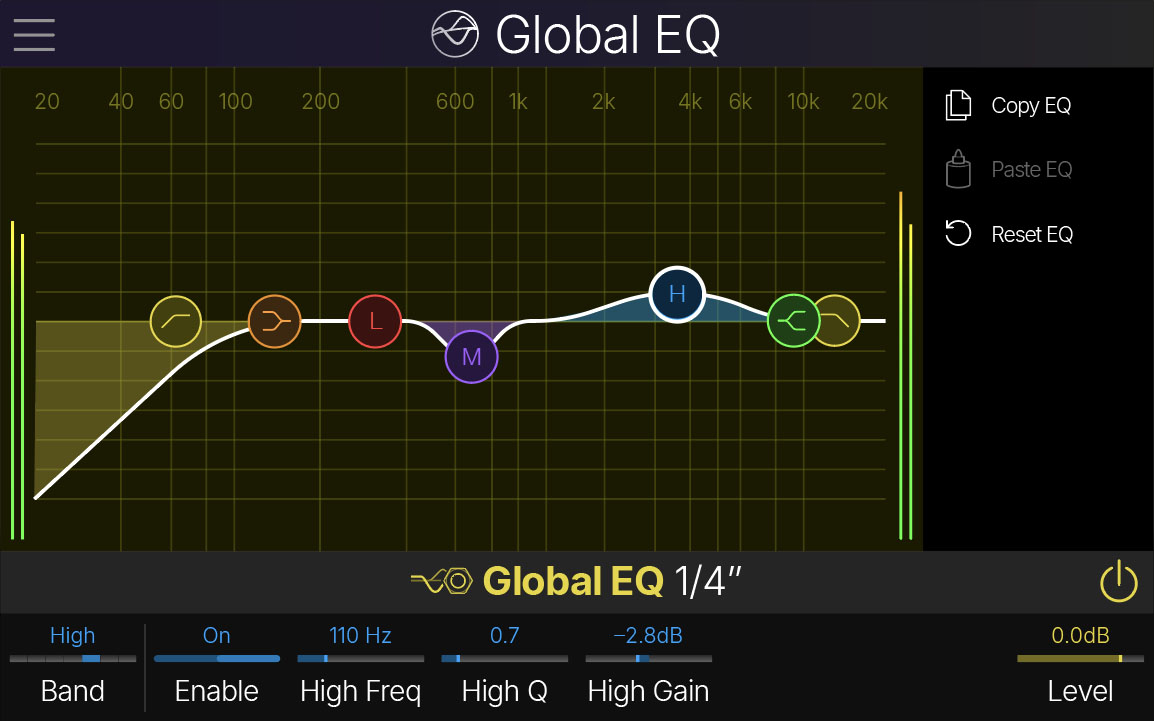
Tap a circular EQ band node, then drag it up or down to change gain and left or right to change its frequency. Alternatively, turn Knob 1 (Band) to select the desired EQ band; its parameters appear to the right.
-
To copy one output’s Global EQ to another, from the source output, tap Copy EQ. Select the destination output and tap Paste EQ.
-
To reset the output’s Global EQ, tap Reset EQ. Note that Low Cut and High Cut bands are still active, so if you want no Global EQ at all, tap the bypass icon
-
Tips for Using Global EQ
-
As a general rule, try reducing Gain for unwanted frequencies rather than heavily boosting the desired frequencies.
-
Use the “sweep and cut” method:
-
Boost a band significantly while listening to your instrument tone or playback
-
Sweep the band horizontally across frequencies until you hear the offending frequency accentuated.
-
As you identify the undesirable frequencies, reduce the Gain on the band(s).
-
-
Use a narrower Q (lower Q values) for Gain reductions and a wider Q (higher Q values) for Gain boosts.
-
Small Gain adjustments (1–3 dB) are often enough. Extreme EQ settings can cause unnatural sound, hiss, and phase issues.
-
Use the Level parameter (Knob 8) once you’ve made your individual band Gain adjustments to optimize the final output level.
🎧 Know Your Frequencies:
-
Sub-bass (20–60Hz): Adds depth, but too much can cause muddiness and rumble.
-
Bass (60–250Hz): Defines warmth and punch; avoid excessive boosts.
-
Low mids (250Hz–500Hz): Can cause muddiness; cut if necessary.
-
Mids (500Hz–2kHz): Affects the presence and body of instruments/voices.
-
Upper mids (2kHz–4kHz): Impacts clarity and attack (especially on guitar tones); be cautious of harshness.
-
Highs (4kHz–10kHz): Brings brightness and detail but can add sibilance.
-
Air (10kHz+): Adds shimmer and openness but can introduce hiss.