Tip: A great way to start using Helix Stadium is to try out the selection of Factory Presets and get familiar with the tonal possibilities. Soon enough, you’ll certainly want to start creating your own tone masterpieces. This page covers the steps for putting together and editing tones to start building your own collection of presets.
Be sure to start with your Stadium’s Phones and Output volume set to a minimum, and gradually raise the volume as you add blocks to your tone.
Creating a New Preset
-
Tap Menu

-
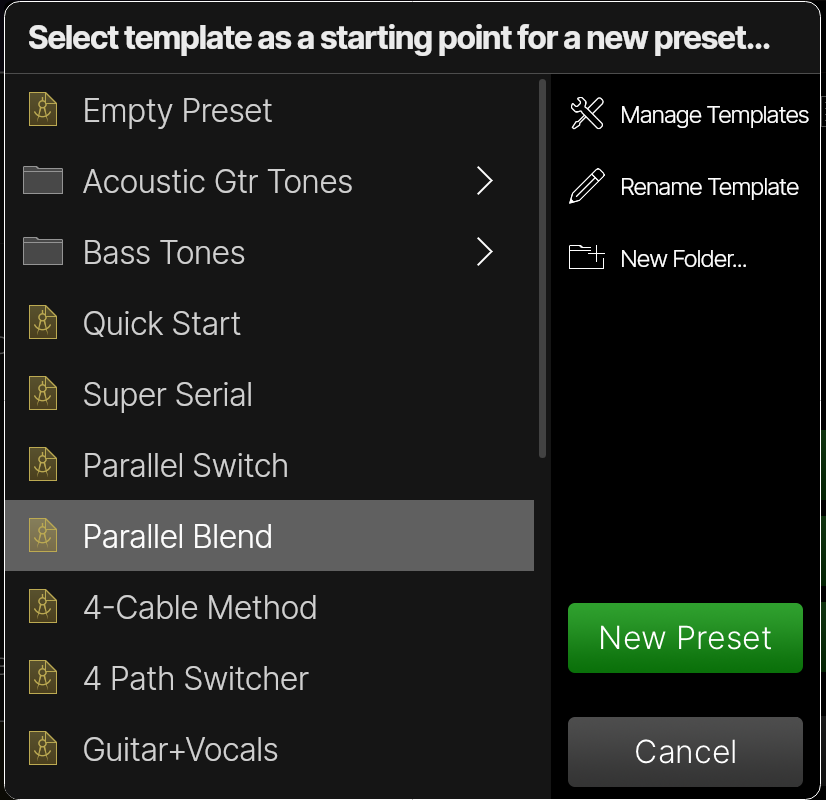
Tap the desired template from which you want to start your new preset. If you’re not sure, tap “Empty Preset.”
-
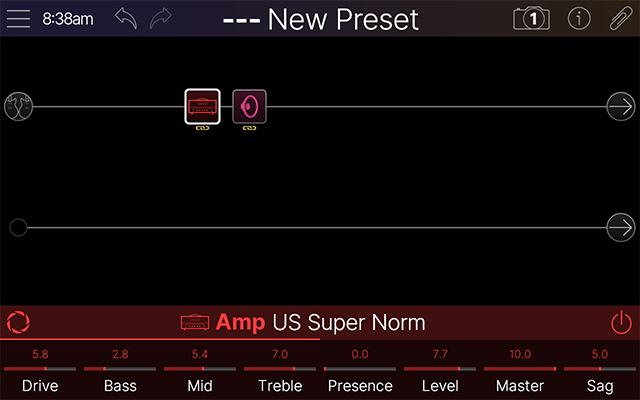
Tap New Preset

Tip: Alternatively, from the Preset List, double-tap on an “Empty” preset location to load an empty new preset.
Adding Blocks

Add an Amp and Cab
-
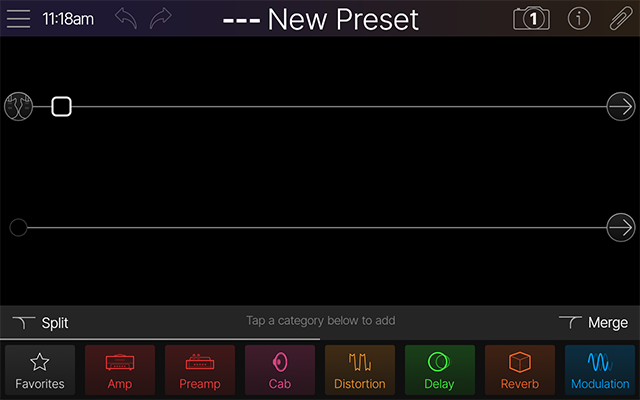
From the Home screen, tap an empty location on Path 1A. Block categories appear in the inspector:

-
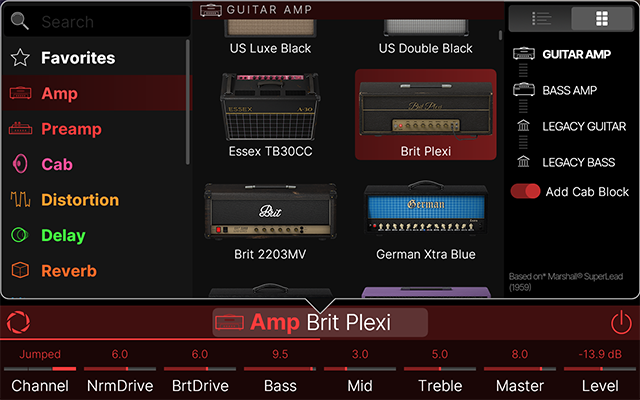
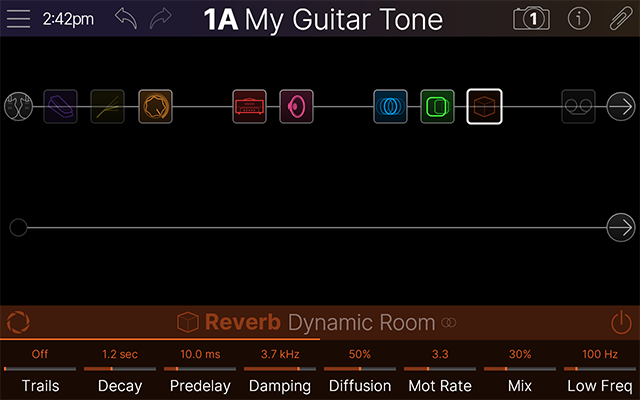
Tap the Amp or Preamp button and double-tap on an Amp from the Model List. By default, the selected Amp and a matching Cab block are added—see Cabs and Cab IRs for details. You’ll see your blocks in the Home View - Edit screen.

Add Some Effects
-
Following the procedure from step
-
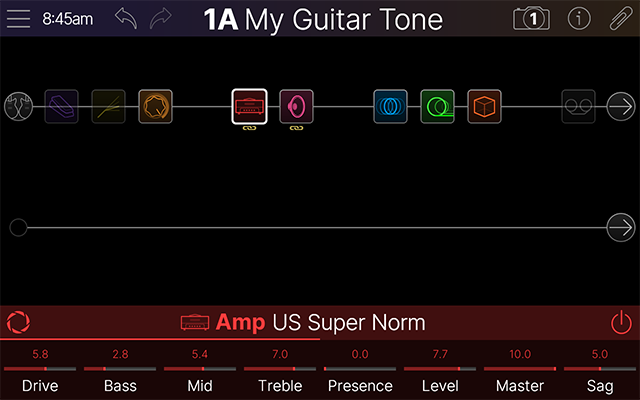
Add Pitch/Synth, Wah/Filter, Dynamics, and Distortion blocks before the Amp and Cab (in what we call “Pre” position). It's best to use mono models in the Pre position since Amp blocks are mono and will sum any incoming stereo signal.
-
Add Modulation, Delay, and Reverb blocks after the Amp and Cab (“Post” position), especially when using distorted amp settings, for a smoother overall sound. (Quite a few Modulation models sound different, but equally great, in the “Pre” position too.)
-
A Looper is usually preferred as the last block before the Output block, so your loop recordings can capture your full amp + effects signal. Use a stereo Looper type if you want your loop recordings to capture stereo effects.
-
An EQ can be useful in many different positions in the tone; multiple EQ blocks can even be used to shape the sound and level feeding into an amp, before or after specific effects, etc.
Congratulations! You have now built a robust tone that you can start tweaking as desired… or just dive in and start playing.
Selecting Blocks and Adjusting Parameters
Select a Block
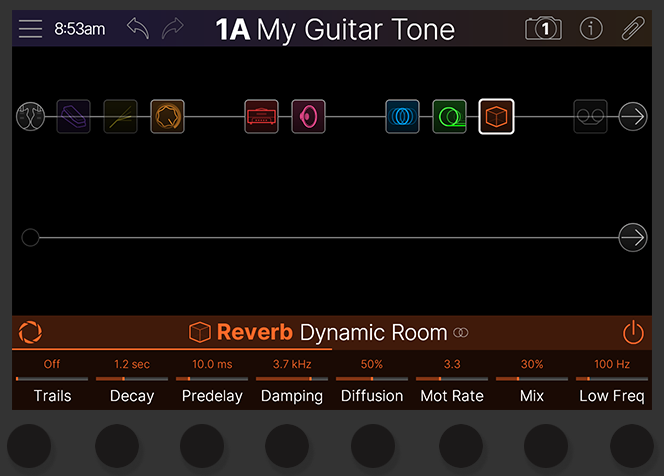
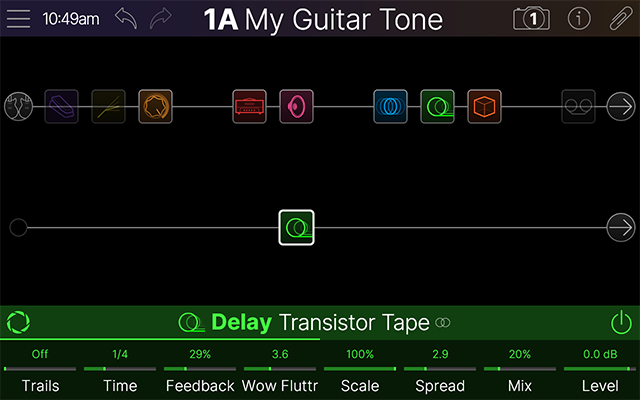
From the Home > Edit screen, tap a block to select it. Alternatively, touch any assigned Stomp switch to instantly jump to its assigned item, or touch repeatedly to cycle through multiple items assigned to the switch. Selected blocks have a thicker white outline, and their parameters appear in the inspector below.
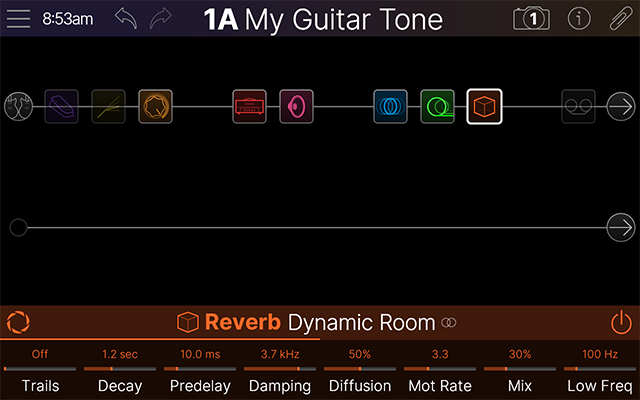
Note: The Inspector shows up to eight parameters at a time for the selected block. Many blocks include more than eight parameters, which are available on additional “pages” in the Inspector, as indicated by the line shown just above the parameters in the Inspector. Swipe the Inspector left/right to access additional parameter pages.
Adjust a Block’s Parameters
There are a few ways to adjust parameters:
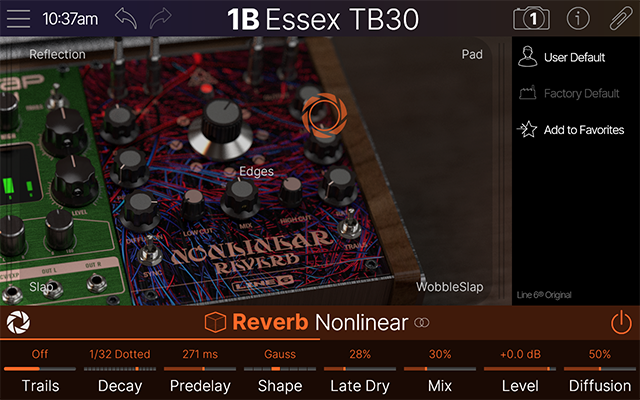
Use the Focus View
For any Amp, Preamp, or Effect model, tap the Focus View button ![]()
Use the Inspector Parameters
Turn the Knob 1~8 below the Main Display that corresponds to the Inspector parameter shown directly above it to adjust its value.
Use the Parameter Panel
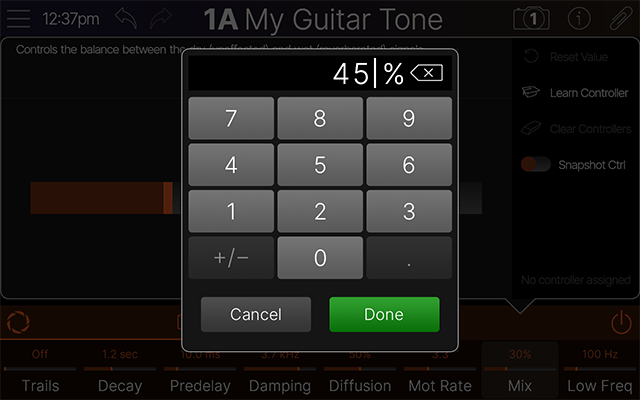
Tap once directly on a parameter in the Inspector to open the Parameter Panel. Here, you can read details about the parameter, and adjust its value by tapping and dragging the slider. Optionally, for numerical values, tap on the value in the panel, enter a precise value, and tap Done.
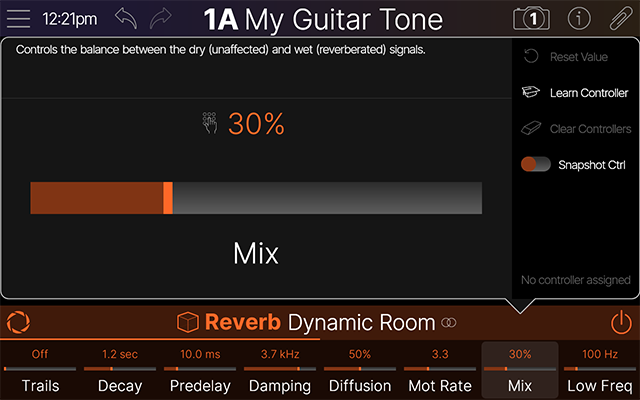
Use the Parameter Panel sidebar options for additional functions:
-
Reset Value: When this option is not dimmed, it means the parameter has been adjusted from its default value. Tap to reset it. (Or, reset a parameter by pressing its respective Knob 1~8 below the Inspector.)
-
Learn Controller: Tap “Learn” to create an assignment to an onboard or externally connected controller device, such as a footswitch, expression pedal, trigger, or MIDI. See the Learn Controller section for details.
-
When the parameter includes a Controller assignment, adjustable Minimum and Maximum indicators appear on the slider (such as the “Heel” and “Toe” values when assigned to an expression pedal). Tap and drag these to adjust the Min and Max values.
-

-
Clear Controllers: Tap to clear all existing Controller assignments from the parameter.
-
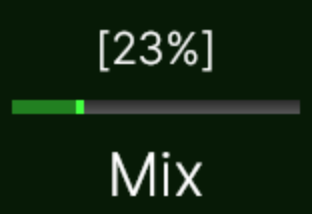
Snapshot Control: When the switch is disabled (left position, the default setting), the parameter is excluded from Snapshot Control—meaning, its value is not stored and recalled with Snapshot changes. Toggle the switch as enabled (right position) if you want to be able to store up to eight different values to be recalled with Snapshots 1~8. You’ll see the parameter’s value appear in white and in brackets when the Snapshot Control is enabled for the parameter

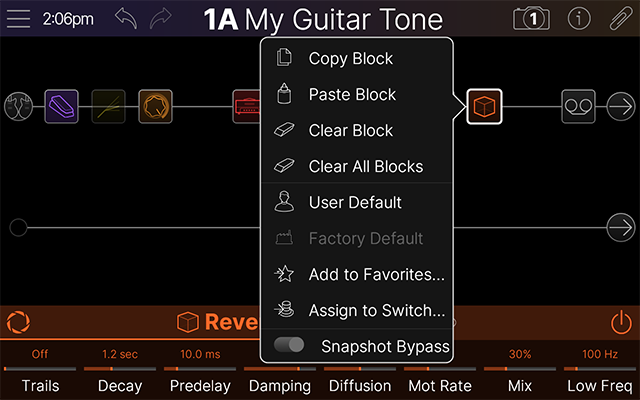
Access a Block’s Action Panel
Tap once on the currently selected block or double-tap an unselected block to open its Action panel. The panel offers several commands and functions for the block, such as Copy, Paste, Clear, configuring User Default settings, and more, as covered in the following sections.
Bypassing a Block
There are a few methods for bypassing a block:
-
Within the Home View - Edit screen, select a block and tap its Bypass button

-
When Stadium is set for Stomp Footswitch Mode, you can press the footswitch assigned to any effect block within your preset to toggle its bypass state.
When bypassed, the block (and its Inspector parameters, when the bypassed block is selected) appears dimmed, as shown below. Additionally, when Stadium is in Stomp Footswitch Mode, the assigned footswitch’s LED and label appear dimmed when the block is bypassed.
Tip: A handy trick is to “Merge” switch assignments and toggle multiple blocks' bypass states with one Stomp footswitch simultaneously—see the following Assigning the Block to a Switch section.
Moving Blocks
Experiment further with re-ordering blocks in the path or changing the path routing.
-
To move a block to a new position on its current path: Simply tap and drag any Amp, Cab, Effect, or Mix block left or right on the current path. Other blocks automatically move to create a new empty space for your block, allowing you to drop the block into the desired spot.
-
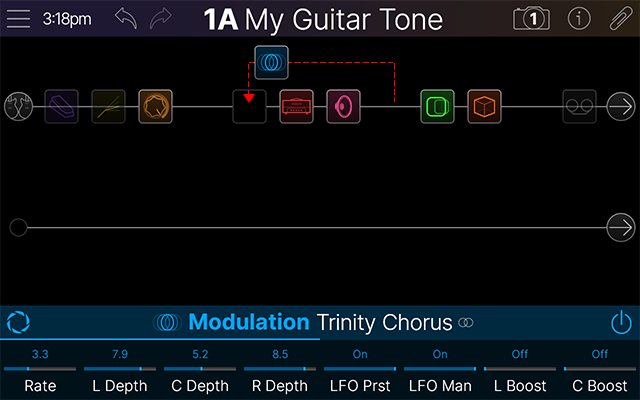
To move a block to a different path: Tap and drag a block up or down to either a parallel or another main target path destination.
-
Parallel Path: Drag downward from Path 1A or 2A, and a parallel path is automatically created with its own Split and Merge blocks. Drop the block onto the parallel path to move it there. See the following Signal Path Routing for the many possibilities for using parallel paths.
-
Path 1A - Path 2A: Tap and drag a block up or down to the opposite main Path. For example, if you drag the modulation block down from Path 1A, you’ll see an empty block location appear as you hover over Path 2A, where you can drop it. If a parallel Path 2B already exists, you can drag and drop the block there.
-
Copying and Pasting a Block
Blocks from one path can be copied and then pasted into the same path, the other path, or a path in an entirely different preset.
-
Access a block’s Action Panel: Double-tap on the block (or, if the block is already selected, tap it once).
-
Tap the Copy Block command.
-
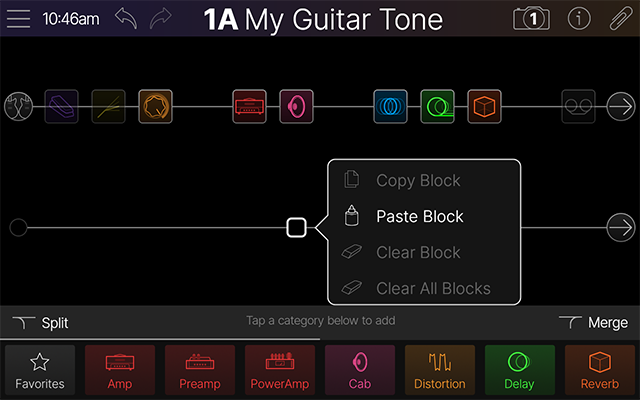
Select a destination: Double-tap on the desired empty block location to open the Action panel (as shown below left). The destination can be on any path within the current or a different preset. Then tap the Paste Block command. A copy of the block appears at the new location (shown below right).
-
The original block’s parameter settings, controller, and snapshot assignments are retained for the new copied block. Any existing bypass switch assignment is not retained on the pasted block.
-
Tip: Input, Output, Split, Merge, and Looper type blocks can also be copied and pasted. If the destination path’s DSP cannot accommodate the copied block, the header will briefly display a DSP full alert—please see Dynamic DSP.
Clearing Blocks
There are several ways to remove an existing block.
-
Drag an individual block off screen: Tap and drag any block quickly toward the top or bottom edge of the Main Display. Once you see the red “Clear” indicator

-
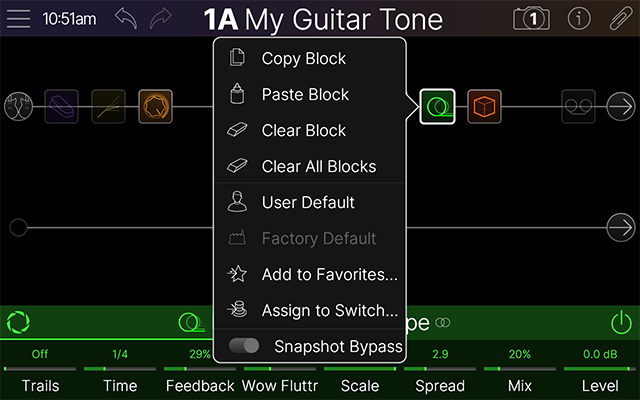
Use the Action panel to clear an individual block: Double-tap on a block to open the Action panel and select the Clear Block command.
-
Use the Action panel to clear all blocks: Double-tap on any block to open the Action panel and select the Clear All Blocks command. A pop-up alert will ask you if you’re sure you want to clear all blocks.
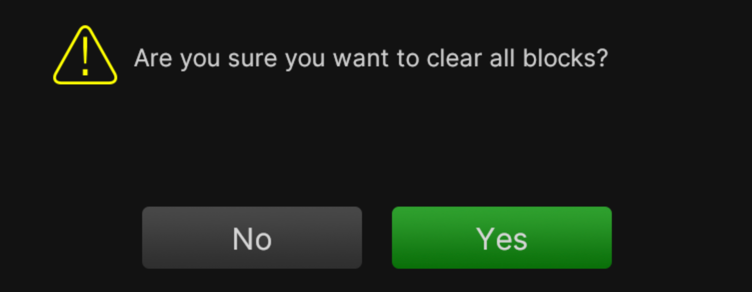
When you tap Yes, all blocks on all paths are cleared, with the exception of existing Input and Output blocks, which remain with their current settings.
Important! Tapping the Undo button 
Creating User Default Settings
Whenever you add a block to your tone and select a model, all the model’s parameters are loaded with a specific set of “Factory Default” values. If you find yourself constantly re-tweaking your commonly used models the same way, you can customize a model’s “User Default” settings to define its new defaults (excluding Input, Output, Split, or Merge Mixer blocks’ settings) so the model loads that way every time.
-
Select any block and tweak it exactly how you like: Configure any of the model’s parameters and bypass state. (Existing MIDI, bypass, snapshot, and controller assignments are not saved with the User Default settings.)
-
Tap the selected block again to open its Action panel: Select the User Default command. Your current parameter settings are now saved as the default for all future uses of the model. (Existing presets that already include the model are not affected.)
-
To return a model to its original Factory Default settings: Tap the selected block again to open its Action panel and select the Factory Default command to reset it for future uses of the model.
Tip: Alternatively, you can create a Favorite. This allows you to customize a model’s parameters, bypass state, snapshot, bypass, and controller assignments, and custom-name the model and add it to the Favorites menu to make it easily accessible via the Model List. Please see the Favorite Blocks page for details.
Assigning a Block to a Switch
You can use the block's Action panel to quickly create, merge, or replace an existing block’s switch assignment(s). For complete details on creating assignments, please see the Bypass/Control Assignment section. To follow are steps for merging multiple assignments to one switch.
Merging Blocks' Switch Assignments
Instead of each block having its own Stomp switch assignment, you can “merge” their assignments to simultaneously toggle two or more blocks on/off.
-
Double-tap on one of your blocks to open its Action panel and select the Assign to Switch command

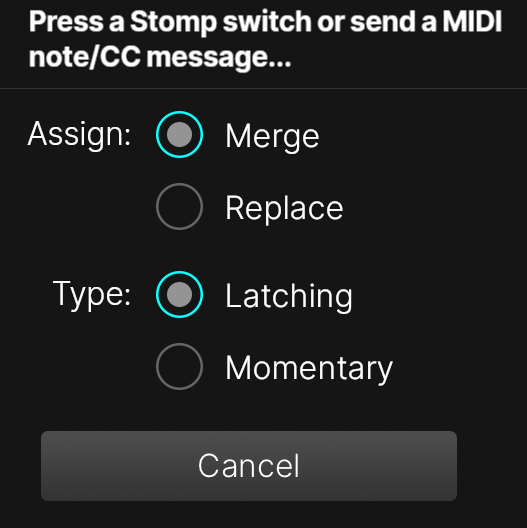
-
Select the Merge and Latching options, and then press the Stomp footswitch that is already assigned to another block to merge both blocks to the switch. You’ll see that the footswitch label has been changed to 'MULTIPLE (2)' to indicate that two blocks are assigned.
Tip: If you want to simultaneously toggle one block on and the other off, such as to switch between two different Distortion blocks, tap on one blocks Bypass button within the Inspector and set its bypass state is set opposite to the state of the other block.
Using Snapshot Bypass
By default, the Action Panel’s Snapshot Bypass switch is enabled (in the right position 
Note: The Helix Stadium Snapshots feature is a big enough topic to warrant its own section. Please see the Snapshots page.