Once you’ve created a new preset or edited an existing one, you’ll want to save it to the USER PRESETS folder and start building your library of tones. You can also save your own custom preset templates, which is a much faster and easier starting point than creating a tone from scratch every time.
Quick-Saving a Preset
If a preset has already been saved to the USER PRESETS folder, and it’s been edited since, the top panel Save button ![]()
Press Save to display the Save screen. Different saving options are available depending on the type of preset selected (Factory, User, or New preset) and the specific target location you select for saving the preset (within the User Preset folder, a setlist, in a currently occupied location, etc.). To follow, we cover all the preset saving scenarios.
![]()
![]()
![]()
Quick-Saving a Preset
Probably the most common case is that you’ve loaded a preset you previously saved within the User Presets folder, and you want to save it within its current location to retain your changes. For a Quick Save, simply press the Save button ![]()
Tip: Factory presets are “read-only” and cannot be overwritten, but you can select any preset within the Factory Presets folder and double-tap the Save button ![]()
Manually Saving a Preset
-
Press the Save button

-
To rename the preset, tap the large preset name in the header


-
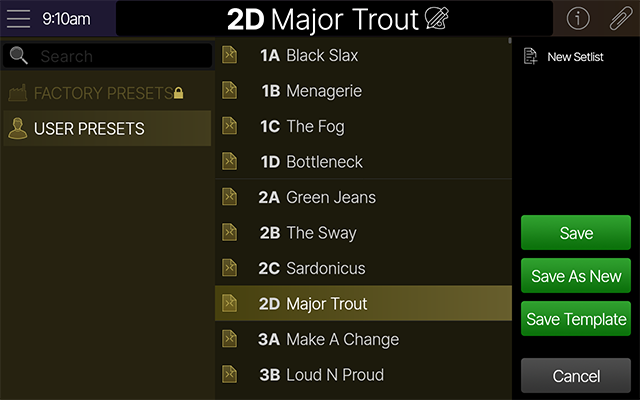
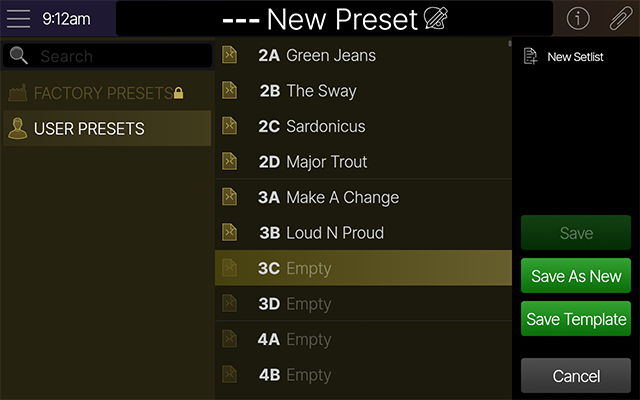
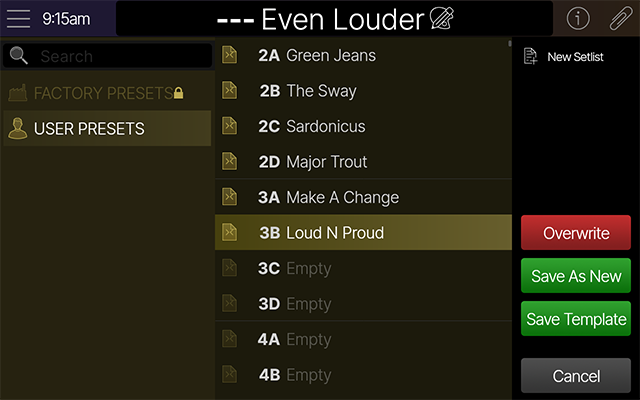
Choose a setlist and preset location in which to save your preset:
-
If the preset has already been saved, choosing the same location displays

-
If the preset has not yet been saved, or an empty location is selected, Save is grayed out. In this case, you must choose

-
If the location already contains a different preset, the Save button changes to

-
-
Tap one of the colored boxes in the sidebar:
-
To simply save any changes made to the current preset, tap
-
To overwrite an existing preset, select the preset to be overwritten and tap
-
To save your preset as a new, unique preset, tap
-
To save your preset as a template, tap

-
Saving a Template
Once you’ve created a preset that includes blocks, signal flow routing, or other configurations that you’re likely to use for future presets, it’s helpful to save it as a template rather than having to recreate it over and over again.
-
Press the Save button
-
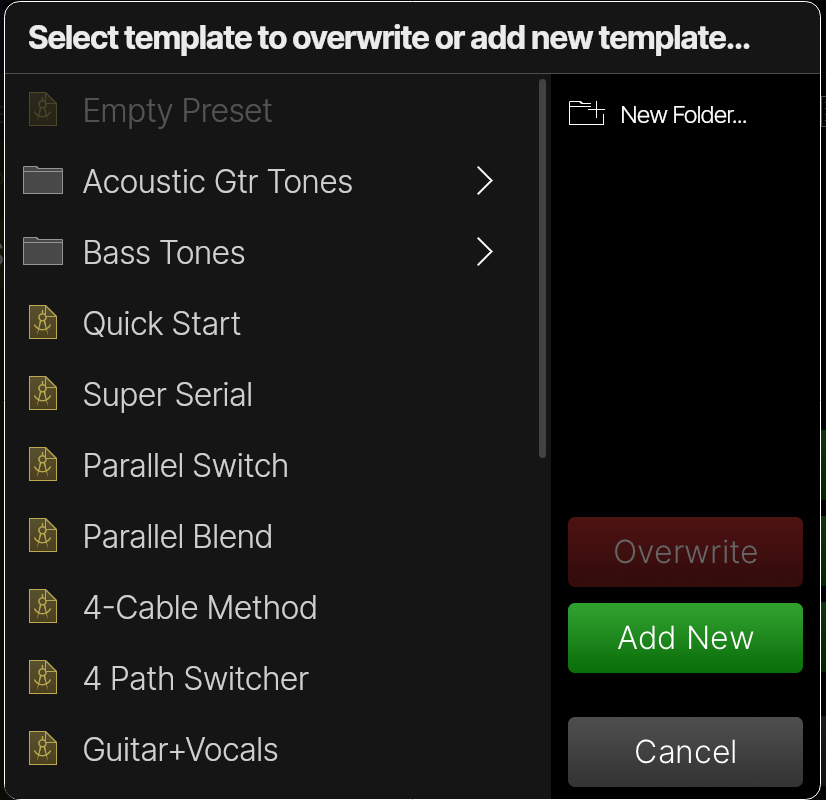
In the sidebar, tap Save Template
-
To add a template folder, tap
-
Tap one of the colored boxes in the sidebar:
-
To save as a new template, tap

-
To replace an existing template, select the template you wish to replace and tap

-