Flags are events that take place at a certain time during song playback—very similar to commands in the Command Center menu, except they take place automatically. A song could have just two flags (Start and End) for casual jamming with your favorite commercial tracks—or hundreds of flags, collectively automating your band or solo acts's entire live show.
Examples include:
-
Selecting a specific preset at the beginning of a song (Start flag)
-
Switching to a different snapshot when the chorus kicks in (Preset/Snapshot or any Marker flag)
-
Reordering sections of a song on the fly and/or choosing which section comes next (Marker flags)
-
Engaging looper functions—record the guitar during the first verse and then play it back for the second verse, where you can harmonize with it (Looper flags)
-
Displaying the Tuner at the end of a song to start the next one and then exiting the Tuner once the next song begins (Utility > Tuner On, Tuner Off flags)
-
Changing the preset in an external MIDI-equipped pedal, keyboard, synth, or standalone softsynth/guitar processing software (MIDI > Bank/Prog flags)
-
Synchronizing Powerpoint or Keynote slides to the music (Hotkey flags)
-
Controlling a MIDI-equipped lighting console or MIDI-to-DMX converter (MIDI > CC flags)
-
Controlling video playback or lighting software (Hotkey flags)
Song Flag Automation
Starting with Stadium Firmware version 1.3, several flag command types now behave as true automation. Showcase keeps track of your position in the song and automatically recalls the Preset, Snapshot, Ext Amp channel, MIDI PC/CC, Hotkey command, tempo, or screen, based on preceding flag(s), even if the playhead does not pass the flag’s location. This means you can jump to any part of the song and the correct sounds and settings will appear at the right time, no matter where the flags are placed.
|
Flag Type |
Description |
|---|---|
|
Start |
Every song has one Start flag at the very beginning that determines the song's initial time signature and tempo. The Start flag also has the ability to recall a specific preset and snapshot. |
|
End |
Every song has one End flag at the very end that determines the song's end location, fade out length (if any), and playback behavior for when the song ends. Moving its location trims the end time of the song. |
|
Marker |
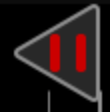
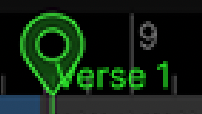
Used to jump to various locations in a song and for rearranging your song on the fly during performance. The flag top on the Song screen displays a small yellow pause icon when its Pause at Marker is set to "On". As with Start flags, Marker flags can recall a specific preset and snapshot. Marker flags, when renamed, will display their name on the Song screen’s ruler for reference. |
|
Cycle |
Cycles a section of the song for repeated jamming. Cycle Start and End points can also be entered in real time by pressing Transport mode's Cycle footswitch. |
|
Preset/Snap |
Used to automatically switch presets and/or snapshots during a song. Note that Start flags and Markers can also recall presets and/or snapshots, so these may be unnecessary. |
|
Looper |
Used to automate looper functions within Helix Stadium itself. For example, you could place a Looper > Record flag at the beginning of the first chorus, a Looper > Stop flag at the end of the chorus, and a Looper > Play flag at the beginning of the second chorus. Playing the song will automate these functions so you could harmonize with what you played in the first chorus durning the second chorus, without pressing a single footswitch. |
|
Utility |
A catch-all for additional functions that allow Helix Stadium to control itself, including turning the click on and off, entering and exiting the tuner or XY Controller screens, and starting and stopping the stopwatch. |
|
Ext Amp |
Used to automatically switch external amps' channels and/or reverb. Same as Ext Amp commands except they happen automatically. |
|
MIDI |
Transmits a MIDI message from both MIDI DIN and USB. Currently supports Bank/Program, CC, and MMC messages. Can be used to recall presets and control parameters in your external stompboxes, synths, keyboards, or with a MIDI-to-DMX converter, even lighting. |
|
Hotkey |
Transmits a QWERTY HID command (with or without modifiers, such as Shift, Alt, and Command) via USB. Basically the same thing as a Hotkey message on the Command Center page, except it's automatically sent during song playback. Can be used to start/stop a Quicktime video, advance Powerpoint slides, or if you're really ambitious and bored, type an angry email to your boss. |
|
Time |
Each song's Start flag determines the song's initial tempo and time signature, but additional Time flags can be added anytime the song's tempo and/or time signature changes. |
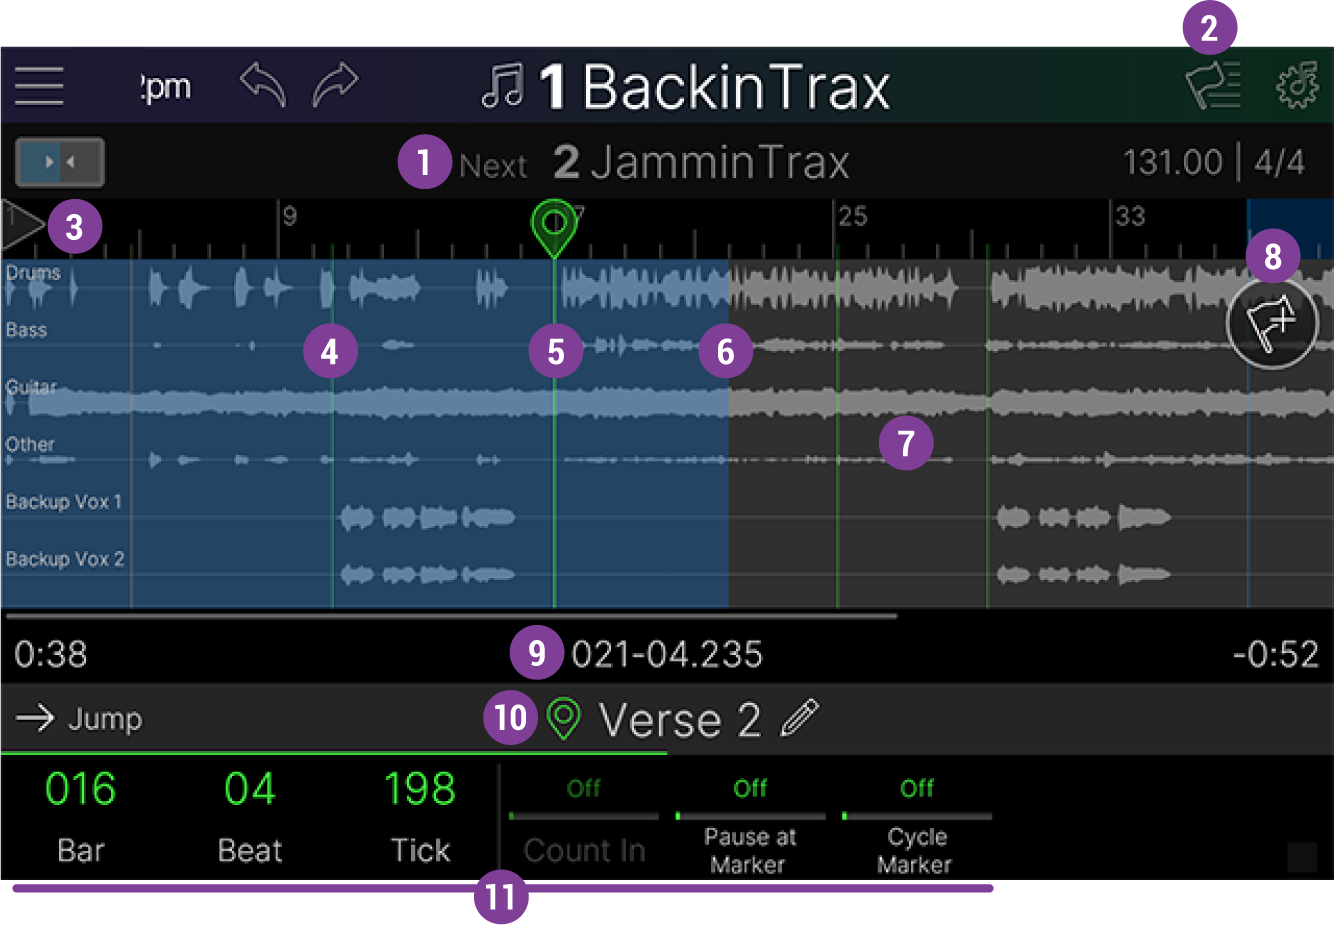
Flag Controls
![]()


![]()
![]()
![]()
![]()
![]()
![]()
![]()
-
Tap a specific location within the flag field to jump the playhead to that time. Swipe left or right to scroll the flag field. Pinch the flag field horizontally to zoom the timeline in and out.
-
Audio track waveforms appear with track names to their left. The height of your added tracks automatically resizes to fill the field’s vertical space.
![]()
![]()
![]()
![]()
-
Tap anywhere in the Playhead Location area to display the Transport Panel.
![]()

Tip: For Marker type flags, when renamed, the Marker’s custom name is also displayed on the Song screen’s ruler for reference, as shown in image above for all Markers.
![]()
Adding a Flag
-
Tap the Add Flag button


-
Tap and drag the desired flag button up to the flag field at the location you want it to occur; its parameters appear in the inspector (below). Alternatively, tap the flag button to insert it at the current location.

-
Adding a Cycle flag actually creates two flags—Cycle Start and Cycle End—with a blue bar connecting them.
-
Tap

-
Tap on the Playhead location area (above the flag name) to display the Transport Panel—see Performing Songs for transport functions.
Selecting Flags
-
From Song View, turn the Lower Knob to scroll through all available flags. Alternatively, tap the top of any flagpole in the ruler area.
-
To scroll through all flags of the same type, press and turn the Lower Knob. For example, if a marker flag is currently selected, pressing and turning the Lower Knob scrolls through all Marker flags, skipping over any other flags.
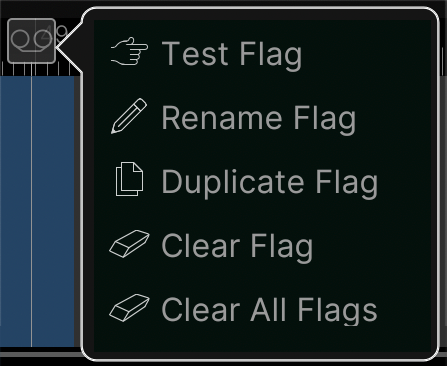
Flag Action Panel
Tap on a selected flag’s icon in the ruler area to open its Action Panel. Depending on the selected flag type, not all Action commands will be available.
Note: Start and End flags do not have an Action Panel; these flag types cannot be renamed, duplicated, or cleared.
|
Flag Action |
Description |
|---|---|
|
Test Flag |
Engages the selected flag so that you can check if your parameter settings are performing the desired function. |
|
Rename Flag |
Lets you name the flag. For example, “Verse 2” is much more meaningful than “Marker 3” and “Strymon Cloud” is more meaningful than “MIDI 7.” |
|
Duplicate Flag |
Creates a copy of the selected flag, including all its parameter settings, in the same time location. |
|
Clear Flag |
Clears the selected flag from the song. |
|
Clear All Flags |
Clears all flags from the current song. (Start and End flags cannot be cleared.) |
Moving a Flag
-
Select a flag and turn knobs 1-3 to move its location. Alternatively, tap the flag icon in the time ruler and drag it left or right.
|
Parameter |
Description |
|---|---|
|
Bar |
Sets the flag’s bar location. |
|
Beat |
Sets the flag’s beat location. |
|
Tick |
Sets the flag’s tick location with a resolution of 240 ticks per beat. Press the knob to cycle quarter divisions of a beat—001, 061, 121, and 181 ticks. |
Flag Types
Initially, a new “empty” song already includes a Start and End type flag. The Start and End flag types are not available from the Add Flag button’s list of flag types. To follow are descriptions of the flag types available and their parameters.

Start Flag
Every song has one Start flag at the very beginning that determines the song's initial time signature and tempo. The Start flag also has the ability to recall a specific preset and snapshot.
Tip: Time flags can be added elsewhere in your song for any tempo or time signature changes.
End Flag
Every song has one End flag at the very end that determines the song's end location, fade out length (if any), and playback behavior for when the song ends. Moving its location trims the end time of the song.
Click to show End Flag settings...
|
Parameter |
Description |
|---|---|
|
Fade Out |
Determines whether a volume fade out is applied to all audio tracks. |
|
Fade Length |
(Grayed out if Fade Out is set to off.) Sets the fade out duration. The fade out area appears as a triangular shading on the track field. |
|
End of Song |
Determines the behavior when the playhead reaches the End flag. An indicator icon appears on the End flag for the selected action:
Note: The End flag’s play and preset/snapshot recall behaviors are superseded by the current Global Settings > Songs > Select Song and Song Play settings. Please review these Global Settings descriptions and select the desired behaviors. |
|
Gap Before Next Song |
(Grayed out if End of Song is set to Pause.) When on, places a variable, silent gap (determined by Gap Length) between the end of the current song and the beginning of the next song. |
|
Gap Length |
(Grayed out if Gap is set to off.) Sets the duration of the gap. |

Marker Flag
Markers are used to jump to various locations in a song and for rearranging your song on the fly during performance. The flag top on the Song screen displays a small yellow pause icon when its Pause at Marker is set to "On". As with Start flags, Marker flags can also recall a specific preset and snapshot.
Tip: If you rename a Marker flag (tap on the pencil icon ![]()
Click to show Marker Flag settings...
|
Parameter |
Description |
|---|---|
|
Count In |
This feature is not currently functional. It will be implemented in an upcoming firmware update. |
|
Pause at Marker |
When set to On, playback pauses at the marker's location. When On, a pause icon indicator appears on the marker |
|
Cycle Marker |
Determines whether the playback cycles between the selected marker and the next marker. (Note that there must be an additional marker flag at a later time position within the song for a cycle region to be created.) Tap the transport Cycle button Tip: You can alternatively add a dedicated Cycle flag to create a cycled region—see the following flag type. |
|
Marker Recalls Preset |
Determines whether reaching a marker automatically recalls a preset and/or snapshot. Set to On and use the next 3 parameters to choose the preset/snapshot to be loaded. |
|
Setlist |
Sets the desired Stadium Setlist, Preset, and Snapshot to be recalled. Turning Recall Preset at Marker automatically fills Knobs 6-8 with [Current] for the selected setlist, preset, and snapshot. If every marker's Recall Preset at Marker is turned on and has the same preset, the preset is never reloaded. If only Snapshot is changed, only the snapshot of the current preset is recalled. |
|
Preset |
|
|
Snapshot |

Cycle Flag
Cycle flags repeat a section of the song for repeated jamming. Cycle Start and End points can also be entered in real time by pressing Transport mode's Cycle footswitch. By default, the Cycle End flag is added 8 bars later than the Cycle Start flag.
Note: To Clear a Cycle flag completely from the song, tap and hold the on-screen Transport Panel’s Cycle button for 2 seconds, until it flashes.
Preset/Snap Flag
Preset/Snap flags are used to automatically switch presets and/or snapshots during a song. Note that Start flags and Markers can also recall presets and/or snapshots, so these may be unnecessary.
Looper Flag
Looper flags are used to automate looper functions within Helix Stadium itself. For example, you could place a Looper > Record flag at the beginning of the first chorus, a Looper > Stop flag at the end of the chorus, and a Looper > Play flag at the beginning of the second chorus. Playing the song will automate these functions, so you could harmonize with what you played in the first chorus during the second chorus, without pressing a single footswitch.
Utility Flag
Utility flags represent a catch-all for additional functions that allow Helix Stadium to control itself, including turning the click on and off, engaging and exiting the tuner or XY Controller screens, or starting and stopping the stopwatch.
Tip: Typically, you’ll want to add Utility flags in pairs. For example, if you add a Utility flag for Tuner On, add another Utility flag for Tuner Off at the desired later time location in your song, so that it exits from the Tuner back to the Song screen.
Ext Amp Flag
Ext Amp flags are used to automatically switch external amps' channels and/or reverb. Same as Ext Amp commands, except they happen automatically.
Note: Global Settings > Switches/Pedals > Control A (Tip), Control B (Ring), Control C (Tip)
Important! Send Ext Amp commands utilize “short-to-sleeve” footswitch inputs to control channel, reverb, and/or tremolo, and have been tested with many common amplifiers. Unfortunately, this does not guarantee compatibility with all products. Depending on the channel switching jack’s circuitry, the Ext Amp function may not operate as expected. Connecting to any other input could cause permanent damage to both your amp and Helix Stadium device. If you’re unsure whether your amp has short-to-sleeve inputs, please contact the manufacturer.
MIDI Flag
Transmits a MIDI message from both MIDI DIN and USB. Currently supports Bank/Program, CC, and MMC messages. Can be used to recall presets and control parameters in your external stompboxes, synths, keyboards, or with a MIDI-to-DMX converter, even lighting.
Note: Global Settings > MIDI > MIDI Over USB C must be set to “On” (the default), and the Send MIDI PC set to the desired port (MIDI Out, USB, or both) for Stadium to send MIDI PC messages.
Hotkey Flag
Hotkey flags transmit a QWERTY HID command (with or without modifiers, such as Shift, Alt, and Command) via USB. Basically the same thing as a Hotkey message on the Command Center page, except it's automatically sent during song playback. Can be used to start/stop a Quicktime video, advance Powerpoint slides, or if you have more time than common sense, type a scathing critique of Line 6 in the YouTube comment section.

Time Flag
Each song's Start flag determines the song's initial tempo and time signature, but additional Time flags can be added anytime the song's tempo and/or time signature changes.