Important! If you haven’t yet loaded songs into Helix Stadium, read Creating a Song in the Helix Stadium App first!
There are multiple ways to select, play, and navigate songs.
The Transport
Helix Stadium provides multiple methods of controlling song playback:
-
Transport Footswitch Mode
-
On-screen Transport Panel
-
Transport Buttons
This means song control is available regardless of the current screen or whether your hands are free!
Tip: Transport functions can also be controlled remotely via MIDI, allowing you to trigger Transport functions even when not currently displaying the Song view. Please see MIDI CCs.
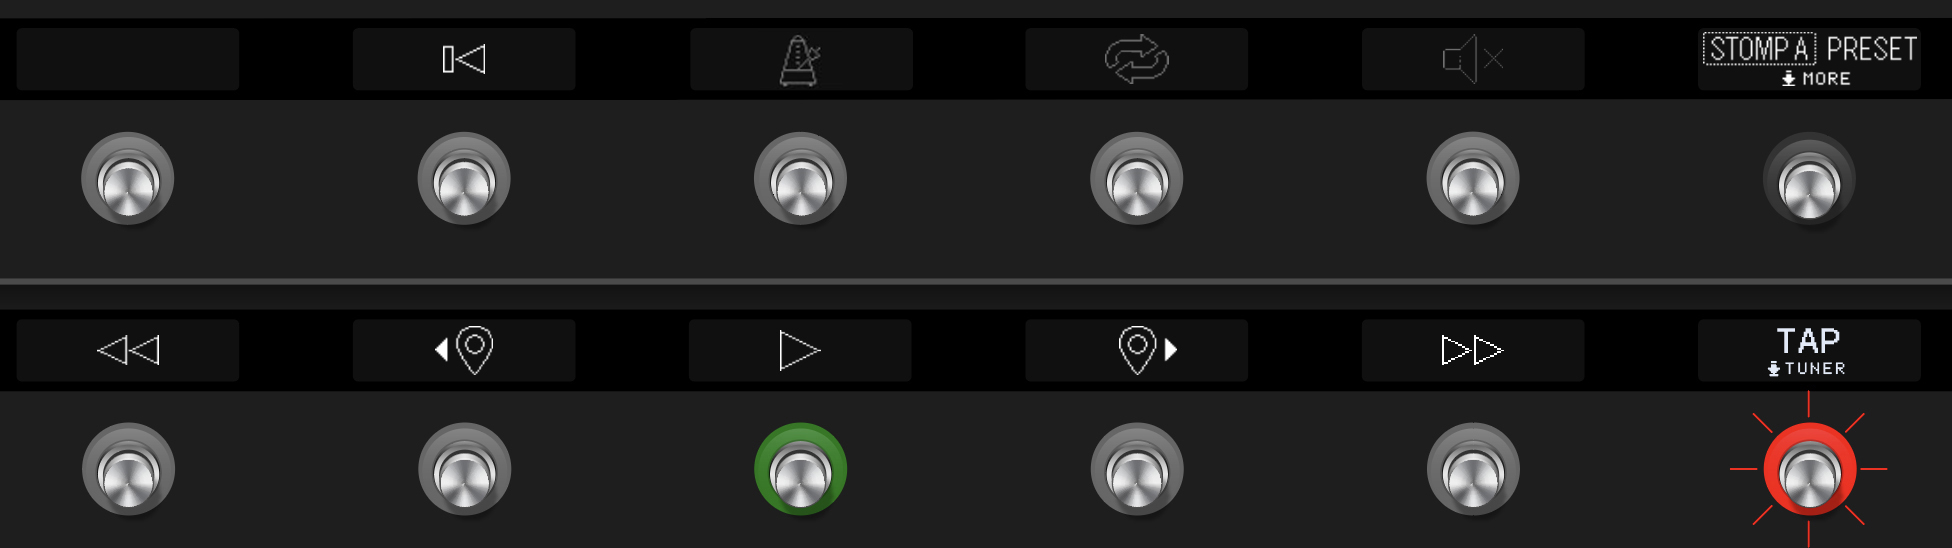
Transport Footswitch Mode
Transport Footswitch Mode offers hands-free control of song playback. To enter Transport mode, press and hold FS6 (MODE) to enter More mode and then press the TRANSPORT switch.
Note: On Helix Stadium XL, the scribble strips display the function label for each switch. On Helix Stadium, the function label for each switch is displayed on the Home > Play screen when Transport Footswitch mode is enabled. Please see the Footswitch Modes section for additional information.
Tip: You can also use the Command Center > Song commands to assign individual transport functions to Stomp A and B footswitches and Instant commands.
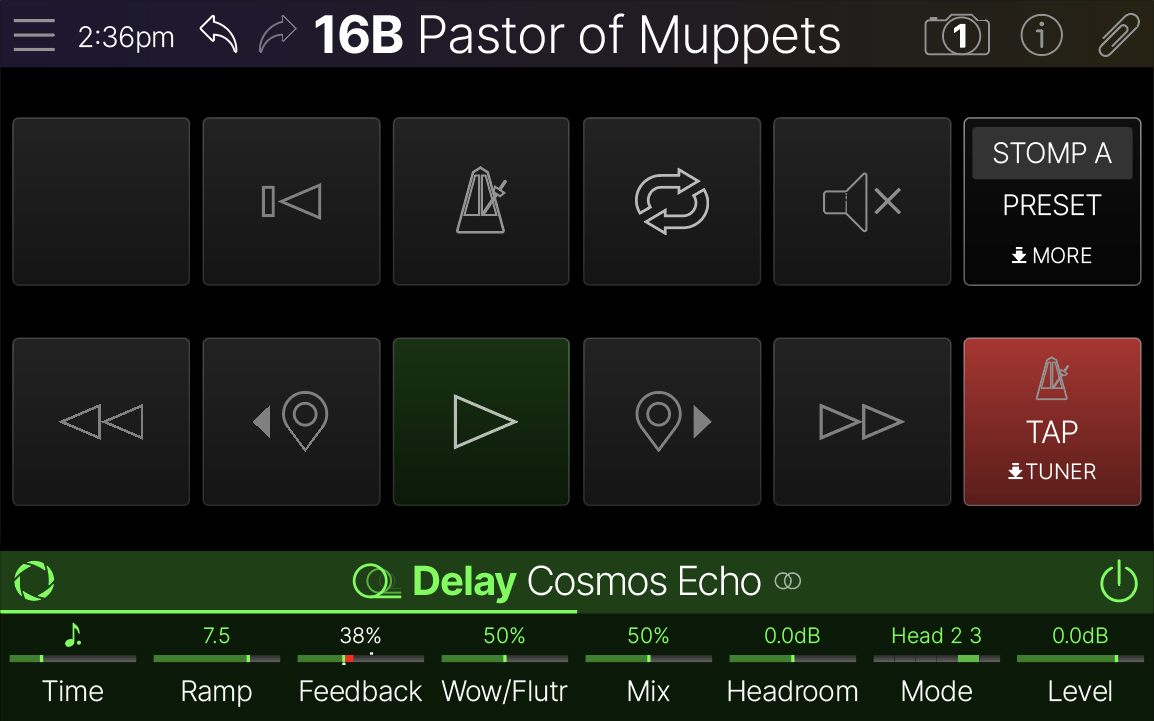
Transport Panel
The Transport Panel can be displayed on the main Song screen by tapping on the location controls row, just above the Inspector. Tap the panel’s X button to close it.

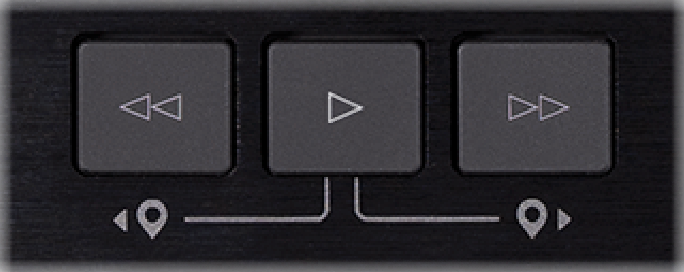
Hardware Transport Buttons
The hardware Transport buttons are dedicated to Song transport functions, regardless of the screen you are currently working in. The middle Play/Pause button is dimly lit when paused, brightly lit when playing, and flashing when a song or marker is cued. Most of the same transport functions as available on the Transport footswitches and panel can be performed using these buttons.
Transport Functions
The following functions can be performed on the Transport footswitches, on-screen panel buttons, or hardware buttons.
-
Play/Pause


-
Press Return To Zero

-
Press Prev Song

-
Press Prev Marker


-
Press Cycle

Selecting Songs
-
Press Prev Song

-
FS6 changes to Cancel (for cancelling the song cue), and FS12 changes to


-
Press
Note: You can change the behavior of ![]()
![]()
-
Skip: Instantly jumps to the selected song, like traditional song skip buttons on a CD or MP3 player. (Remember those?)
-
Cue (default): Selects the song but doesn’t play it; press
Additionally, the Global Settings > Songs > Song Play option lets you choose what happens when you select Play for the Cued song:
-
Play (default): Immediately starts playback of the cued song.
-
Load: Loads the song, but does not automatically start its playback or load the song’s Start Flag-Preset/Snapshot (if enabled).
-
Load+Preset: Loads the song and its Start Flag-Preset/Snapshot (if enabled), but does not automatically start its playback.
Selecting Markers
Markers are a type of flag used to jump to—and therefore reorder—sections of your songs in real time. Markers can also trigger preset and snapshot changes on playback—see Adding a Flag for details.
-
Press Prev Marker


-
FS6 changes to Cancel (for cancelling the marker cue), and FS12 changes to
-
Press
Note: You can change the behavior of ![]()
![]()
-
Skip: Instantly jumps to the selected marker.
-
Cue (default): Selects the marker but doesn’t play it; press
-
Next Marker: Causes playback to automatically jump to the cued marker when the next marker (or song end) is reached; this lets you rearrange sections of your song on the fly. For example, if you’re playing your big solo before the last chorus and you want it to play twice as long, at any time during the solo, press
Repeating a Section of a Song (Cycle)
-
While the song is playing back, at the point you want the cycle to start, press Cycle
-
At the point you want the cycle to end, press Cycle
-
Press Cycle
-
Cycle start and end are remembered. Press Cycle
-
-
To clear a Cycle from memory, press and hold Cycle
-
Alternatively, if a cycle does not yet exist in the song, press and hold Cycle
Setting a Playback Location
Normally, you can just tap on the song’s flag field (waveforms) to jump to that location. You can also manually set a playback location:
-
From the main Song screen, tap the location row, just above the Inspector; The Transport panel appears:
-
Turn the knobs below the screen to set the playback location:
-
Knobs 1 and 2: Time Elapsed
-
Knobs 3, 4, and 5: Song’s location in Bars, Beats, and Ticks
-
Knobs 7 and 8: Time Remaining
-
Chasing the Song
By default, Chase is enabled, keeping the playhead (the right edge of the blue progress bar) centered on the screen. If you swipe to scroll the current view area, or touch-pinch or touch-expand to zoom in/out, Chase is disabled, letting you view another area of the song without it auto-scrolling away. Tap the Chase button to toggle it on and off.
-

-

-
Chase is automatically enabled if you return to the beginning of the song or select a different song.
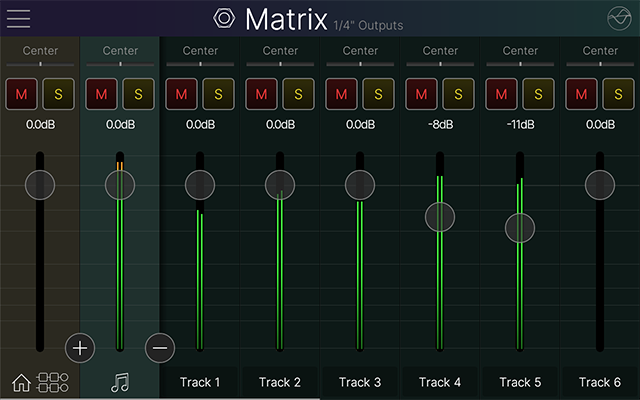
Setting Track Levels
The Matrix Mixer allows discrete mixes of the song from the 1/4”, XLR, and Phones outputs, including individual level, pan, mute, and solo for all eight audio tracks. See Main Volume/Matrix Mixer.
-
Press 1/4”


-
Use the mixer’s Song channel

-
Tap the