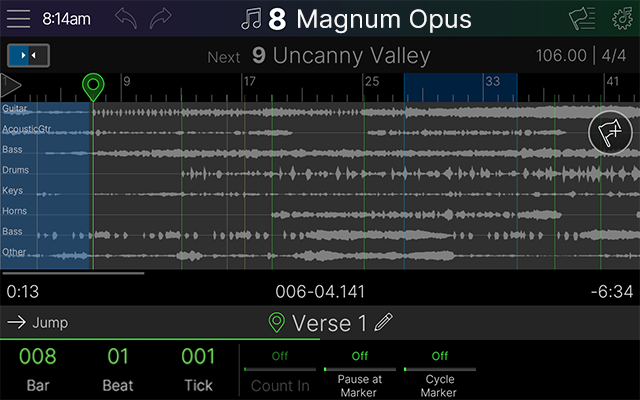
Showcase™ is the Line 6 live automation and playback engine built right into Helix Stadium. By creating Showcase songs with audio tracks, markers, and events (called flags), Helix Stadium can serve as either a simple rehearsal and jamming tool or the centerpiece of your entire stage—Showcase songs have the ability to automate preset and snapshot recall, looper functions, and MIDI commands, as well as tempo sync not only Helix Stadium’s effects, but your time-based pedals as well.
Where Do I Start?
Creating your Showcase songs begins in the Helix Stadium application. If you have not already, download and install the latest Helix Stadium application on your macOS or Windows computer.* Once all your audio tracks are added to a song within the app, the song is transferred to Helix Stadium via Wi-Fi, after which you can add and edit flags, markers, and song settings within Helix Stadium’s Song View.
*Important! You’ll need to be running the Helix Stadium application version 1.2.0 or later (see the Helix Stadium Application page) and update your Helix Stadium firmware to version 1.2.0 or later (see Keeping Helix Stadium Updated) for Song View. It is recommended to update to the latest available versions to access the latest features and achieve optimal performance.
Preparing your Audio Files
Your song can include up to 8 audio files. If using more than one audio file, such as stems for a multi-track song, all audio files should start at the same 00:00 time to remain synced. Showcase songs can utilize audio files with the following properties:
-
WAV (.wav), AIFF (.aif), FLAC (.flac), or OGG Vorbis (.ogg)
-
Maximum length of 13 minutes play time
-
Sample Rate of 44.1, 48, 88.2, or 96kHz
-
Bit rate of 16, 24, or 32-bit
-
Mono or stereo
All song tracks are converted to 48kHz, 16-bit stereo files for use in Helix Stadium.
Tip: If your song contains numerous tempo or time signature changes, it may be easier to export your own custom click track as one of the eight audio tracks instead of creating and aligning many Time flags to ensure Stadium’s click lines up properly.
Creating a Song in the Helix Stadium App
Before powering on Helix Stadium, make sure your Stadium-formatted microSD card is inserted. Song tracks stream directly from the microSD card.
-
Power on Helix Stadium, connect it to Wi-Fi, and sign in to your Line 6 account.
-
Launch the Helix Stadium app on your computer and connect Helix Stadium via Wi-Fi.
-
From the app, click the Song

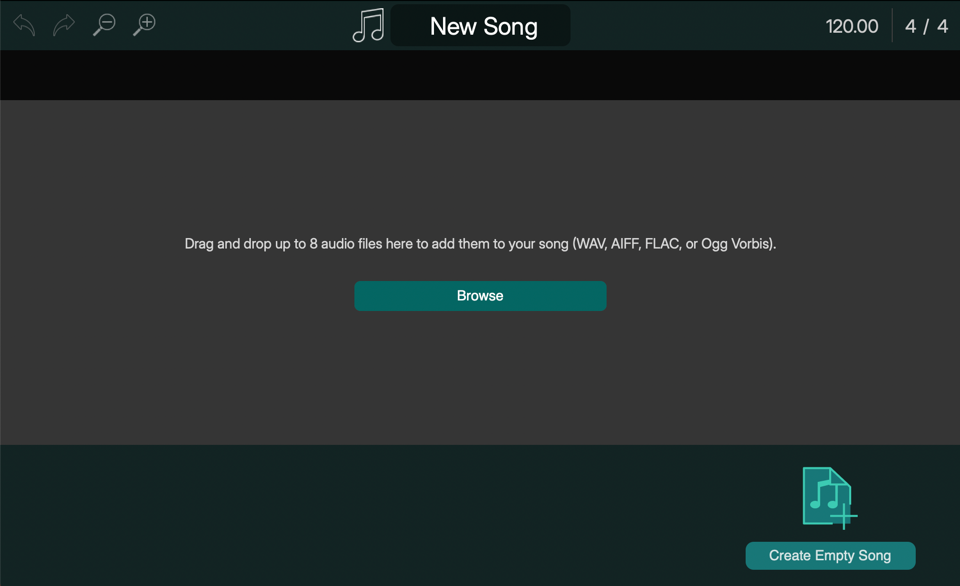
Note: With an “empty” song loaded in Helix Stadium’s Song View, you can still add flags and markers, set a tempo, and “play” the song (with or without an the click) to trigger its markers and flags in real time. To transfer an empty song, before adding any audio files, click ![]()
-
Click the Browse

-
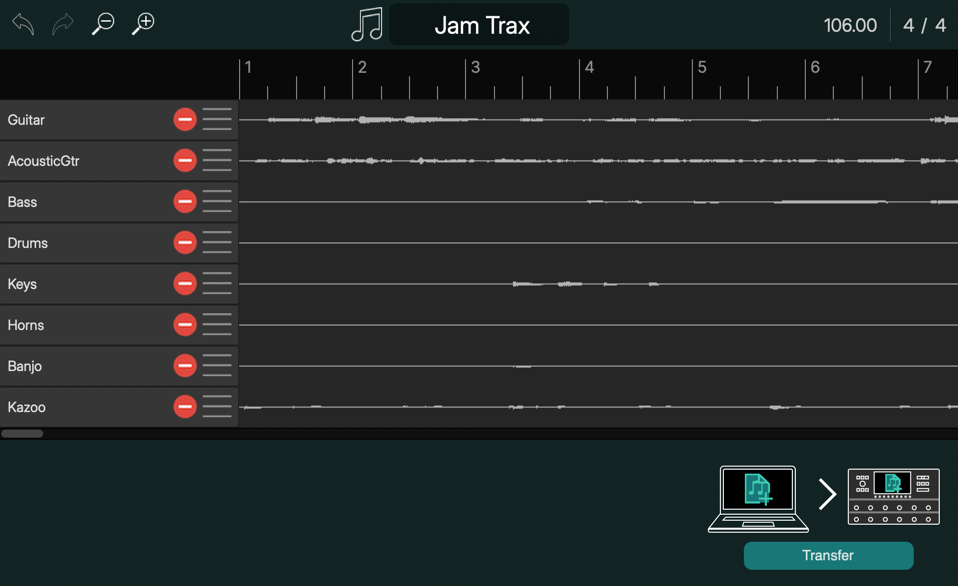
Once you’ve added your audio files, you can name the song and individual tracks and reorder tracks as desired. If you did not enable the Tempo Detection, you can optionally enter the song’s initial tempo and time signature manually. See Editing in the New Song Window below for details.
-
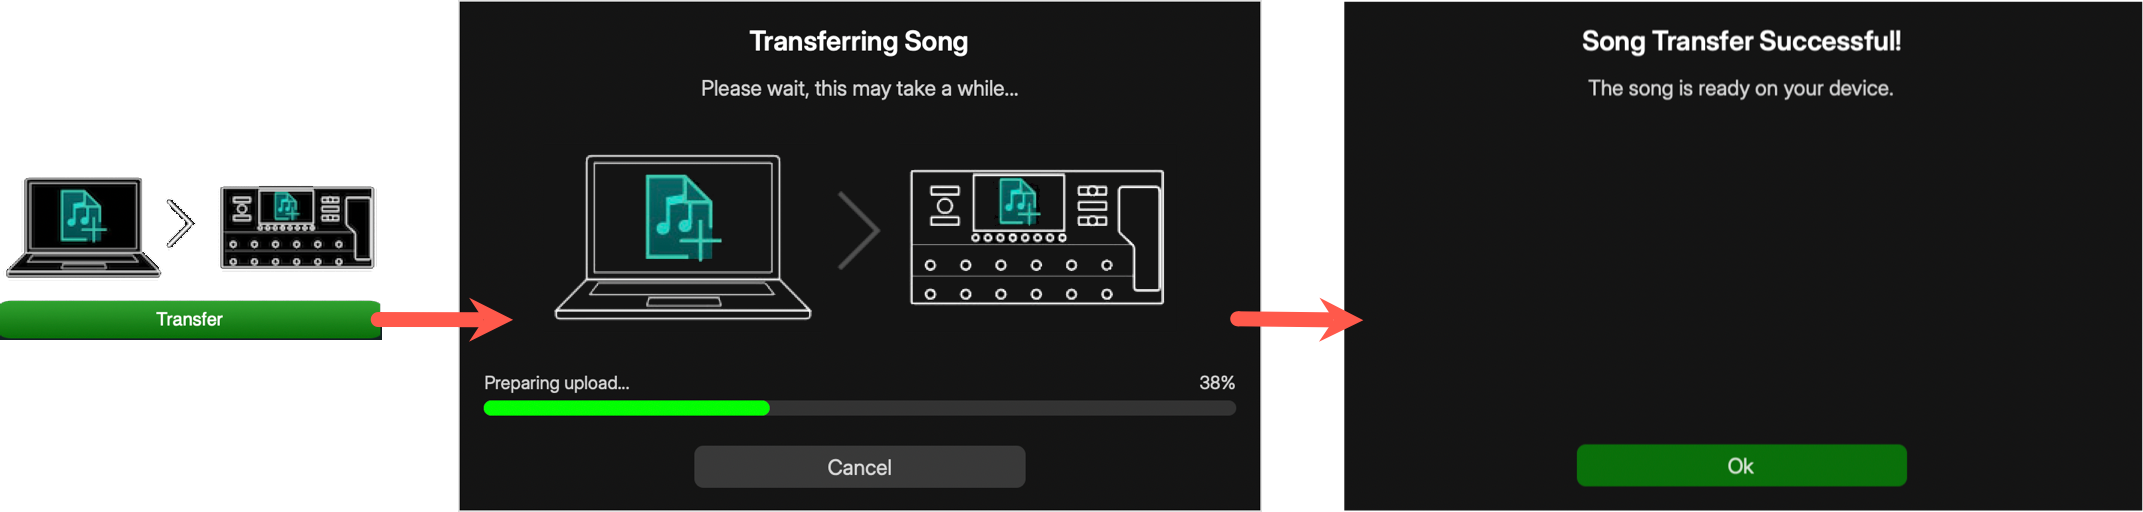
Click Transfer. A dialog informs you of the progress and alerts you once the transfer is complete.
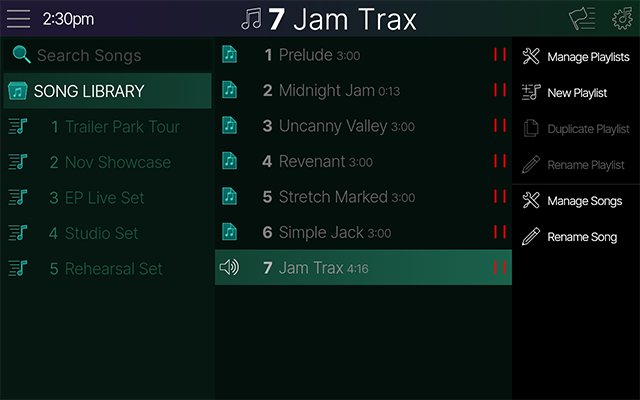
Your new song now appears in Helix Stadium as the last song in the SONG LIBRARY list (see below), where you can load the song and further edit it by adding flags & markers, setting playback behavior, adding the song to your playlists, and more. Please refer to Performing Songs for details.
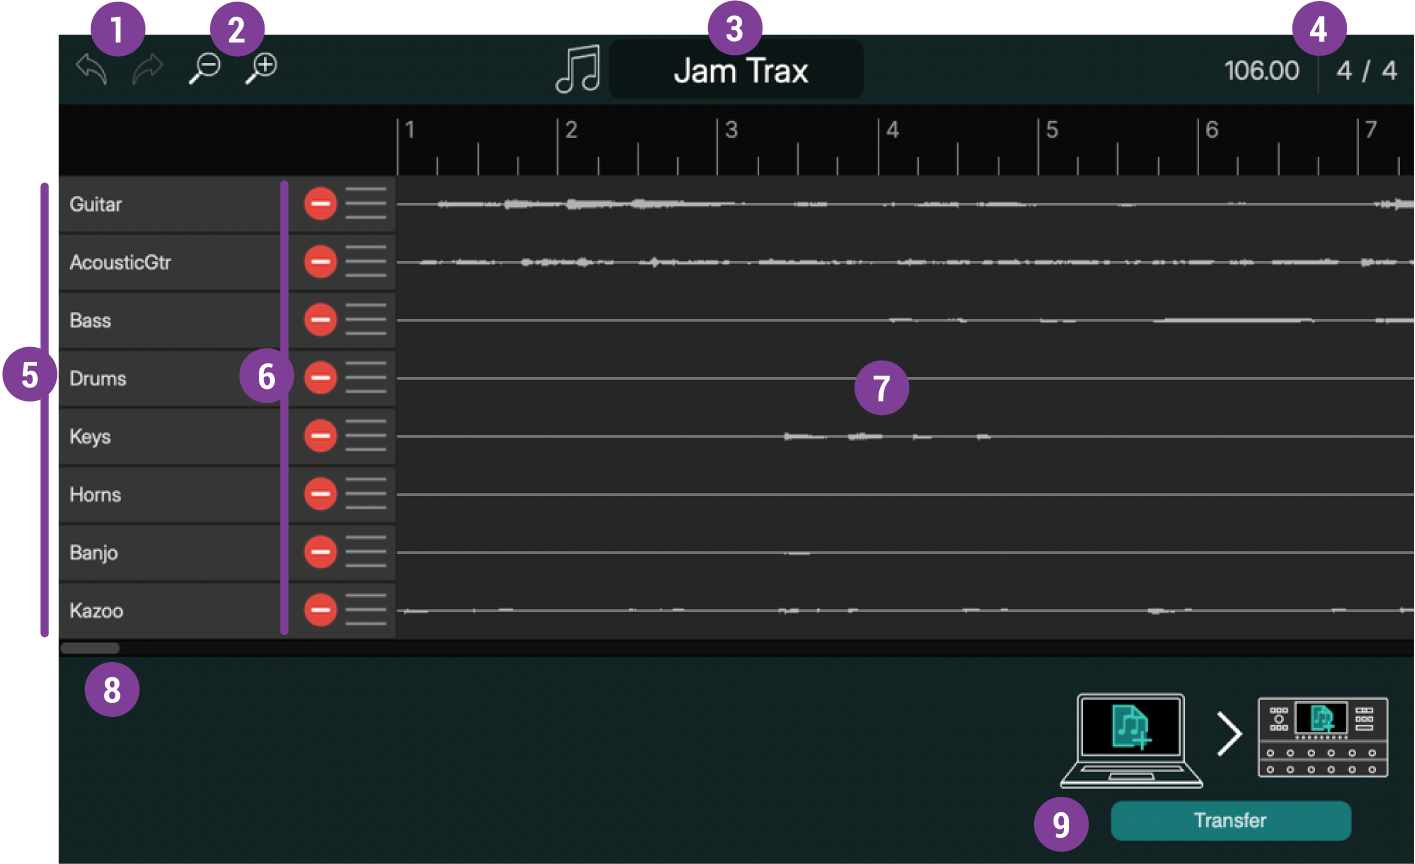
Editing in the New Song Window
Note that the following tasks can also be performed in Helix Stadium’s Song Screen once the song or songs are transferred.
![]()

![]()
![]()
![]()
![]()
![]()
![]()
![]()
![]()
![]()
![]()
![]()
![]()
*Note: You’ll want to be sure that all your desired audio files are added for your song before doing the Transfer. Audio tracks cannot be added to a song that already exists in Helix Stadium.