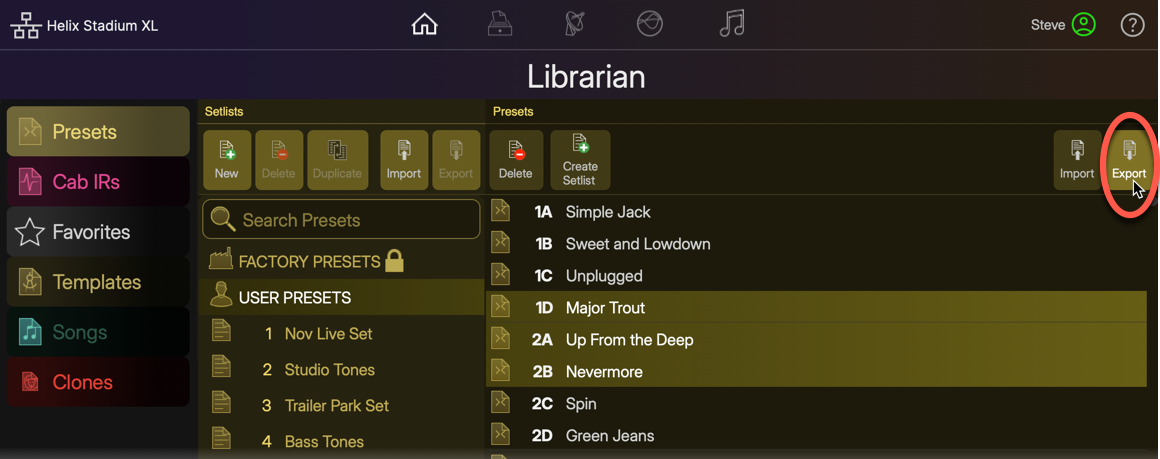
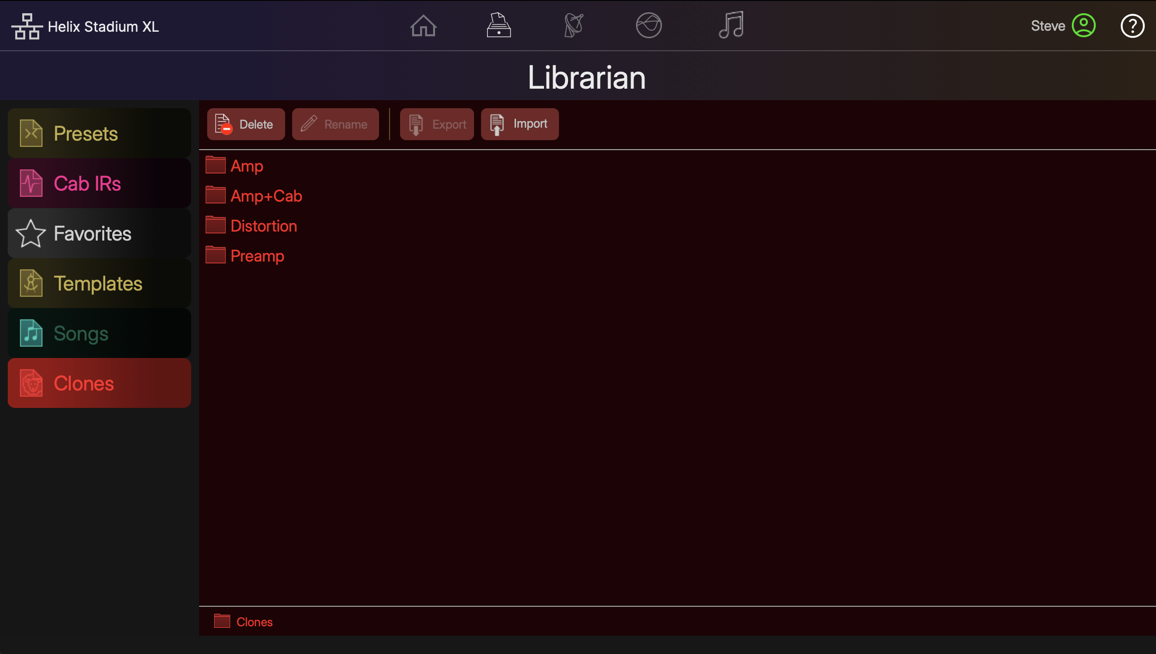
The Librarian window provides access to all Helix Stadium file assets, which include Presets, Cab IRs, Favorites, Preset Templates, and Showcase Songs.

Select a Library in the left column (Presets, Cab IRs, Favorites, Templates, Songs, or Clones) to display its contents list. Much like working in the Librarian lists on your Stadium device’s screen, you can fully manage all your files in the app. Additionally, the Librarian’s Import and Export options allow you to copy and move files between your computer and Stadium device. See the following sections for details.
Tip: Type into the Search field ![]()
Importing & Exporting Presets and Setlists
Helix Stadium presets and setlists can be exported using the Helix Stadium app to build a virtually unlimited library of Stadium preset (.hsp) and setlist (.hss) files. These presets and setlists can be imported into your Stadium device’s internal memory at any time using either the app’s Home View > Preset Panel or the Preset Librarian. Please also refer to the Presets and Setlists page.
Tip: You can import original Helix/HX/Native Plug-in preset files (.hlx) and setlist files (.hls) to add them to your Stadium preset library following the steps below. Please also see the Importing Presets section for details on preset compatibility.
Importing & Exporting Presets
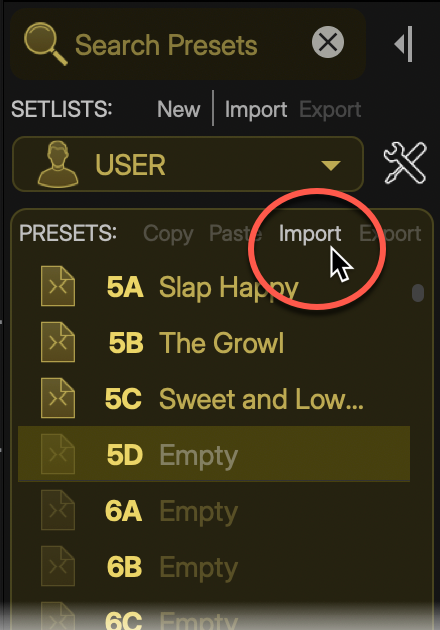
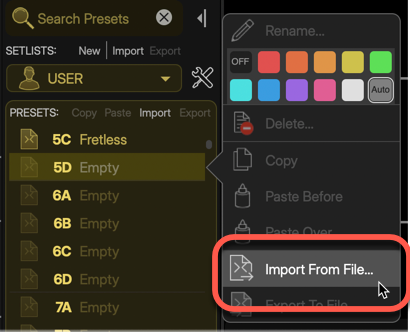
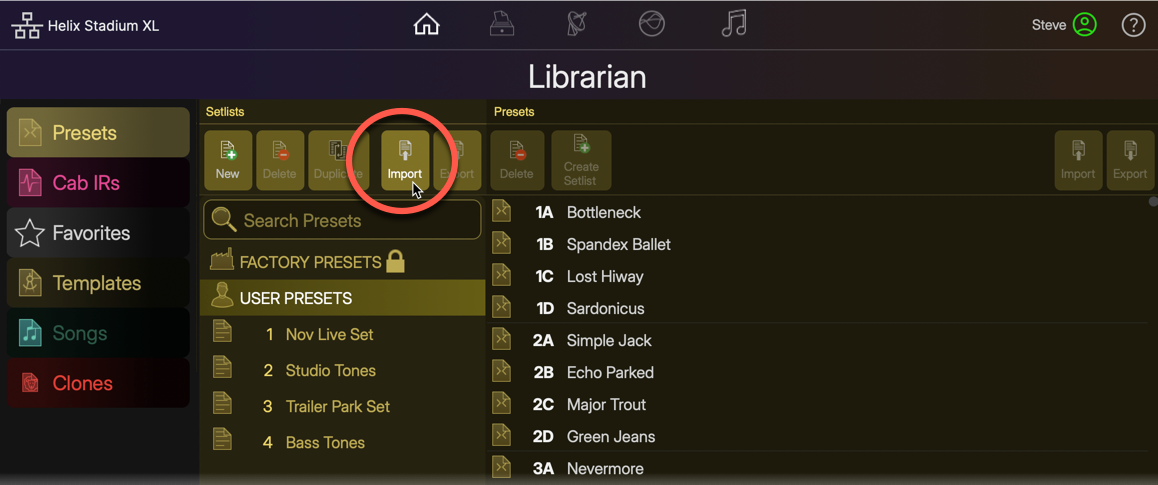
To Import a Preset: From either the app’s Home View Preset Panel or the Preset Librarian, select an empty preset location and use one of the several Preset Import options, as shown below.

-
Browse to your computer folder where preset files are stored, select one (or multiple presets), and import. Note that if you select a preset location that already contains a preset, the imported preset will permanently overwrite it.
-
Alternatively, access the Import Preset command from the application’s main File menu, or drag preset files directly from your computer and drop them into the desired preset list location within either the Helix Stadium app’s Home View Preset Panel or Preset Librarian.
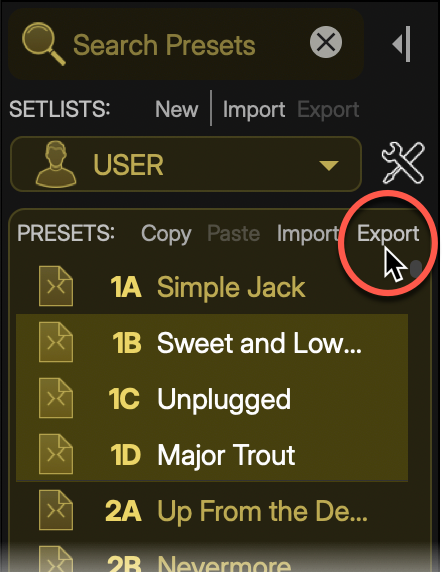
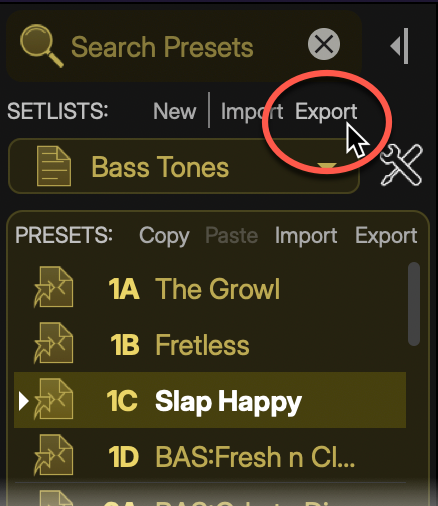
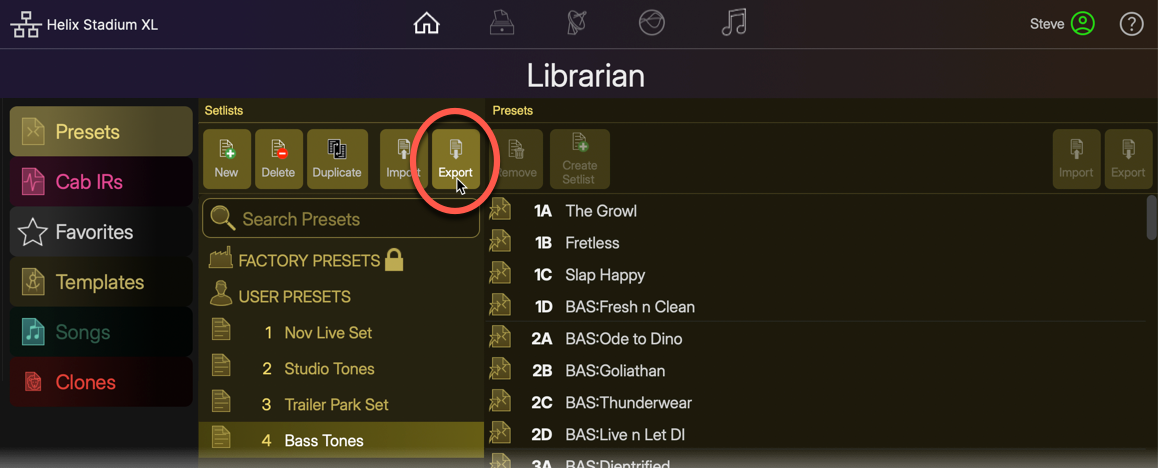
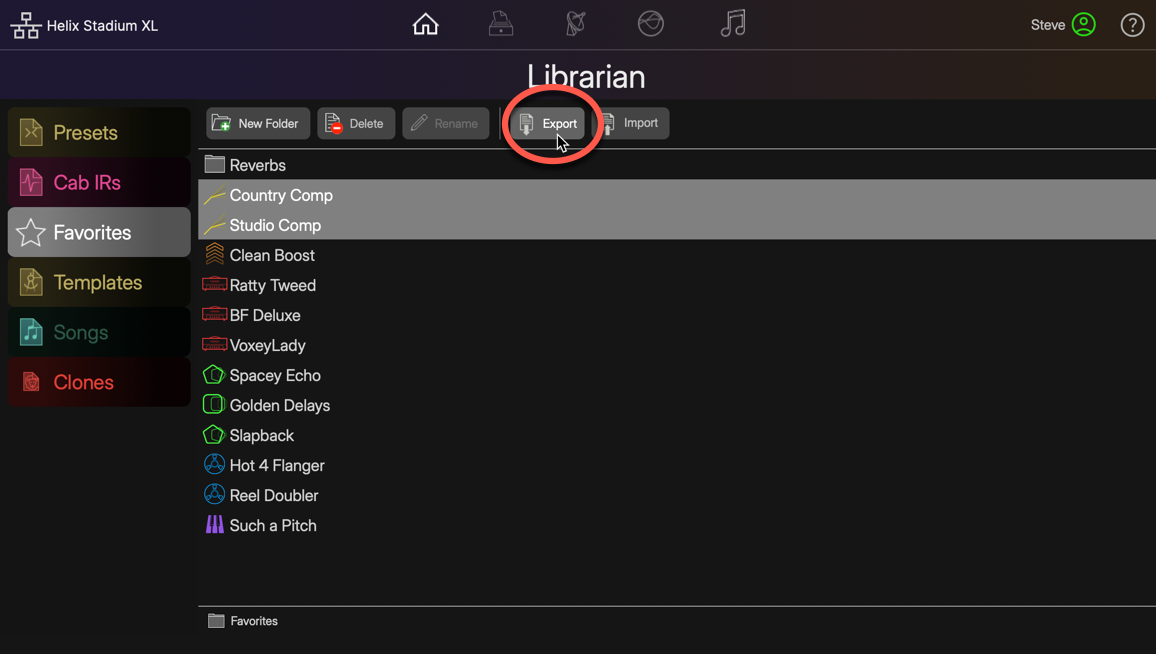
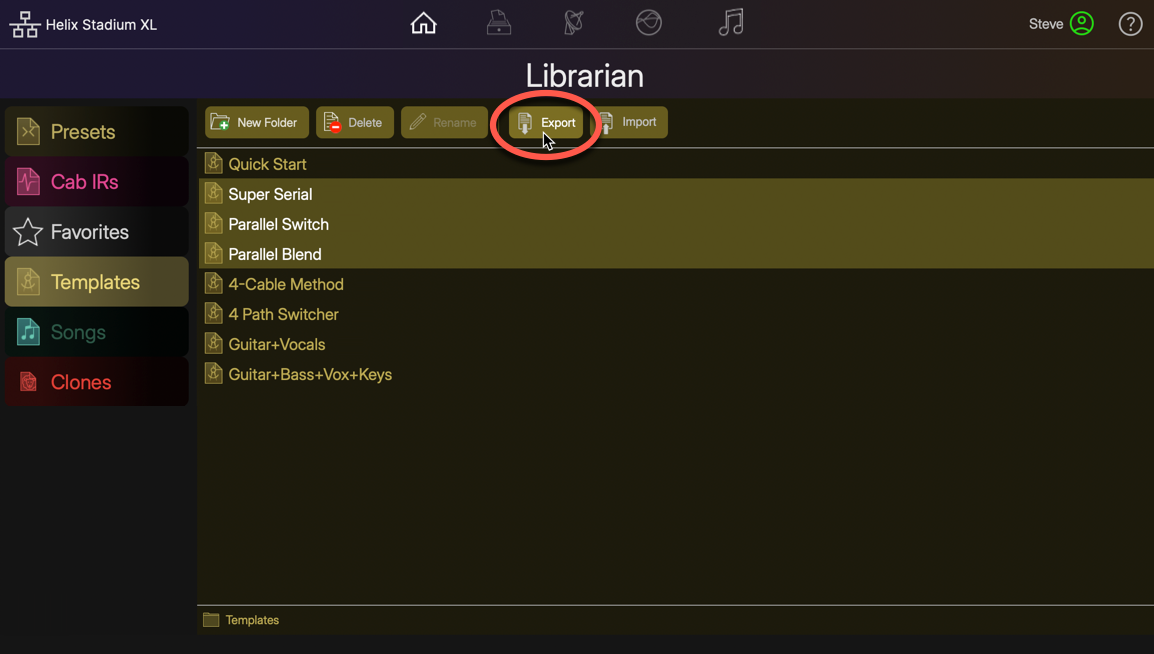
To Export a Preset: Select any Factory, User, or Setlist preset(s) within either the app’s Home View Preset Panel or the Preset Librarian View list and use one of the several Export Preset options.

-
Browse to the desired computer folder where you’d like to store your Stadium preset files and export them.
-
Alternatively, access the Export Preset command from the application’s main File menu, or drag preset files directly from any preset list location within either the Helix Stadium app’s Home View Preset Panel and drop them into a computer folder to export them.
Managing Presets
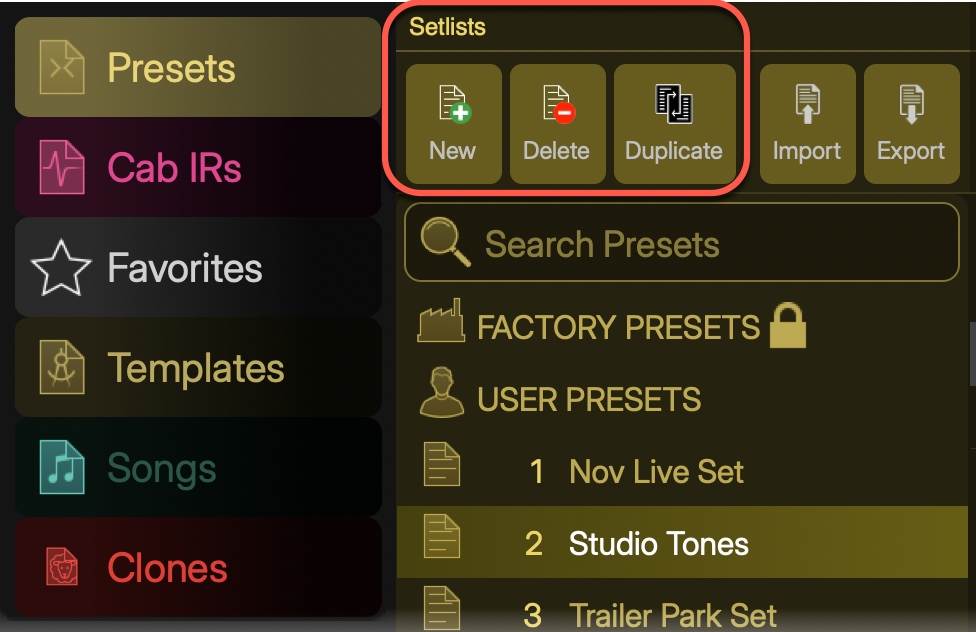
Use the buttons at the top of the Librarian’s Presets panel to Delete presets from the current User Presets folder or Setlist, or to Create a Setlist that includes alias copies of the currently selected presets. (Presets within the Factory Presets folder are read-only—they cannot be deleted, but can be exported to your computer or dragged into other preset folders/setlists to make editable copies of them.)
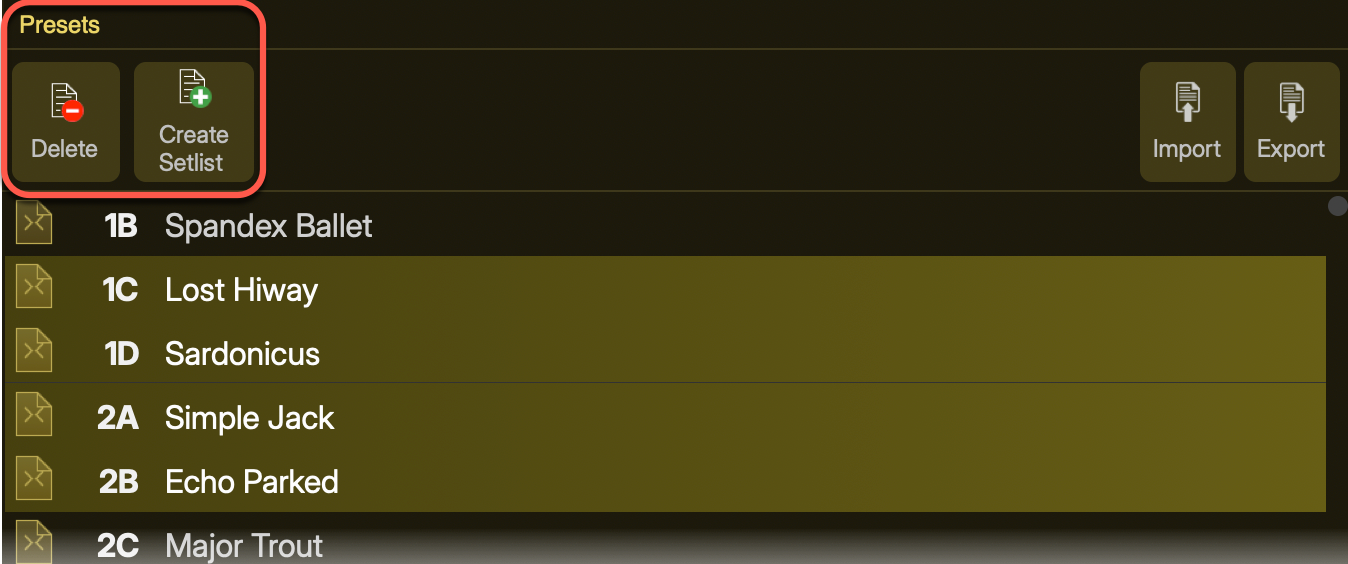
Tip: Click and drag any preset(s) up/down within the Preset panel to reorder the Library list.
Importing & Exporting Setlists
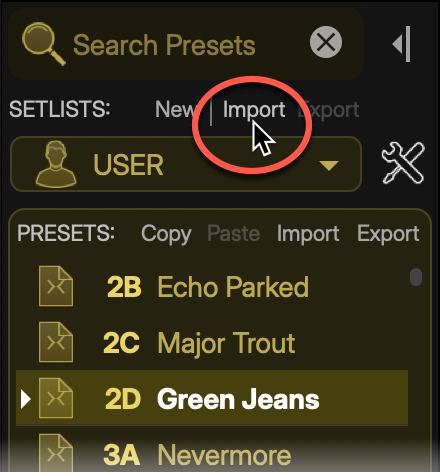
To Import a Setlist: Use one of the Setlist Import options from either the app’s Home View Preset Panel or the Preset Librarian.
-
Browse to the computer folder where Stadium setlist files are stored, select one or more setlist(s), and import them. The imported setlist will be added as the last Setlist.
-
Alternatively, you can access the Import Setlist command from the application’s main File menu.
Note: Since setlists contain only “alias” type presets, an original reference preset file for each imported setlist preset is added into the User Presets folder.
To Export a Setlist: Use one of the several Export Setlist options from either the app’s Home View Preset Panel or the Preset Librarian.
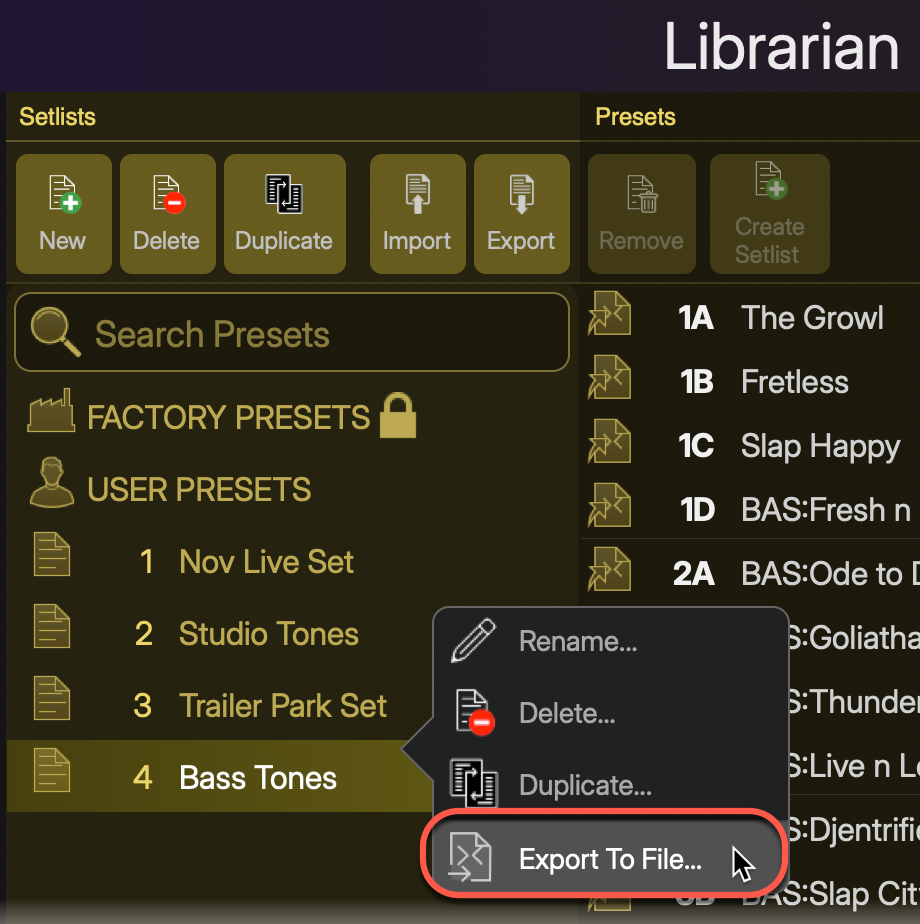
-
Alternatively, access the Export Setlist command from the application’s main File menu.
-
Browse to the desired computer folder where you’d like to store your Stadium setlist files and export them.
Note: An exported setlist is saved as a single (.hss) file on your computer. It includes full copies of each of its preset files. Therefore, when you import a setlist back into Stadium, it is added as a new setlist, and all its presets are added as new presets in the USER PRESETS folder. If presets by the same name already exist in your USER PRESET, copies of the presets are added, appended with “(1)” to their names (rather than overwriting any of your existing presets).
Managing Setlists
Use the buttons at the top of the Preset Librarian’s Setlist panel to create a New setlist or Delete or Duplicate the currently selected setlist(s).
Tip: Click and drag any setlist(s) up/down within the Setlist panel to reorder the list.
Importing & Exporting IR Files
Helix Stadium devices can utilize third-party Impulse Response .wav files within one or both tab locations within a Cab block, providing endless possibilities for speaker emulation. Please refer to the Cab IR section for details on using IRs. Many vendors now offer expertly captured IRs of practically any speaker and mic combination. Once you’ve purchased and saved IR .wav files to your macOS or Windows® computer, launch the Helix Stadium application and import your desired IRs into your Stadium device’s IR library.
Note: If you import several hundred IR files, the next time you power on your Helix Stadium device, it may take a few extra minutes to complete a necessary indexing process for the IR Library. Future startups of your device will not require this additional indexing time.
Importing IR Files
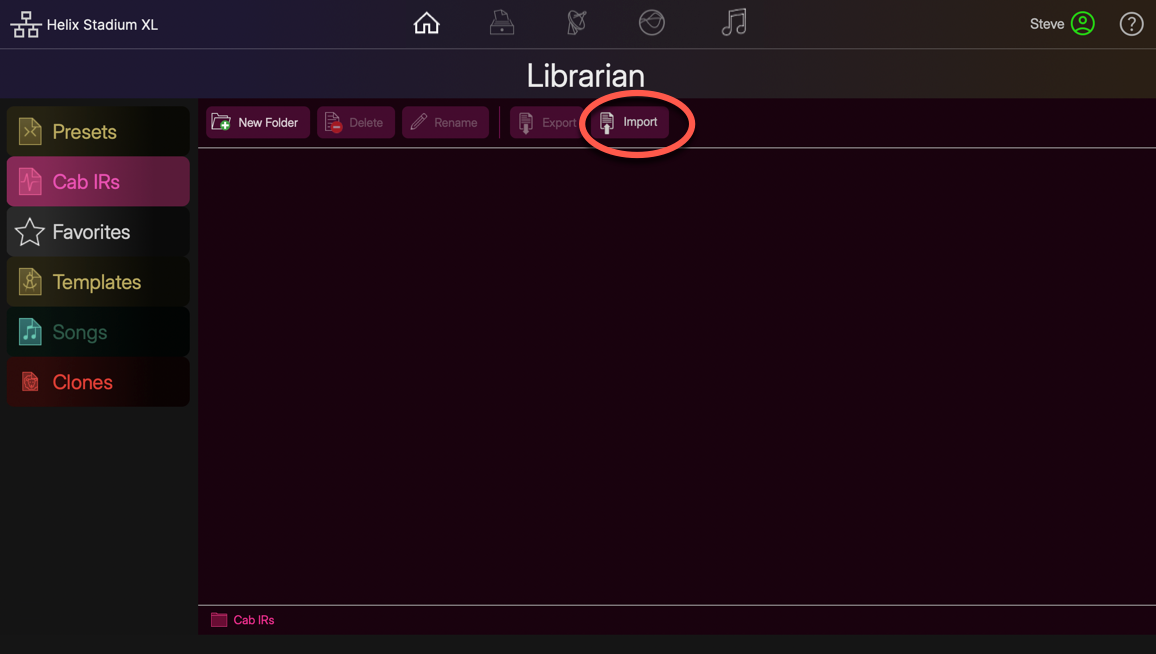
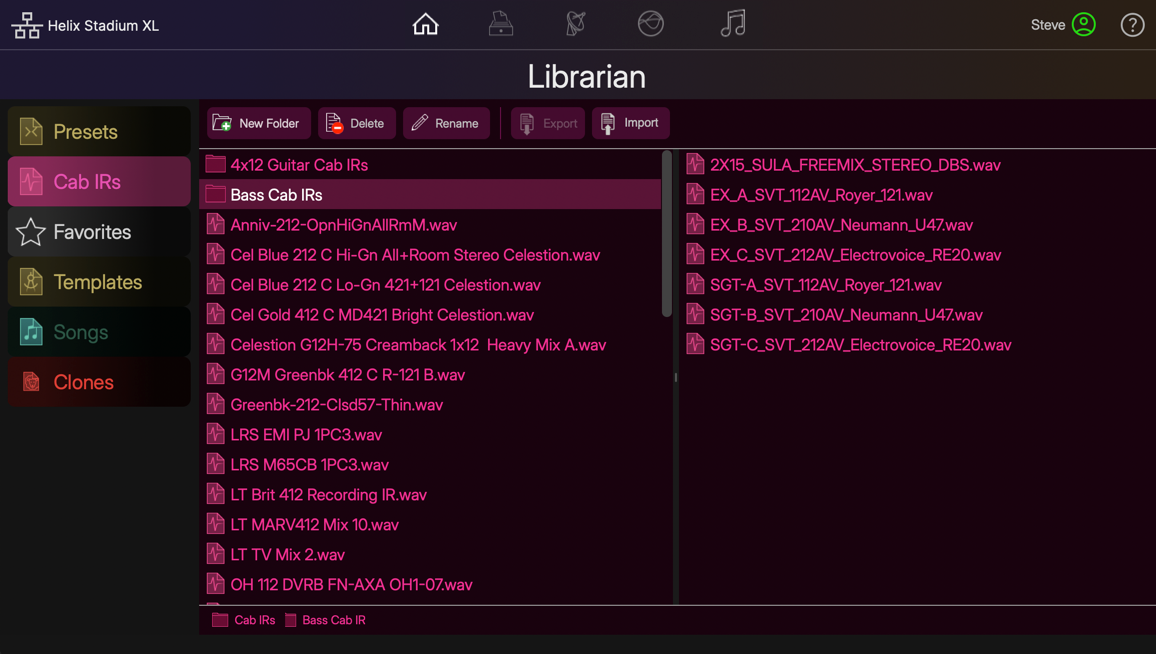
Within the Librarian View, click the Cab IRs button 
Note: Import of mono or stereo IR .wav files of any sample rate and bit depth is supported. IRs are automatically converted and processed within Helix Stadium as 48kHz, 32-bit float, mono.
-
Click on the Import button
-
Alternatively, you can drag IR .wav files from your computer folder and drop them directly into the Cab IR librarian to import them.
-
-
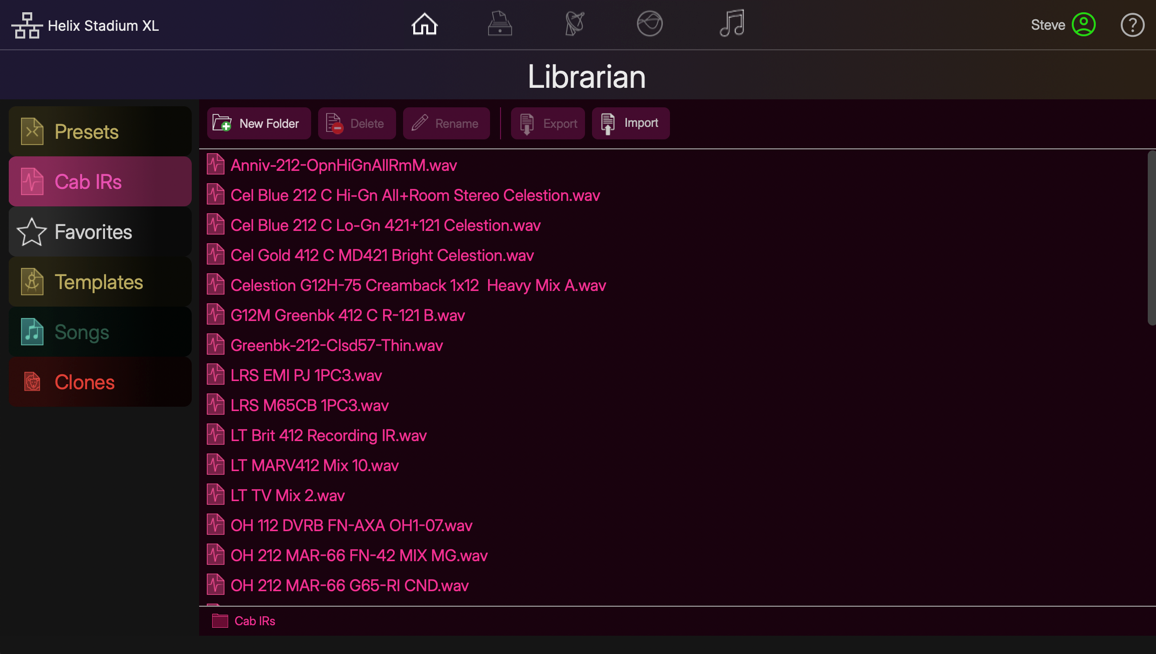
When the import is complete, you’ll see all IRs appear in the librarian’s right pane. These IRs are then available for any preset’s Cab blocks.
-
To Use Your Imported IRs: Add a Cab block within your preset, select either of the tabs within Cab’s Inspector, select the Cab IR category, and your list of imported IRs is available for selection. You can add up to two IRs within a Cab block. Please refer to the Cab IR page for additional details.
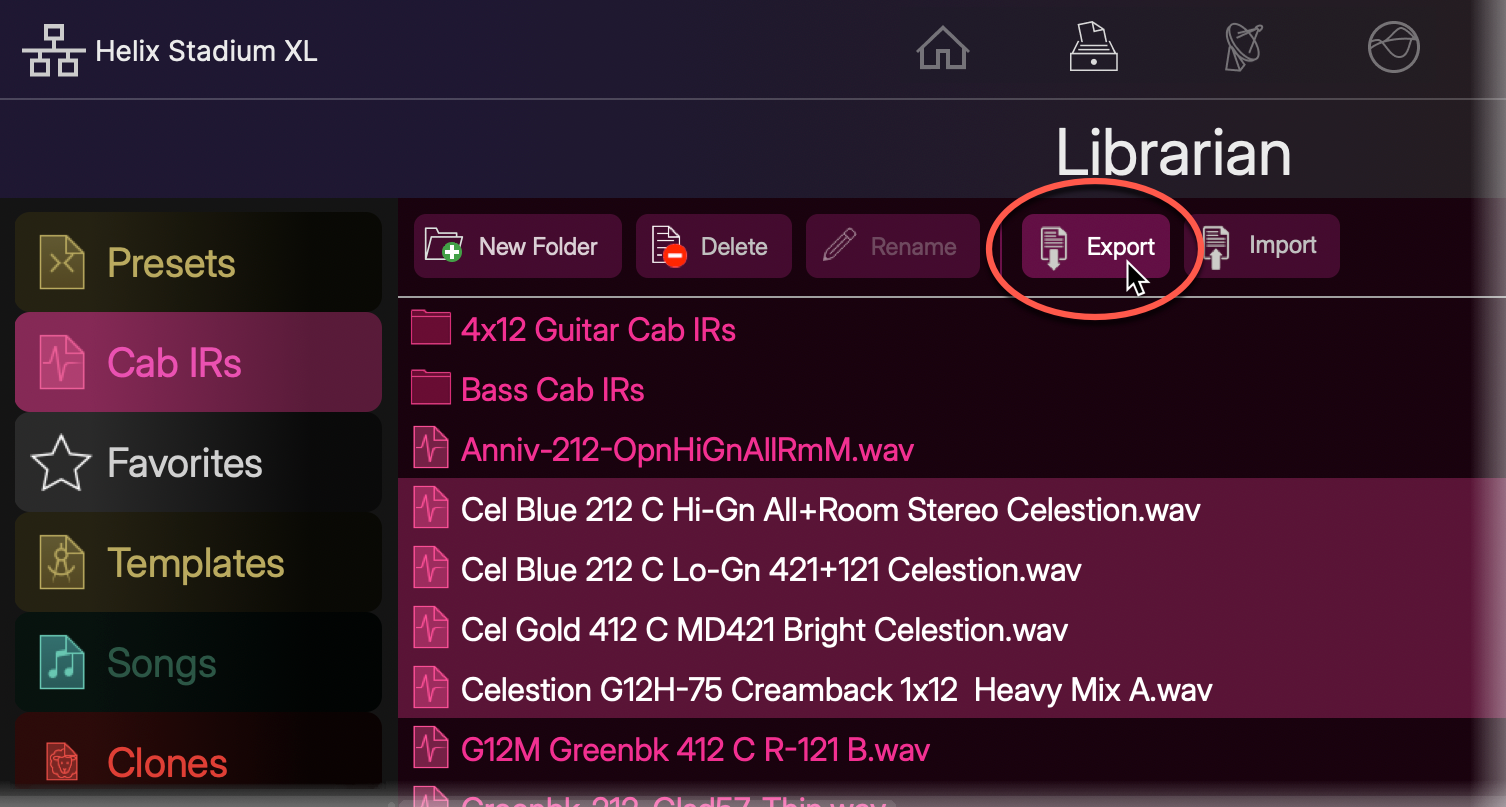
Exporting IR Files
-
To Export IRs: Select the desired IR file(s) within the Cab IRs Librarian right pane, click the Export button, browse to the desired folder on your computer, and save.
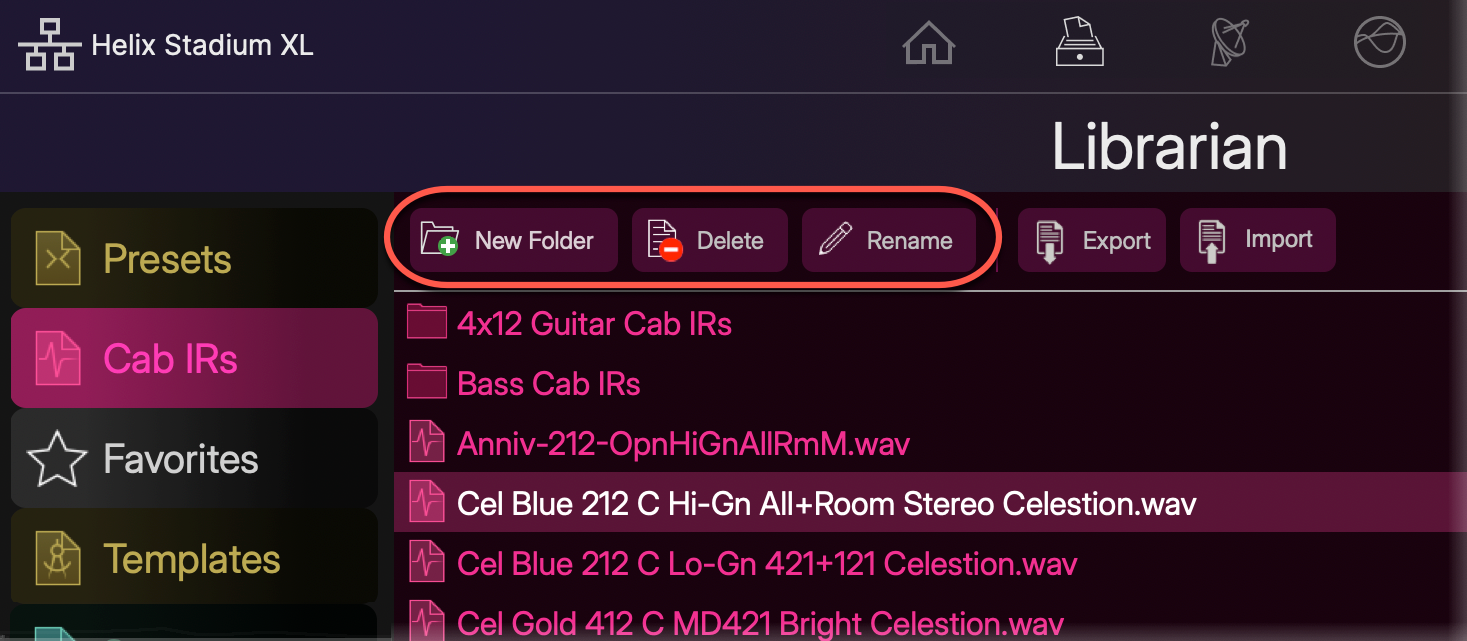
Managing IRs
Use the buttons at the top of the Cab IR Librarian to Delete* or Rename the selected IRs, or to create a New Folder for managing your library of IR files. Please also refer to the Cab IR List section for additional details.
*Note: Deleting an IR file from the IR Library that is used within any saved preset will result in the preset’s Cab block changing to “UNRESOLVED,” with no IR loaded in the respective tab.
-
Note that you can select the desired IRs in the list, then click New Folder to automatically move all selected IRs into the newly created folder in a single step.
-
Folders always appear at the top of the Cab IR list. Drag IRs between the IR list and your folders to move and arrange them as desired.
-
Click on a folder to show its contents on the right.
-
Importing & Exporting Favorites and Preset Templates
The Helix Stadium app’s Librarian View also offers import and export for your Favorites and Preset Templates. This allows you to back up these files on your computer and restore them individually as desired.
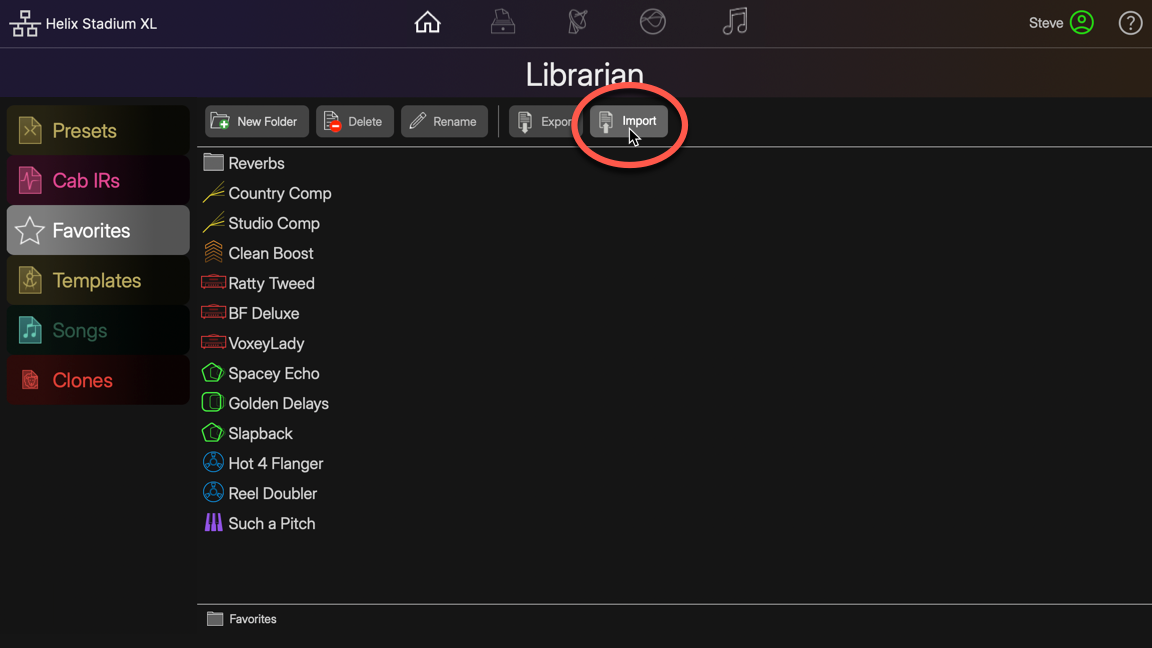
Within the Librarian View, click Favorites 
Importing Favorites or Preset Templates
Click on the Librarian’s Import button, browse to the folder on your computer where your Favorite or Template files are stored, and select and import the desired file(s). Alternatively, you can drag Favorite or Template files from your computer folder and drop them directly into the app’s respective Librarian to import them.
Tip: You can import either Stadium Favorite (.hls) or original Helix Favorite (.fav) files.
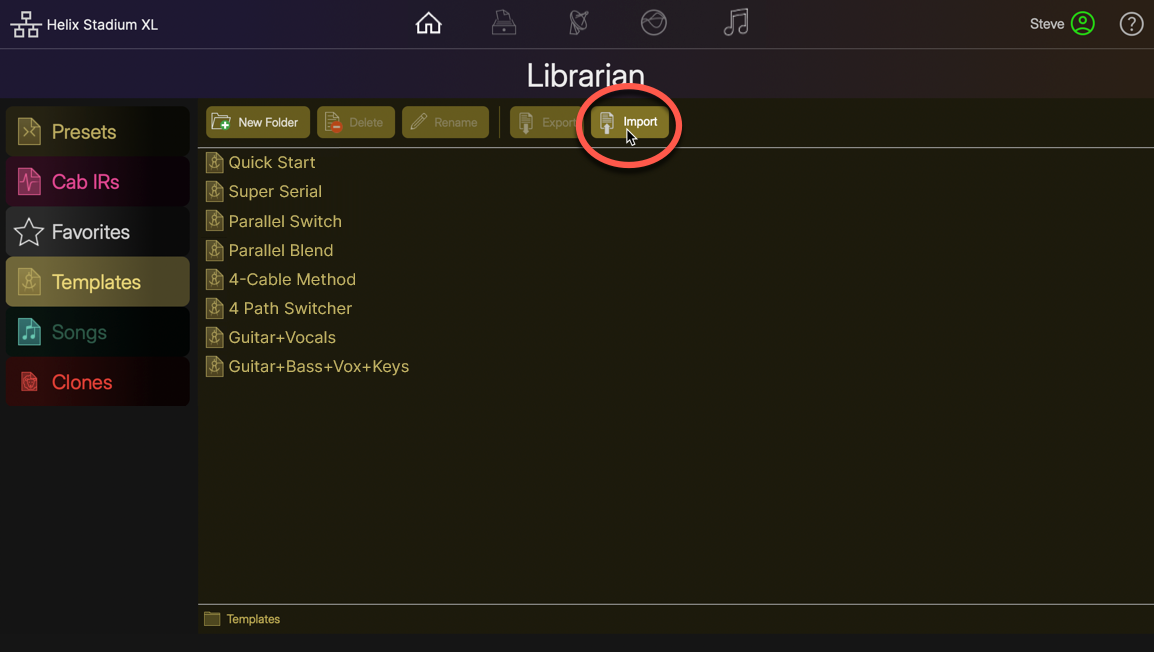
Tip: A set of Preset Templates is already included to get you started.
Exporting Favorites or Template Files
Select the desired file(s) within the Librarian right pane, click the Export button, browse to the desired folder on your computer, and save. Alternatively, you can drag Favorite or Preset Template files to a computer folder to export them.
Managing Favorites and Templates
Use the buttons at the top of the Favorites or Templates Librarian to Delete or Rename the selected files, or to create a New Folder to manage your Favorites and Templates.

-
Note that you can select the desired Favorites or Templates from the list, then click New Folder to automatically move all selected files into the created folder in a single step.
-
Drag files between the Librarian list and your folders to move and arrange them as desired.
-
Click on a folder to show its contents on the right.
-
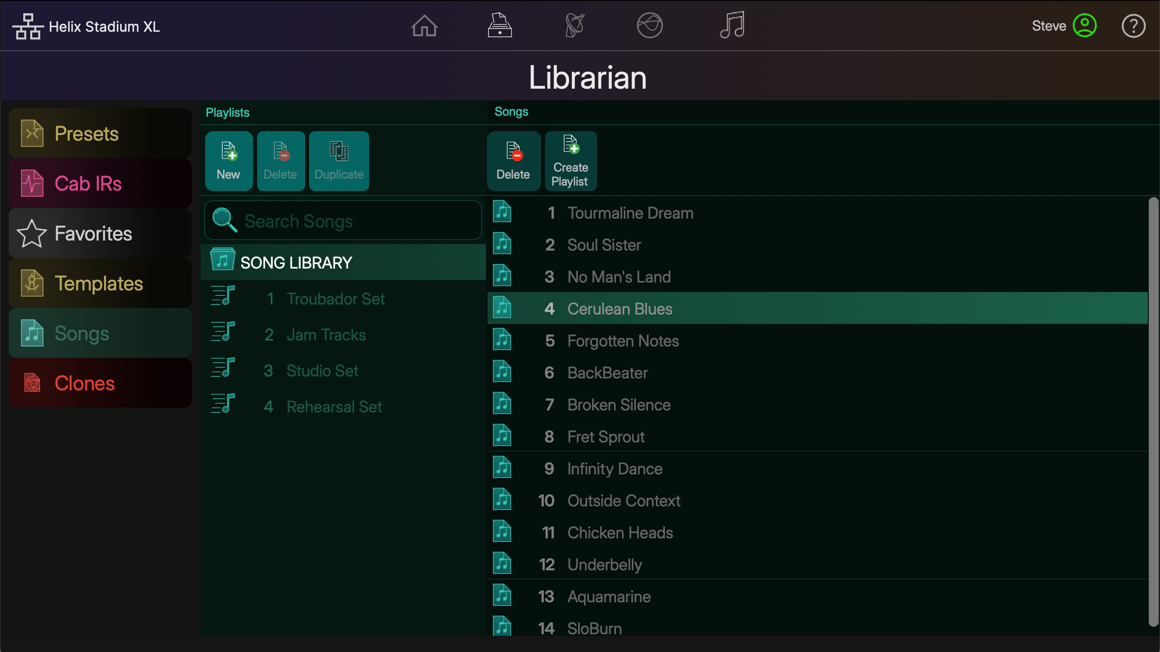
Managing Songs and Playlists
The Songs Librarian manages all Showcase songs and playlists stored on Helix Stadium. Click the Songs button in the left column to display all current playlists and songs. Click on the SONG LIBRARY folder or an existing playlist to access its list of songs.
Note: Creating a new song is accomplished in the app’s New Song window—see Creating Showcase Songs.
Managing the Song List
-
To Reorder Songs in the List: Click to select one or multiple songs in the list and drag up/down to the desired position.
-
To Rename a Song: Click twice on a song in the list, type in your custom name, and press Enter/Return.
-
To Add Songs to a New Playlist: Select the desired songs in the list and click the Create Playlist button
-
To Add Songs to an Existing Playlist: Select the desired songs in the list and drag them onto the desired playlist in the left pane.
-
To Delete Songs from the SONG LIST or a Playlist: Click to select the songs in the list and click the Delete button
-
Deleting any SONG LIST song permanently deletes the song from Helix Stadium, including all “alias” versions of the song from playlists.
-
Deleting any playlist song clears the alias song from the current playlist only. The original, referenced song in the SONG LIBRARY and any other playlists' instances of the song remain undeleted.
-
Managing Playlists
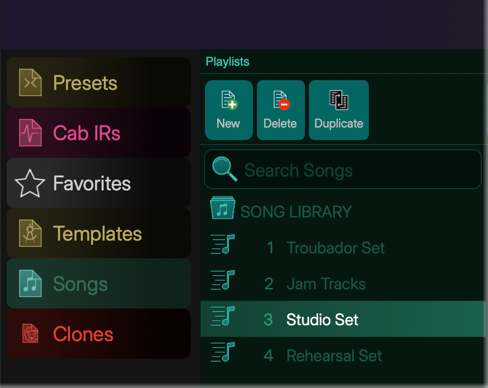
Once you create one or more playlists, they appear in the Playlists column of the Song Librarian, as shown above. Click to select a playlist to access its contents in the right column list.
-
To Reorder Playlists: Click to select a playlist and drag it up/down to the desired position.
-
To Rename a Playlist: Click twice on a playlist, type in your custom name, and press Enter/Return.
-
To Create a New Playlist: Click the New button
-
To Duplicate a Playlist: Select the desired playlist in the Playlists column and click the Duplicate button
-
To Delete a Playlist: Click to select a playlist and click the Delete button
Importing & Exporting Clone Files
Helix Stadium devices can create Amp+Cab, Amp, Preamp, and Distortion clone files. The Clones Library folders are initially empty, awaiting your creation or import of clone files—please refer to the Clones section for details on creating your own Clones.
Importing Clone Files
Within the app’s Librarian View, click 
-
Click on the Import button
-
Alternatively, you can drag clone files from your computer folder and drop them directly into the Clones Librarian - USER folder to import them.
-
-
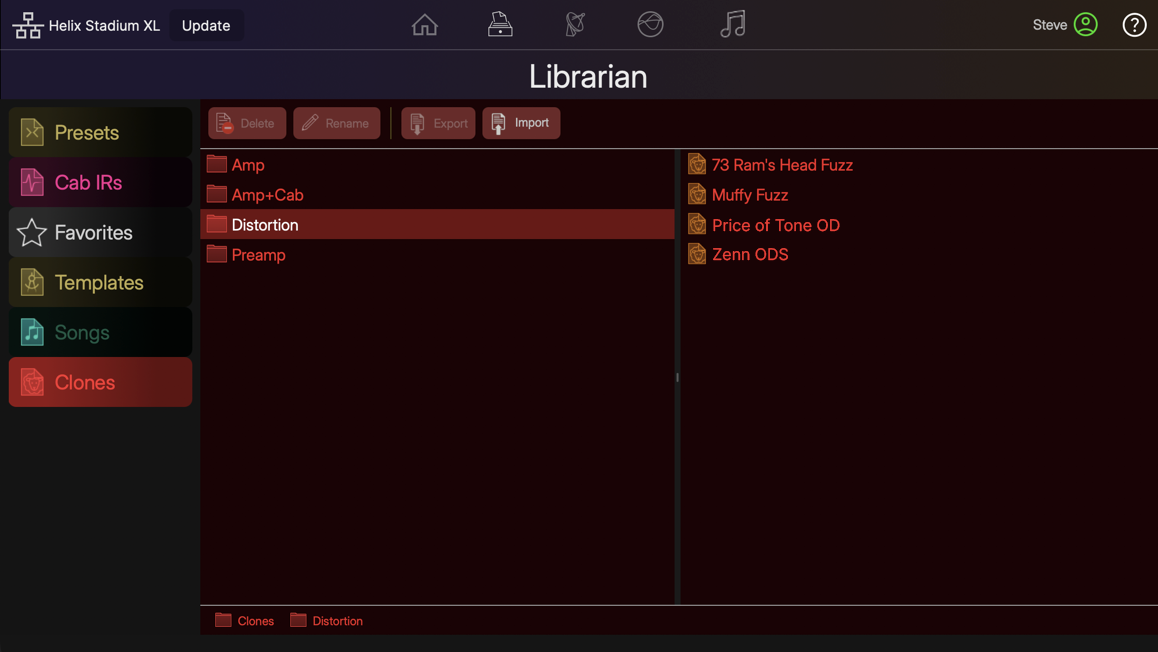
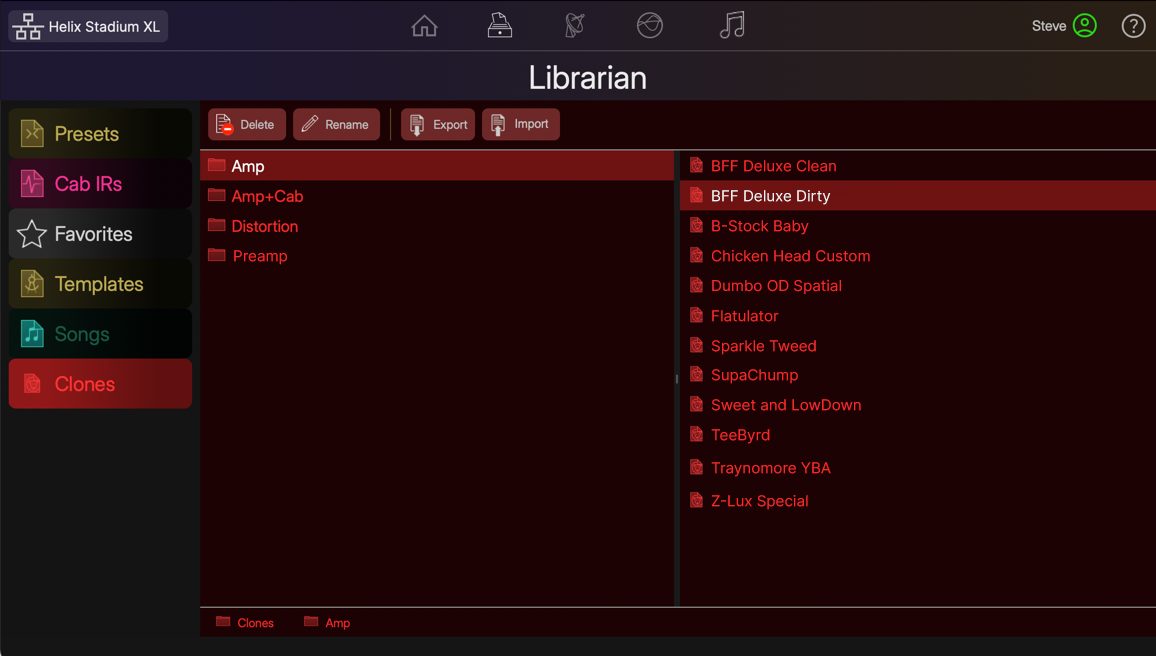
When the import is complete, you’ll see all clones appear in the respective clone folder’s right pane, as shown below. These clones are now available for clone blocks within your Stadium presets.
-
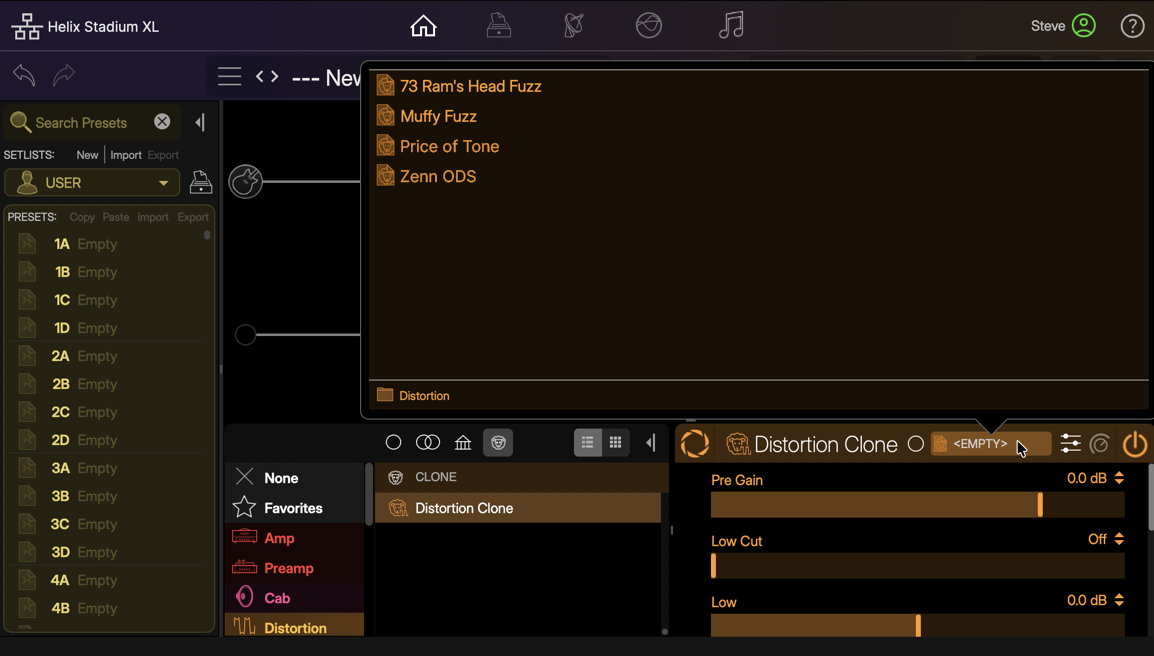
To Use Your Imported Clones: In the Helix Stadium app’s Home - Edit screen, add an Amp+Cab, Amp, Preamp, or Distortion Clone block to your preset, select the CLONES category in the Model List, then click in the Inspector’s Clone Selection box to display the list of clone files, as shown below. Please refer to the Clones section for additional details.
Exporting Clone Files
-
To Export Clones: Select the desired clone file(s) within the Clones librarian right pane, click
-
Alternatively, drag clone files from the app’s Clones Librarian and drop them in a folder on your computer to export them there.
-
Managing Clones
Select a clone type folder in the left column and select the desired clone file(s) in the right pane. Use the buttons at the top of the Clones Librarian to Rename or Delete the selected clone files.
-
To rename a clone file, select any individual clone within the Clones librarian right pane, click
-
To delete one or more clone files, select the clone(s) within the Clones librarian right pane and click
*IMPORTANT! Use the Export Clones option (see above) or create a full Helix Stadium backup before deleting clones to ensure you have copies.
Note: Deleting a clone file from the Clones Library that is used within any saved preset will result in the preset’s clone block changing to “UNKNOWN,” with no clone loaded within the block.