As of Helix Stadium firmware v1.3, the Line 6 Proxy™ Cloning feature is included, allowing you to quickly and accurately capture a “clone” of any physical amplifier, preamp, amp + speaker cab combination, or distortion pedal with its current settings. Once created, your clones can then be selected and used much like other Stadium Amp, Preamp, and Distortion blocks in your Stadium presets.
Looking for Clones? Visit the Line 6 CustomTone free community site where you can download Helix Stadium presets and clones, as well as upload and share your own creations!

About Clones
-
Stadium’s Proxy engine allows you to create clones of:
-
An amplifier, including a speaker cabinet and a microphone.
-
An amplifier with no speaker cabinet (requires the use of a load box).
-
A preamp, which can be either a standalone preamp or the preamp portion of an amplifier (requires that the preamp or amp include a PREAMP OUT or FX SEND).
-
A distortion, drive, boost, or fuzz type pedal.
-
-
Your created and imported clones are saved in and selectable from Stadium’s respective Amp, Preamp, or Distortion Model Lists, allowing you to add them as Clone blocks to your presets.
-
Clones offer similar functionality as Stadium Amp & Effect models:
-
A set of Gain and EQ parameters.
-
Bypass and other parameters can be assigned for Snapshot, Stomp, and external Switch/Pedal/Trigger/MIDI control.
-
Parameters can be saved with your own User Defaults, and Clone blocks with your customized settings & assignments can be added as Favorites.
-
-
Due to the complexity of Proxy Clones, a Clone block can require approximately the same DSP usage as an Agoura Amp model. Up to four Clone blocks can be added per preset (two clones per main path).
-
All Clone blocks are mono—any stereo block positioned before a clone will be summed to mono.

Creating Clones
Using Stadium’s Proxy Cloning feature is designed to be a streamlined process—choose the desired clone type to create, then follow the on-screen steps to connect your target device to Stadium, set your levels, and start the capture. The Proxy Cloner sends test signals to collect your device’s “DNA,” then uploads the data to Line 6 online servers to create the clone. You can compare the clone to the original gear and save it to your Stadium Clone Library. The steps for connecting and setting levels vary by device type, as covered below.
Before Creating a New Clone…
Please check the following connections and settings for the best results:
-
Save your current preset to retain its edited settings.
-
Disconnect any MIDI and USB-C cables from Helix Stadium to eliminate potential noise and interference.
-
Connect Stadium’s main 1/4″ or XLR OUTPUTS to a monitoring system, or the PHONES jack to headphones, to allow you to accurately monitor your signal. Use Stadium’s large Volume knob to adjust the 1/4″, XLR, or PHONES Output level for monitoring.
-
Ensure your audio connections are as noise-free as possible for optimal cloning. If necessary, toggle the Ground Lift on your external devices, or use a line isolator or hum eliminator to reduce ground noise.
-
Before creating an Amp+Cab type clone using a microphone on a speaker cab, first configure Global Settings > Ins/Outs > Mic In Phantom Power On or Off, depending on whether your microphone requires phantom power. Please refer to your mic manufacturer’s specifications for its requirements.

Connect to Wi-Fi and Sign In
If not already, connect Stadium to Wi-Fi (or Ethernet) and sign in to your Line6.com account. The cloning process occurs on Line 6 online servers and requires Internet access and that you are signed in.

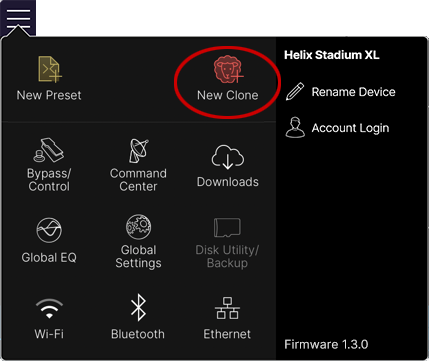
Select New Clone
To start, tap Stadium’s Main Menu button and tap the New Clone button.

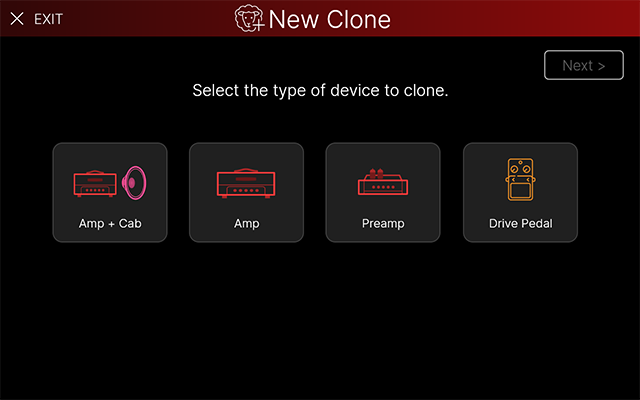
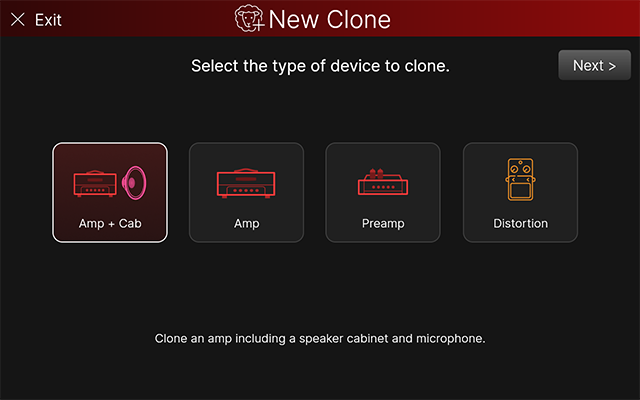
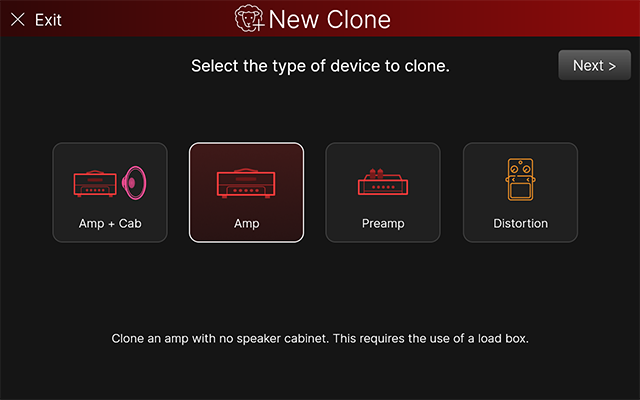
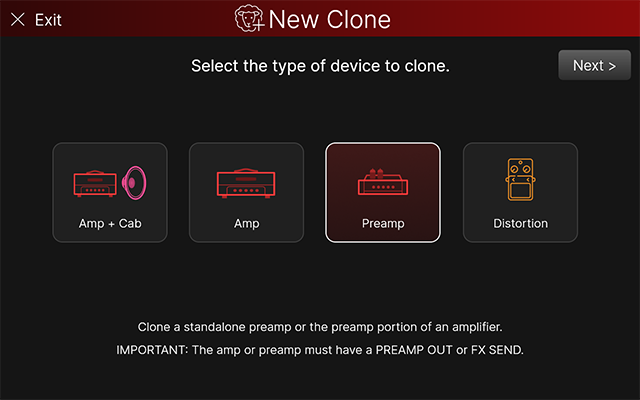
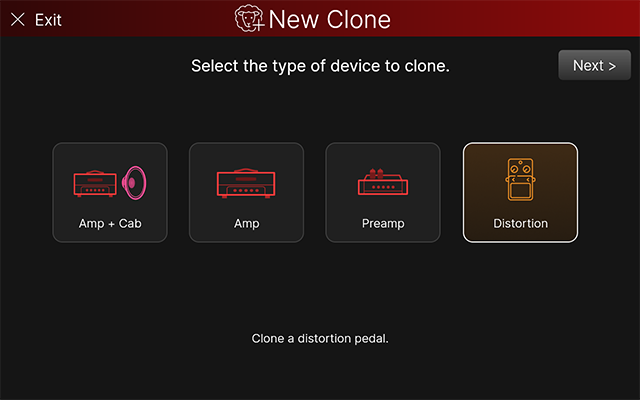
Select the Device To Clone
The initial New Clone screen appears, where you select the device type you want to clone, as described below. Once you’re ready to give it a try, tap the desired device on the initial New Clone screen, read its description, then tap 
Note: During the New Clone process, you can tap ![]()
If the Helix Stadium application is currently running and connected to Stadium, an alert in the app will tell you that it becomes “locked” until your New Clone process is complete. The application is not used for clone creation, but does offer features to import, export, browse, and manage your library of clones.

Tip: Regardless of which type of device you are cloning, avoid adding compression, modulation, and time-based effects in the signal path with the device, and turn off an amp’s reverb, tremolo, or other on-board effects. The goal is to capture the purest possible tone from your target device, dialed in for your desired tone.
Tap

Connecting Your Device
Note that the screen and its setup instructions vary depending on the clone type you selected in step ![]()
Important! Always reduce the volume to minimum on all your devices before making your audio connections.
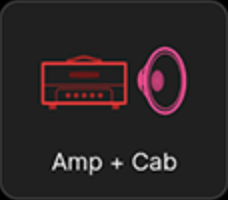
Amp+Cab Connection and Setup
Tap the Amp+Cab clone type on the initial screen, read its description, then tap
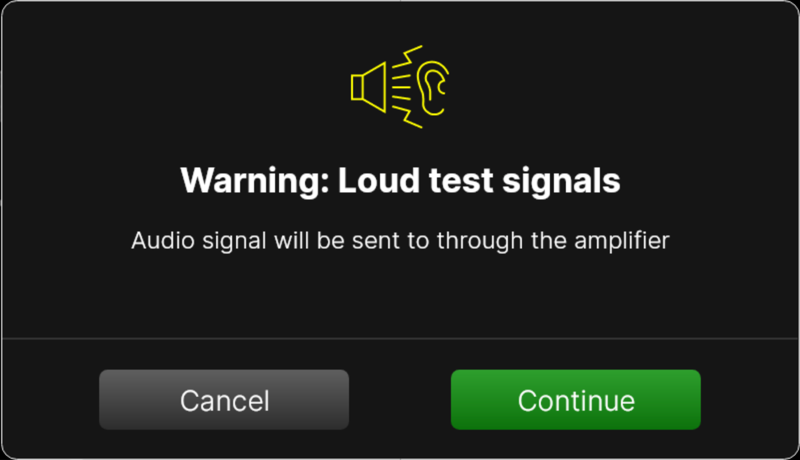
WARNING! As the screen alerts you, once the test signals are fed through your amp, it can become VERY loud through your cab.
If possible, isolate your speaker cab or mic it up in another room; otherwise, wear proper hearing protection.
Tap ![]()
Click to view the Amp+Cab clone connection and setup details...
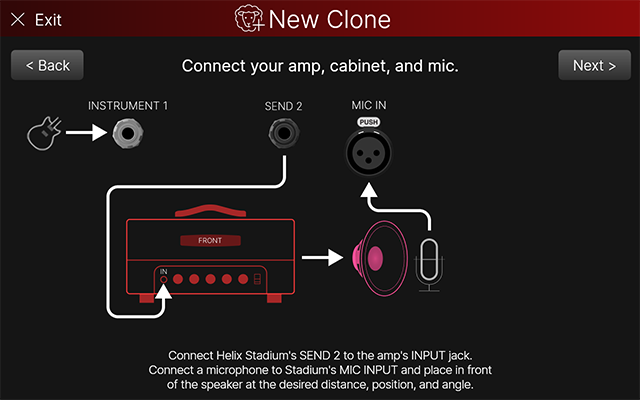
The Amp+Cab > Connect your amp, cabinet, and mic instruction screen is displayed. Note that the SEND and RETURN instructions differ for Helix Stadium XL and Helix Stadium devices.

-
With your amp connected to the speaker cabinet, connect your guitar or bass to Stadium’s INSTRUMENT 1 (Helix Stadium XL

-
Connect a microphone directly to Stadium’s XLR MIC IN and place it in front of the speaker cabinet, adjusting its position to capture the desired tone, much like you would for recording.
-
For best results, keep the mic within a few inches of the speaker to minimize capturing room reflections.
-
-
Connect from Stadium’s SEND 4 (Helix Stadium XL
-
Once your connections are complete, tap

-
Play your instrument and set your amp with the desired settings.
-
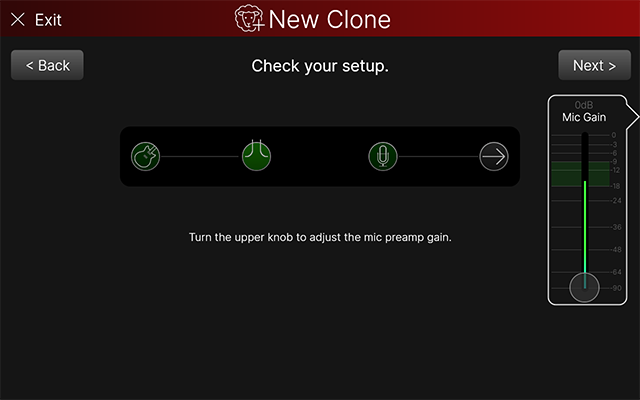
Play your instrument with heavy strumming. You’ll see the Instrument In and FX Loop blocks on the screen light green to indicate an incoming signal. Raise the screen’s Mic Gain fader from minimum so that the Mic block lights green and the Mic Gain meter peaks within the -18 to -9 range (indicated by the green shaded area of the fader), as shown above.
-
Note that you can tap and drag the on-screen Mic Gain fader, or turn Stadium’s upper right knob to adjust its value. Press the upper right knob to reset Mic Gain to its default (minimum) value.
-
-
Once your Mic Gain level is set appropriately, tap
Please go to ![]()
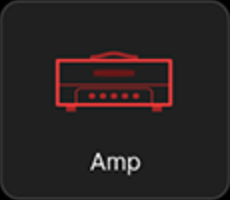
Amp Clone Connection and Setup
Tap the Amp clone type on the initial screen, read its description, then tap
Click to view the Amp clone connection and setup details...
Important! As alerted on the Stadium screen, a load box is required to connect to the amp’s Speaker Out. Please also refer to your amp and load box manufacturers' documentation for details.
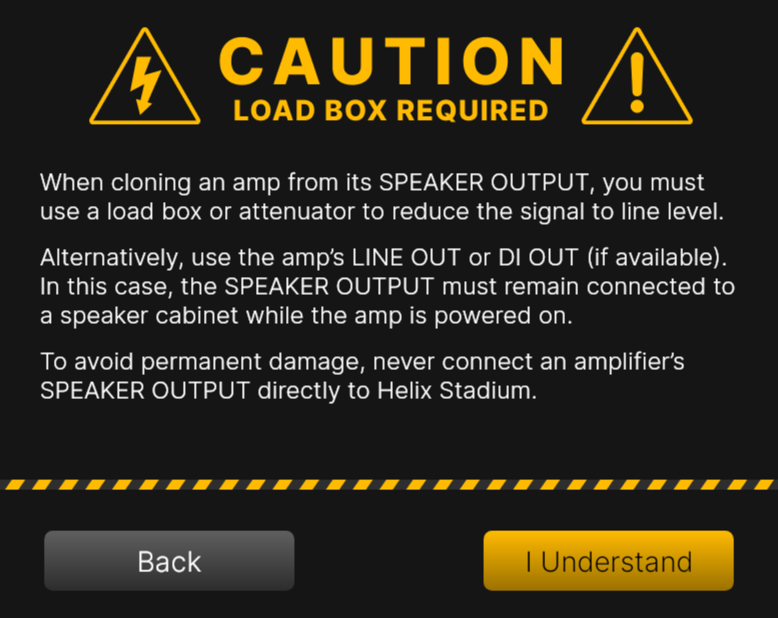
Once you’ve read the caution text and are sure you understand the requirements for your setup, tap ![]()
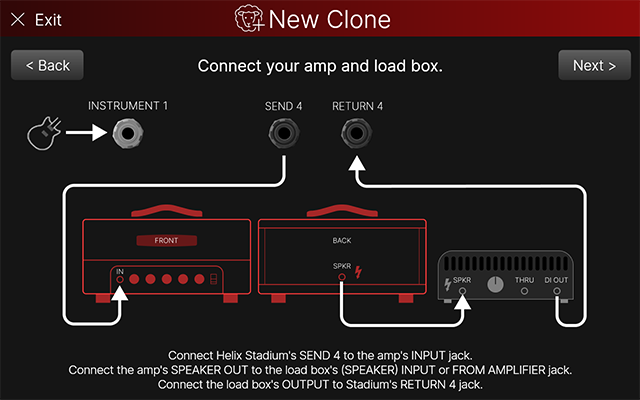
The Amp > Connect your amp and load box instruction screen is displayed. Note that the SEND and RETURN instructions differ for Helix Stadium XL and Helix Stadium devices.

-
Connect your guitar or bass to Stadium’s INSTRUMENT 1 jack (Helix Stadium XL
-
Connect from Stadium’s SEND 4 (Helix Stadium XL
-
Connect the amp’s SPEAKER OUT to a load box’s SPEAKER INPUT (or, sometimes labeled as FROM AMPLIFIER) jack.
-
Connect the load box’s OUTPUT jack to RETURN 4 (Helix Stadium XL
Note: Some load boxes offer the option to apply a speaker emulation or IR to their output signal. The Proxy Cloning process is not optimal for capturing the combined signal of a direct amp and IR/speaker emulation. For best results, we recommend using only your amplifier’s output signal from your load box for Amp clones.
-
Once your connections are complete, tap
-
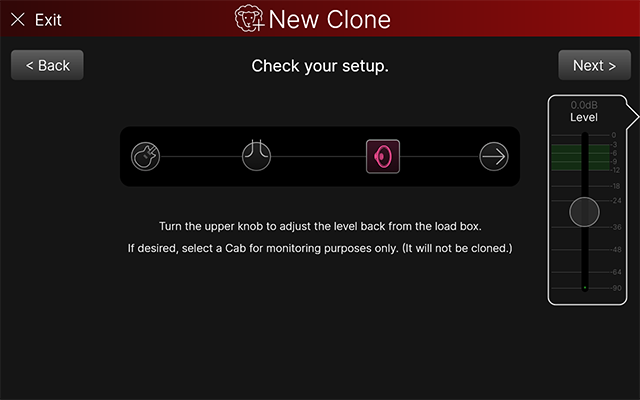
A Cab block within the signal chain is enabled, with a default cab loaded. Optionally, tap the Cab block to select a different Cab model or IR from the Cab Model screen and adjust its parameters to audition your amp with speaker simulation added, as shown below, or tap the Bypass button to disable the Cab. (The cab block is for monitoring purposes only and is not captured as part of your clone.)
-
Play your instrument and set your amp with the desired settings.

-
Play your instrument with heavy strumming and adjust the screen’s Level fader so that its meter peaks within the -12 to -3 range (as indicated by the green shaded area of the Level fader), as shown above.
-
Note that you can tap and drag the on-screen Level fader, or turn Stadium’s upper right knob to adjust its value. Press the upper right knob to reset it to its default value.
-
Once you have your amp’s settings and Level configured, tap
Please go to ![]()
Preamp Clone Setup
Tap the Preamp clone type on the initial screen, read its description, then tap
Click to view the Preamp clone connection and setup details...
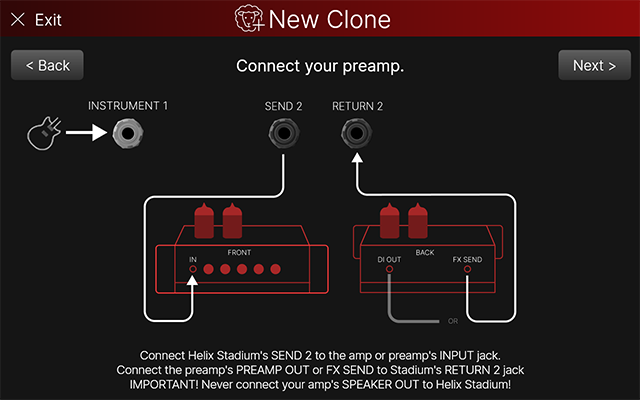
The Preamp > Connect your amp and load box instruction screen is displayed. Note that the SEND and RETURN instructions differ for Helix Stadium XL and Helix Stadium devices.

-
Connect your guitar or bass to Stadium’s INSTRUMENT 1 jack (Helix Stadium XL
-
Connect from Stadium’s SEND 4 (
*Note: If cloning the Preamp stage of your guitar or bass amplifier, connect Stadium’s SEND 4 ( ![]()
![]()
Remember to always keep a speaker or load box connected to your amplifier’s SPEAKER OUT to provide the appropriate resistance load.
-
Connect the preamp’s DI OUT jack to Stadium’s RETURN 4 (
-
Once your connections are made, tap
-
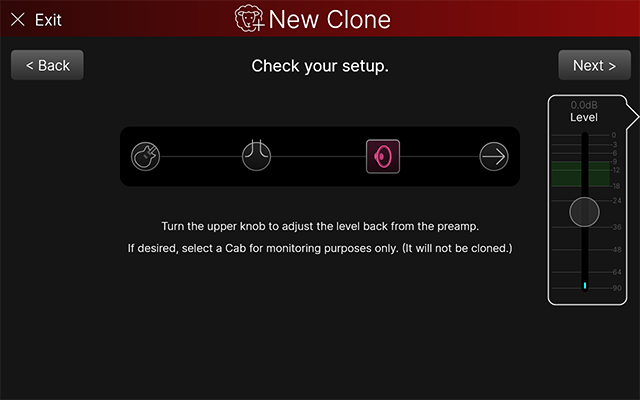
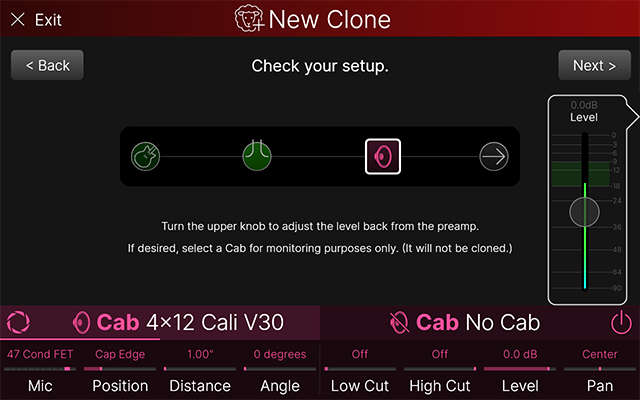
A Cab block within the signal chain is enabled, with a default cab loaded. Optionally, tap the Cab block to select a different Cab model or IR and adjust its parameters to audition your preamp with speaker simulation added, as shown below, or tap the Bypass button to disable the Cab. (The cab block is for monitoring purposes only and is not captured as part of your clone.)
-
Play your instrument and set your preamp with the desired settings.
-
Play your instrument with heavy strumming and adjust the screen’s Level fader so that its meter peaks within the -18 to -9 range (as indicated by the green shaded area of the Level fader), as shown above.
-
Note that you can tap and drag the on-screen Level fader, or turn Stadium’s upper right knob to adjust its value. Press the upper right knob to reset it to its default value.
-
-
Once you have your preamp’s settings and Level configured, tap
Please go to ![]()
Distortion Pedal Clone Setup
Tap the Distortion clone type on the initial screen, read its description, then tap
Click to view the Distortion pedal clone connection and setup details...
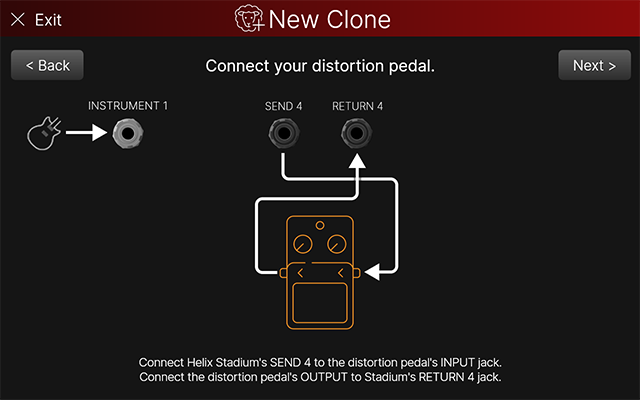
The Distortion > Connect your distortion pedal instruction screen is displayed. Note that the SEND and RETURN instructions differ for Helix Stadium XL and Helix Stadium devices.

-
Connect your guitar or bass to Stadium’s INSTRUMENT 1 jack (Helix Stadium XL
-
Connect from Stadium’s SEND 4 (
-
Connect the pedal’s OUTPUT jack to Stadium’s RETURN 4 (
-
Once your connections are made, tap

-
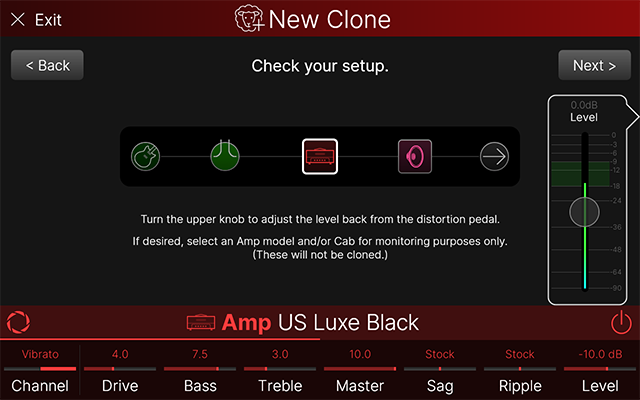
Optionally, tap the Amp and Cab block and enable them, select a specific Amp and a Cab or IR model, and adjust the parameters to audition your pedal, as shown below. (This amp and cab processing is for monitoring purposes only and is not captured as part of your clone.)
-
Play your instrument and set your pedal with the desired settings.
-
Play your instrument with heavy strumming and adjust the screen’s Level fader so that its meter peaks within the -18 to -9 range (as indicated by the green shaded area of the Level fader), as shown above.
-
Note that you can tap and drag the on-screen Level fader, or turn Stadium’s upper right knob to adjust its value. Press the upper right knob to reset it to its default value.
-
-
Once you have your pedal’s settings and Level configured, tap
Please go to step ![]()

Enter New Clone Name and Info

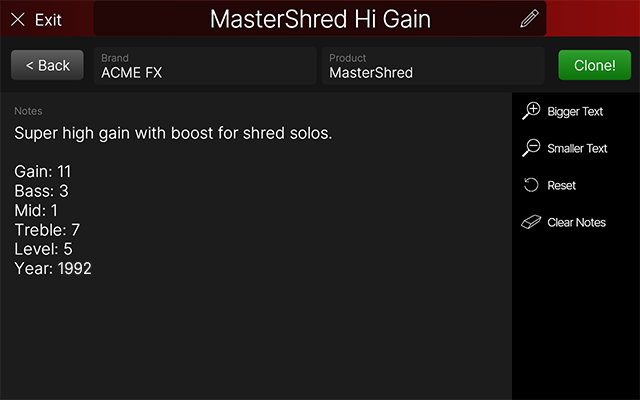
-
Enter a Clone Name in the field at the top of the screen (shown above left). The name you enter is how the clone file will appear in your Clone Library and menus. It is highly recommended to enter a brief, informative name here so you can easily find and tell your clones apart as you build a library!
-
Optionally, tap in the Brand, Product, and Notes metadata text panels to add descriptive info, such as your amp’s Channel, Gain, EQ settings, intended use, and any other details for reference (shown above right). This info is also utilized by Stadium’s Search.
Tip: You’ll be able to reference your clone file’s metadata later within its Focus View screen. See the Focus View > Clone Blocks section.
-
Tap

WARNING! As we mentioned earlier, if you are doing a miked Amp+Cab type clone, the next steps can be very LOUD! Hearing protection is recommended.
Note: Once your current clone is completed, if you start a new clone of the same type and enter a new clone name, you’ll see that the Clone Info you entered from the last completed clone is retained, so you can just edit it as needed rather than enter the Brand, Product, and Notes in again for the same device. Optionally, use the sidebar’s Reset and Clear Notes options to easily clear out existing text.

The Proxy Cloning Process
Several steps are performed automatically during the Proxy Cloning process. Simply leave all device controls undisturbed, sit back, and wait for the process to complete, as indicated on the progress screens. Each stage of the process is described below.
Note that, in any of the following screens, you can tap ![]()
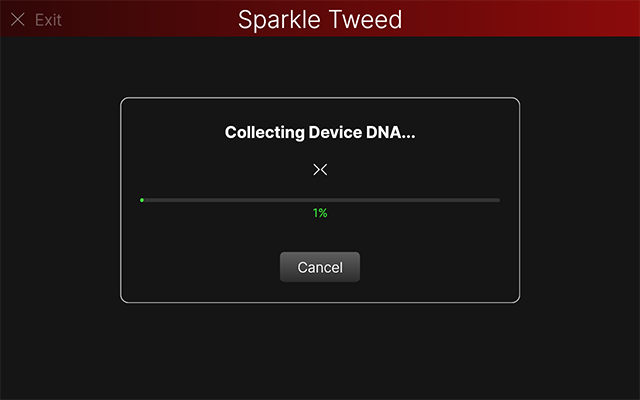
Collecting Device DNA
A progress screen is displayed while test signals are fed into your amp to perform the learning process (below left). Once progress reaches 100%, the next screen and process will be displayed automatically.
Upload, Process, and Download
The next stages proceed automatically, with a meter indicating its progress, as shown below.
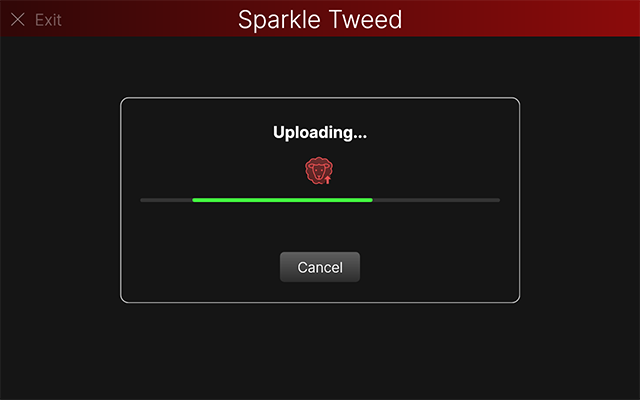
Uploading: The collected DNA information from your device is uploaded to the Line 6 servers.
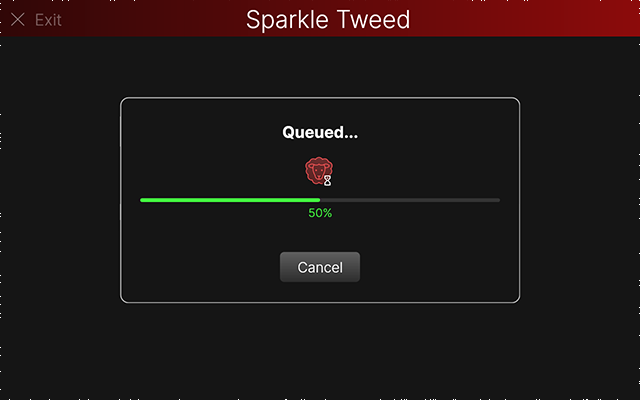
Queued: Your clone task wait position is displayed for the next available processing time on the Line 6 servers.*
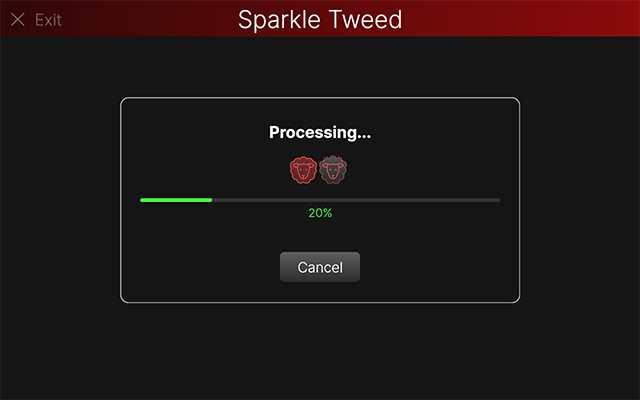
Processing: The clone is being created.
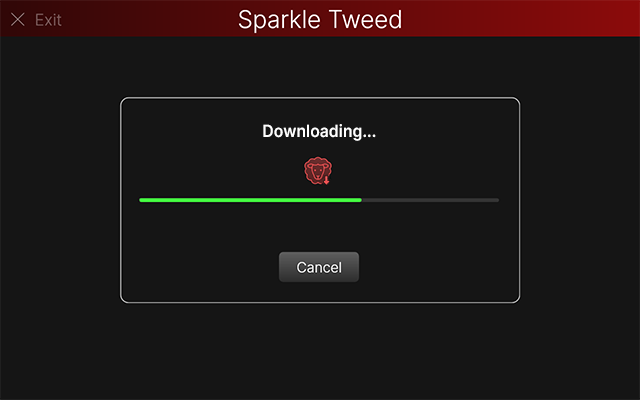
Download: Clone creation is complete, and the clone file downloads quickly to your Stadium internal library.
*Note: The queued time can vary substantially depending on the following factors:
-
The number of other customers' tasks that are currently in the queue and being processed.
-
The number of clones that you’ve initiated in the recent past. (In attempts to provide fair access, the queue may be longer for customers who have recently uploaded several clones to provide slightly shorter wait times for new and less frequent customers' server access.)

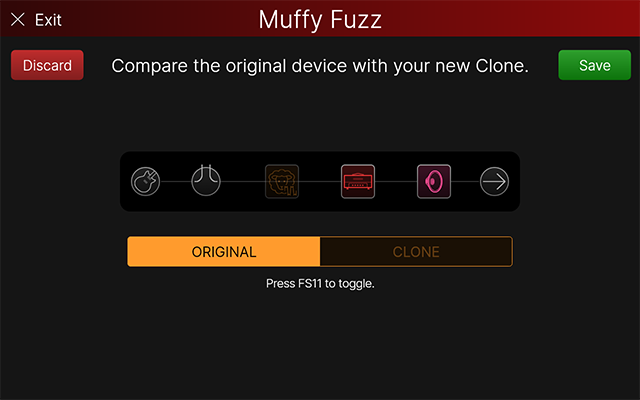
Compare
Play your instrument and tap the on-screen buttons to compare CLONE (the clone you just captured) versus ORIGINAL (the connected target device’s actual signal), as shown below. Optionally, you can use Footswitch 11 to toggle between ORIGINAL and CLONE preview.

The clone block’s parameters are displayed
-
For all clone types, when the CLONE preview is selected, its parameters in the Inspector are displayed (shown above right), which you can adjust to audition with the clone.* These parameters are also available for your saved clone files when selected in the Clone File Browser and when the clone is added to your presets. Also, see Clone Parameters on the following page.
-
Depending on the type of clone you created, this screen will include a Cab block (for Amp or Preamp clone types), or an Amp and Cab block (for a Distortion clone type, as shown below) in the monitor signal path, similar to your options in the Setup screen back in step
*Note: The Clone, Amp, and Cab block parameters and their settings are for previewing within the Compare screen only. These settings are not saved with your clone file.
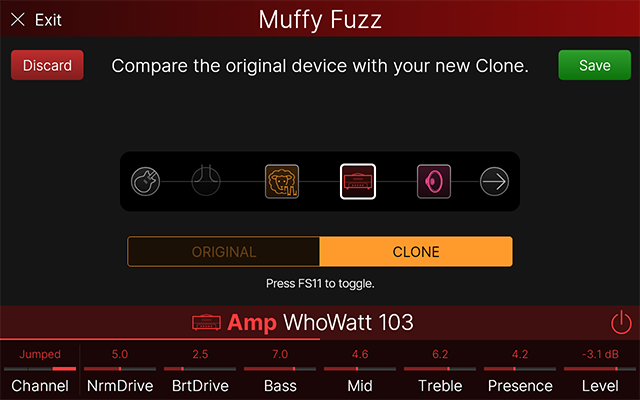
Amp block selected for editing
If the clone is to your liking, tap ![]()
![]()
Repeat the steps above to create additional clones!
Tip: Please see the next Selecting and Managing clones page for instructions on organizing and adding your clones to presets.