Please check out the following video for an overview of the Preset Info and Preset Clips features. Then consult the sections on this page for additional details.
Preset Info
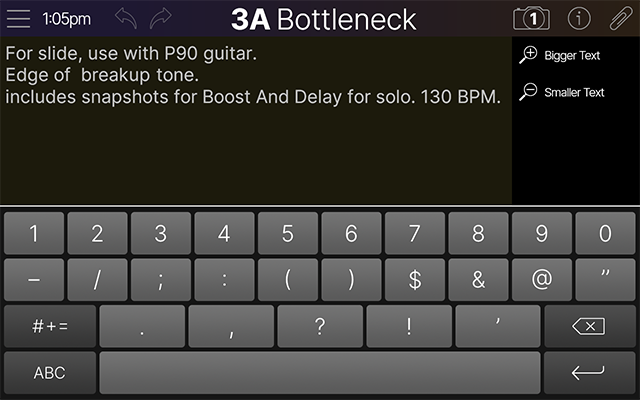
All factory presets include tips on how to use them best. Type in info for your own presets, like guitar/pickup/playback system used, creative controller assignments, tips/tricks, self-affirming platitudes, taco recipes, etc. This Preset Info is saved with the preset and is also referenced when using the Search Presets function.
Tip: All factory presets include helpful, descriptive notes in their Preset Info screens. Please review the factory presets' Info to get some ideas for how to enter effective details for your own custom presets.
-
In the header, tap the Preset Info icon


-
Tap Bigger Text or Smaller Text in the sidebar to increase/decrease the text size.
-
Tap anywhere in the text field. The keyboard appears (see below).
-
Type in the desired text and tap

Tip: You’ll probably find it easiest to enter and edit Preset Info from the comfort of the Helix Stadium app.
Preset Clips
Every factory preset includes a unique dry guitar or bass riff so you can hear it in context; also known as the “Ohhh, I’ve been chugging with 7-string EMGs through a country preset designed for a single coil Tele. That’s why I thought this preset sucked” feature. Clips can also help you dial in presets without constantly switching between playing and tweaking.
Important!
Be sure to reduce the volume of Stadium’s output(s) before entering the Preset Clip view, and gradually increase the volume as needed.
Audible playback of Preset Clips requires that at least one of the current preset’s Input blocks is set to Instrument 1 or Instrument 1+2 (on Stadium XL) or to Instrument (on Helix Stadium). All factory presets already include one or more such Input block by default.
-
Load a factory preset and tap the Clip icon

-
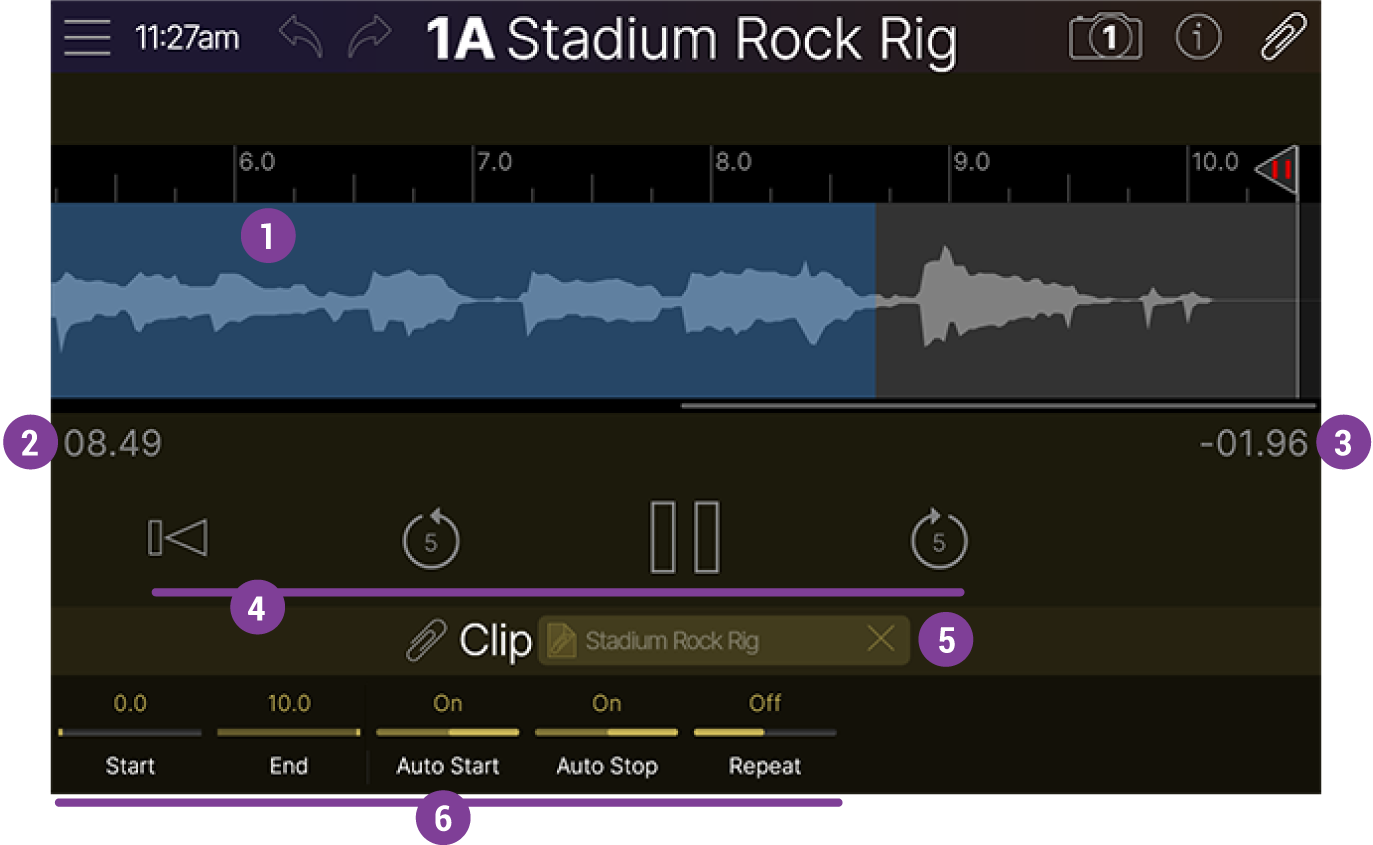
Tap the transport icons to control playback.
Tip: By default, clip playback stops automatically if you exit the Preset Clip view. However, if you set Knob 4 (Auto Stop) to Off and Knob 5 (Repeat) to On, the clip continues to play when exiting Preset Clip view. This lets you edit your preset and hear the changes in real time.
![]()
![]()
![]()
![]()
-
Return to Zero: Tap

-
Back/Forward 5 Seconds: Tap


-
Play/Pause: Tap to start playback. Tap again to pause playback.
![]()
![]()
|
Parameter |
Description |
|---|---|
|
Start |
Sets the start point of the clip. Alternatively, tap and drag the Start flag in the Time Ruler. |
|
End |
Sets the end point of the clip. Alternatively, tap and drag the End flag in the Time Ruler. |
|
Auto Start |
When On, the clip starts playing automatically when you enter the Preset Clip screen. When Off, the clip can only be played manually by tapping the Preset Clip screen's Play icon. |
|
Auto Stop |
When On, the clip stops playing when you exit the Preset Clip screen. When Off, the clip continues to play when you exit the Clip view, letting you edit your preset and hear the changes in real time. |
|
Repeat |
When On, the clip repeats over and over. When Off, the clip plays once and stops. |