
To follow are simple steps to get you started creating your own preset, including how to edit its models and signal path for customized tones to fit your workflow.
Tip: A great way to start using Helix Stadium Native is to try out the selection of Factory Presets and get familiar with the tonal possibilities. Soon enough, you’ll certainly want to start creating your own tone masterpieces, as covered in the following sections.
Creating a New Preset
Click the Preset Menu and select New Preset, as shown below.

A New Preset is loaded with an empty Signal Flow, awaiting your addition of Amp, Cab, and Effect blocks.

Adding Blocks
Add an Amp and Cab
-
Click an empty location on the top path (Path 1A) where you want to add a block.
-
In the Edit Panel, click in the Model Browser and select the Amp model category.
-
Select a subcategory from the top toolbar of the Amp models column (Guitar Bass, Legacy, or Clone).
-
Optionally, Amp and Amp+Cab type Clones can be used for an Amp block. Please see the Amp & Preamp Blocks page for adding Clone files.
-
-
Click on the desired Amp in the models column to load it. You’ll instantly hear the loaded Amp model, and its adjustable parameters appear in the Edit Panel on the right.
-
By default, a matching Cab block is added along with your selected Amp. You can optionally disable the Add Cab Block switch to add only an amp. Please see the Amp & Preamp Blocks section.
-
-
Click on the Cab block in the signal flow to edit its mic, position, and other parameters in the Edit Panel (as shown below, left). You can select a different Cab model—note that a cab block can use up to two Cab models. Also, see the Edit Panel section.
-
Click the Focus View button

-
Optionally, Impulse Response files (IRs) can be used in a Cab block. Please see the Cab Models section for adding IR files.
-


Tip: Once you’ve added a few blocks, it is recommended to click the Preset Menu, choose Save Preset As, and name and save the “New Preset” as a preset file on your computer.

Add Some Effects
-
Click on an empty location on the signal path again and use the Model Browser to add some Effect blocks. There are a few general guidelines for effects placement, but also feel free to totally ignore them and experiment.
Note: If you are using the Helix Stadium Native Intro version, some effects categories are dimmed and not selectable (Pitch/Synth, Wah/Filter, and Volume/Pan). This is expected, as the free Intro version’s limited model set does not include models in these categories. See the Helix Stadium Native License Versions section for additional details.
-
Add Pitch/Synth, Wah/Filter, Dynamics, and Distortion blocks before the Amp and Cab (in what we call “Pre” position). It's best to use mono models in the Pre position since Amp blocks are mono and will sum any incoming stereo signal.
-
Add Modulation, Delay, and Reverb blocks after the Amp and Cab (“Post” position), especially when using distorted amp settings, for a smoother overall sound. (Quite a few Modulation models sound different, but equally great, in the “Pre” position too.)
-
An EQ can be useful in many positions in the signal path; multiple EQ blocks can even be used to shape the sound and level of the signal feeding into an amp, before or after specific effects, etc.
Tip: You can create Favorites for any Amp, Cab, or Effect block to save your specific parameter settings, making it easily available from the Favorites category. See Favorites.

Congratulations! You have now built a robust tone that you can start tweaking as desired… or just dive in and start playing.
Editing Blocks
-
Select a block to edit it: Click on any block in the Signal Flow panel to select it, and its Bypass button

-
Click the Edit Panel’s Focus

-
Note that Input, Output, Split, and Merge type blocks can also be selected to access their options and parameters within the Edit Panel, such as the Gate & Trim (Input blocks) and Level & Pan (Split, Merge, and Output blocks).
-

-
Reposition a block: Click and drag a block to change its position in the Signal Flow.
-
Drag left/right to move it to a new position on the current path.
-
Drag a block down slowly from the main path to create a parallel path and add the block to it. See Signal Path Routing for details.
-
Right-click on a block to open its Action Menu, where several commands can be selected, such as to toggle its Bypass, create Automation and MIDI assignments, Copy, Paste, Clear, and more.
-
Hover your mouse cursor over a block to access its handy Bypass toggle (left) or Clear Block (right) button, as shown below.
-

-
Copy/Paste a block: Right-click on any Amp, Cab, or Effect block and choose Copy from its Action menu. Click another path location to select it, then right-click and select Paste to copy the block there with its current parameter settings.
-
Any existing parameter Automation and MIDI Assignments are also copied/pasted.
-
For any existing parameters with Snapshot Control enabled, the “enabled” switch state is copied/pasted, but the parameter values stored with each snapshot are not.
-
If you select another existing block and choose Paste, this will replace the selected block.
-
Note that you can also Paste into a different preset.
-
For Input, Output, Split, and Merge-type blocks, Copy/Paste is also available, allowing the block’s parameter settings to be copied & pasted into a location with the same block type.
-
-
Remove a block: Click and drag a block up and out of the plugin window to clear it from your preset. Or, right-click and choose Clear, or hover over the block and click its “X” Clear button.
Creating User Default Settings
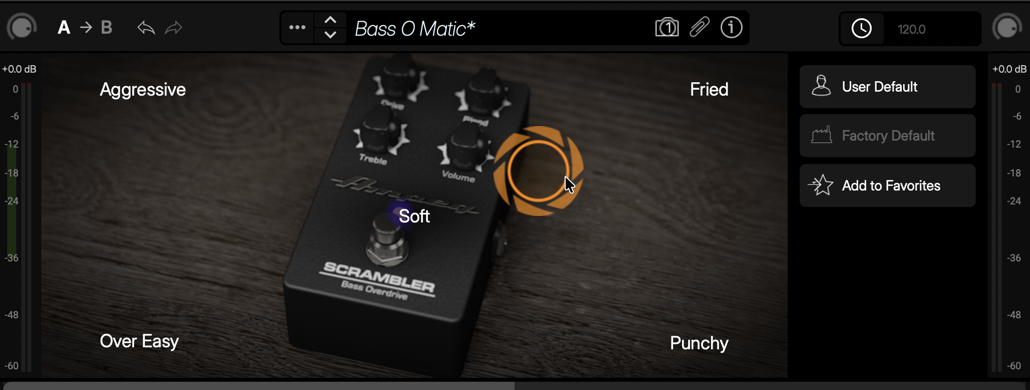
Whenever you add a block to your tone and select a model, all the model’s parameters are loaded with a specific set of “Factory Default” values. If you find yourself constantly re-tweaking your commonly used models the same way, you can customize a model’s “User Default” settings to define its new defaults (excluding Input, Output, Split, or Merge Mixer blocks’ settings) so the model loads that way every time.

-
Select any block and tweak it exactly how you like: Configure any of the model’s parameters and bypass state. (Existing Automation, MIDI, and Snapshot assignments are not stored/recalled with the User Default settings.)
-
Right-click the block to open its Action panel: Select User Default. Your current parameter settings are now saved as the default for all future uses of the model. (Existing presets that already include the model are not affected.)
-
To return a model to its original Factory Default settings: Right-click the block, open its Action panel, and select the Factory Default command to reset it for future uses of the model.
Tip: Alternatively, you can create a Favorite. This allows you to customize a model’s parameters, bypass state, custom name, and more, and add it to the Favorites menu for easy access via the Model List. Please see Favorites for details.